Indiquez-nous le code erreur ou le problème rencontré
pour obtenir un diagnostic ou un devis de réparation.
Codes erreur les plus fréquents
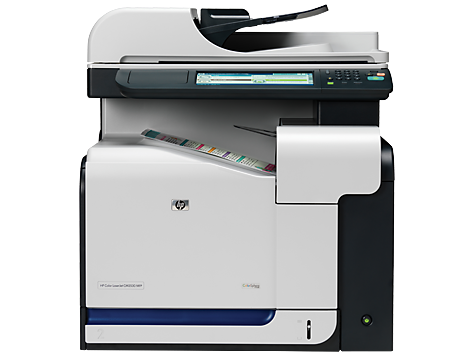
Imprimante HP Color LaserJet CM3530, CM3530FS
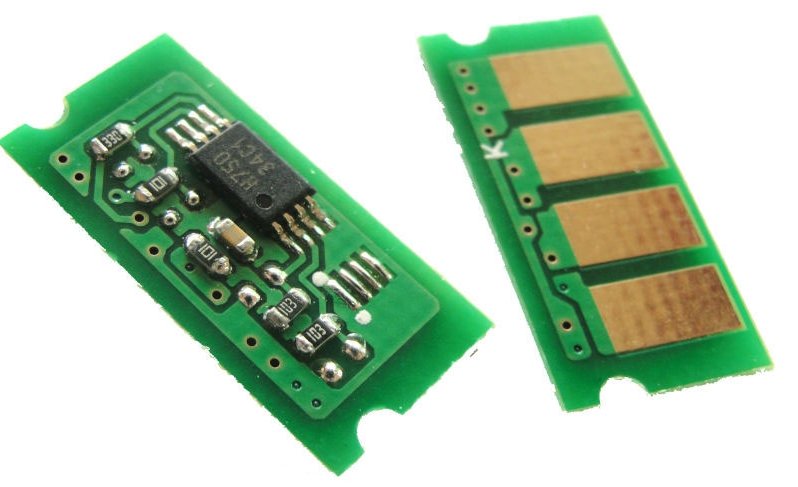
Code Erreur 10 ou Erreur mémoire consommable 
Code Erreur 13.xx ou Bourrage papier 
Code Erreur 49 
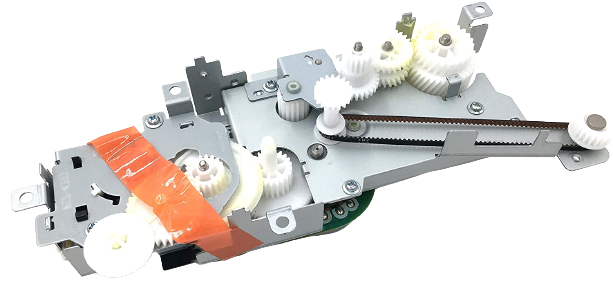
Code Erreur 50 ou Erreur Station fusion ou Remplacer kit de maintenance 
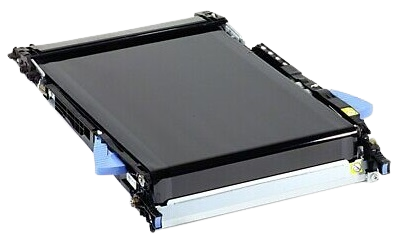
Code Erreur 59.F0 
Message Bac récup toner plein 
Problèmes les plus fréquemment rencontrés
Imprimante HP Color LaserJet CM3530, CM3530FS
Tableau de tous les codes erreurs
Imprimante HP Color LaserJet CM3530, CM3530FS
- code :
10.00.YY
- affichage :
10.00.YY Supply memory error
- description :
The product is unable to read the cartridge data. The print cartridge is present but defective. • 10.00.00 Supply memory error (black print cartridge) • 10.00.01 Supply memory error (cyan print cartridge) • 10.00.02 Supply memory error (magenta print cartridge) • 10.00.03 Supply memory error (yellow print cartridge) • 10.10.00 Supply memory error (e-label for the black print cartridge) • 10.10.01 Supply memory error (e-label for the cyan print cartridge) • 1
- remede :
1. Open the front door and remove the print cartridge, and then reinsert it. 2. Close the front door. If the message reappears, turn the product off and then on. 3. If the error reappears, replace the print cartridge.
- code :
11.XX
- affichage :
11.XX Internal clock error
- description :
The product's real time clock experienced an error.
- remede :
Whenever the product is turned off and then turned on again, set the time and date at the control panel. See the user guide for more information. If the error persists, you might need to replace the formatter.
- code :
13.01
- affichage :
13.01 Jam In Tray 3
- description :
The leading edge of the paper fed from Tray 3 stopped before reaching the media feed sensor (SR4).
- remede :
Follow the onscreen instructions to locate and remove the paper or obstruction.
- code :
13.04
- affichage :
13.04 Jams inside right door
- description :
The paper stopped at the registration sensor (A).
- remede :
Follow the onscreen instructions to locate and remove the paper or obstruction.
- code :
13.05
- affichage :
13.05 Fuser area jam
- description :
The leading edge of the paper stopped between registration and the input to the fuser. The paper did not reach the loop sensors (SR14, SR15)
- remede :
Follow the onscreen instructions to locate and remove the paper or obstruction.
- code :
13.06
- affichage :
13.06 Fuser area jam
- description :
The paper stopped at the fuser-delivery sensor (D).
- remede :
Follow the onscreen instructions to locate and remove the paper or obstruction.
- code :
13.12
- affichage :
13.12 Jam inside right door
- description :
The duplex refeed paper stopped before it reached duplex re-pickup sensor (SR22).
- remede :
Follow the onscreen instructions to locate and remove the paper or obstruction.
- code :
13.13
- affichage :
13.13 Jam inside right door
- description :
The duplex refeed paper stopped between the duplex re-pickup sensor (SR22) and registration.
- remede :
Follow the onscreen instructions to locate and remove the paper or obstruction.
- code :
13.1C
- affichage :
13.1C Fuser Wrap Jam
- description :
The paper is stopped in the fuser.
- remede :
Follow the onscreen instructions to locate and remove the paper or obstruction.
- code :
13.20
- affichage :
13.20 Jams inside right door
- description :
The paper is stopped at either the registration sensor (SR8), the loop sensors (SR14,SR15) or the fuser-delivery sensor (SR5).
- remede :
Follow the onscreen instructions to locate and remove the paper or obstruction.
- code :
13.21
- affichage :
13.21 Jams inside right door
- description :
Either the front or right side door was opened while paper was in the path.
- remede :
Follow the onscreen instructions to locate and remove the paper or obstruction.
- code :
13.2E
- affichage :
13.2E Paper Late Jam Near Fuser at Sensors F - J
- description :
The paper stopped between the fuser-output sensor (F) and the output-bin-full sensor (J).
- remede :
Follow the onscreen instructions to locate and remove the paper or obstruction.
- code :
13.30.00
- affichage :
13.30.00 Jam inside lower right door
- description :
Paper being fed from Tray 3 did not reach registration sensor.
- remede :
Follow the onscreen instructions to locate and remove the paper or obstruction.
- code :
20
- affichage :
20 INSUFFICIENT MEMORY To continue touch OK
- description :
The product does not have enough memory to print the page.
- remede :
Touch OK to print a partial page. Reduce the page complexity or add product memory.
- code :
22
- affichage :
22 EMBEDDED I/O BUFFER OVERFLOW
- description :
Too much data was sent to the embedded HP Jetdirect print server. An incorrect communications protocol might be in use.
- remede :
Touch OK to print the transferred data. Some data might be lost. Check the host configuration.
- code :
30.01.02
- affichage :
30.01.02 Scanner failure
- description :
The document feeder is jammed.
- remede :
1. Remove all originals from the document feeder. 2. Open the document feeder top cover and check for torn paper or other objects, such as paper clips.
- code :
30.01.03
- affichage :
30.01.03 Scanner failuref
- description :
An ADF pickup failure occurred.
- remede :
1. Verify that the original documents are not damaged. If one edge is damaged, try rotating the originals. 2. Verify that the document feeder guides are not too tight against the stack of originals. 3. Clean or replace the document feeder rollers and the separation pad.
- code :
30.01.08
- affichage :
30.01.08 Scanner failure
- description :
The scanner carriage is locked or it has not returned to the home position within the expected time.
- remede :
1. Verify that the scanner is not locked. 2. Verify that the scanner carriage can move freely. If it cannot move, replace the scanner.
- code :
30.01.14
- affichage :
30.01.14 Scanner failure
- description :
The SCB firmware failed.
- remede :
1. Turn the product off and then on. 2. Replace the SCB.
- code :
30.01.18
- affichage :
30.01.18 Scanner failure
- description :
The SCB ASIC failed.
- remede :
1. Turn the product off and then on. 2. Replace the SCB.
- code :
30.01.19
- affichage :
30.01.19 Scanner failure
- description :
The scanner lamp failed.
- remede :
1. Turn the product off and then on. 2. Replace the scanner.
- code :
30.01.23
- affichage :
30.01.23 Scanner failure
- description :
A scanner calibration error has occurred.
- remede :
1. Turn the product off and then on. 2. Replace the scanner.
- code :
30.01.25
- affichage :
30.01.25 Scanner failure
- description :
The scanner-control board (SCB) cannot communicate with the product.
- remede :
1. Turn the product off and then on. 2. Check the SCB LED. 3. Verify that the SCB connections are correct. 4. Verify the cable from the scanner to the formatter is not plugged in backwards. 5. Replace the SCB
- code :
30.01.36
- affichage :
30.01.36 Scanner failure
- description :
An error occurred during the SCB firmware upgrade.
- remede :
1. Turn the product off and then on. 2. Resend the firmware upgrade. 3. Replace the SCB.
- code :
30.01.39
- affichage :
30.01.39 Scanner failure
- description :
There was an AFE1 (analog front-end) failure.
- remede :
1. Turn the product off and then on. 2. Replace the scanner
- code :
30.01.4
- affichage :
30.01.41 Scanner failure
- description :
There was a SCB error.
- remede :
1. Turn the product off and then on. 2. Replace the SCB
- code :
30.01.40
- affichage :
30.01.40 Scanner failure
- description :
The scanner AFE 2 failed.
- remede :
1. Turn the product off and then on. 2. Replace the scanner
- code :
30.01.42
- affichage :
30.01.42 Scanner failure
- description :
The PCI-E (peripheral component interconnect express) cable is faulty or disconnected.
- remede :
1. Turn the product off and then on. 2. Check the PCI-E cable connections at the SCB and the ICB. 3. Replace the PCI-E cable
- code :
30.01.43
- affichage :
30.01.43 Scanner failure
- description :
The SCB memory has failed.
- remede :
1. Turn the product off and then on. 2. Replace the SCB
- code :
30.01.44
- affichage :
30.01.44 Scanner failure
- description :
Communication failed on the SCB.
- remede :
1. Turn the product off and then on. 2. Replace the SCB
- code :
30.01.45
- affichage :
30.01.45 Scanner failure
- description :
The SCB has failed.
- remede :
1. Turn the product off and then on. 2. Replace the SCB
- code :
30.01.46
- affichage :
30.01.46 Scanner failure
- description :
The SCB enumeration failed.
- remede :
1. Turn the product off and then on. 2. Check the PCI cable at the scanner and formatter. 3. Check the SCB connections. 4. Replace the SCB
- code :
40
- affichage :
40 Embedded I/O Bad Transmission
- description :
A temporary printing error occurred. The connection between the product and the EIO card in the specified slot has been broken.
- remede :
Touch OK to clear the error message and continue printing. Turn the product off and then on.
- code :
41.3
- affichage :
41.3 Load Tray <XX>: [Type] [Size]
- description :
The specified tray is loaded with media that is longer or shorter in the feed direction than the size adjusted for the tray. This message also appears if two or more sheets of media stick together in the product or if the tray is not adjusted correctly. If using glossy paper, ensure that it has been acclimated.
- remede :
Touch OK to use another tray. Reconfigure the size in a tray so that the product will use a tray that is loaded with the correct media size. If the message does not clear automatically from the control-panel display, turn the product off and then on.
- code :
41.5
- affichage :
41.5 Load Tray <XX>: [Type], [Size] To use another tray, touch OK
- description :
The product detected an unexpected paper size. There is a tray type mismatch. The tray is a cassette and there is another tray available for use.
- remede :
To continue, load the tray with the size and type indicated. Or, if another tray is available, touch OK to use it. This problem affects printing, but some scan functions might still be available.
- code :
41.X
- affichage :
41.X ERROR
- description :
A temporary printing error occurred.
- remede :
Touch OK to clear the error. If the error is not cleared, turn the product off and then on.
- code :
49.XXXXX
- affichage :
49.XXXXX ERROR
- description :
A firmware error has occurred. This type of error can be caused by corrupted print jobs or software program issues, non product-specific printer drivers, poor-quality USB or network cables, bad network connections or incorrect network configurations, invalid firmware operations, or unsupported accessories.
- remede :
The following steps should help to identify possible causes and a resolution to the error condition: 1. Turn the product off then on. If the error returns, disconnect all interface cables and turn the product off and then on again. If the error recurs only after connecting one of the interface cables or it happens randomly, go to step 2. If the error returns after the second time you turn the product off and on, follow these steps: a. The error has been isolated to when the product is in stan
- code :
50.1
- affichage :
50.1 FUSER ERROR
- description :
The fuser has experienced a lowtemperature error.
- remede :
1. Remove any paper jams from the fuser area. 2. Remove the fuser. Check the connector (J50) between the fuser and the product. Replace the cable or fuser if the connector is damaged. 3. If the problem persists, replace the fuser.
- code :
50.2
- affichage :
50.2 FUSER ERROR
- description :
The fuser has experienced a warm-up error.
- remede :
1. Reinstall the fuser. Check the connector (J50) between the fuser and the product. Replace the cable or fuser if the connector is damaged. 2. Reconnect the connectors (J138, J115) of the DC controller PCAy. Reconnect connector (J60), on the power line between the low voltage power supply and the fuser. 3. If the problem persists, replace the fuser.
- code :
50.3
- affichage :
50.3 FUSER ERROR
- description :
The fuser has experienced a hightemperature error.
- remede :
1. Reinstall the fuser. Check the connector (J50) between the fuser and the product. Replace the cable or fuser if the connector is damaged. 2. If the problem persists, replace the fuser.
- code :
50.4
- affichage :
50.4 FUSER ERROR
- description :
The fuser driver circuit has experienced an error.
- remede :
1. Check the power source. If a power generator is used, improve the situation. NOTE: If the product does not meet the power requirement of 43 to 67Hz frequency, the fuser temperature control does not work, which causes a malfunction. 2. Reconnect connector (J101) on the DC controller PCA. 3. If the problem persists, replace the lowvoltage power supply.
- code :
50.5
- affichage :
50.5 FUSER ERROR
- description :
The fuser has experienced a type-mismatch error.
- remede :
1. Reinstall the fuser. Check the connector (J50) between the fuser and the product. Replace the cable or fuser if the connector is damaged. 2. Reconnect the connector (J139) on the DC controller PCA. 3. If the problem persists, replace the fuser.
- code :
50.7
- affichage :
50.7 FUSER ERROR
- description :
The fuser has experienced a pressure release mechanism error.
- remede :
1. Reconnect the connectors (J117, J123) on the DC controller PCA. 2. Run the sensor test to test the fuser pressure-release sensor (H) SR7. If the sensor is defective, replace the fuser.
- code :
50.8
- affichage :
50.8 FUSER ERROR
- description :
The fuser has experienced a lowtemperature error.
- remede :
1. Remove any paper jams from the fuser area. 2. Reinstall the fuser. Check the connector (J50) between the fuser and the product. Replace the cable or fuser if the connector is damaged. 3. If the problem persists, replace the fuser.
- code :
50.9
- affichage :
50.9 FUSER ERROR
- description :
The fuser has experienced a hightemperature error.
- remede :
1. Reinstall the fuser. Check the connector (J150) between the fuser and the product. Replace the cable or fuser if the connector is damaged. 2. If the problem persists, replace the fuser.
- code :
51.1Y
- affichage :
51.1Y Error
- description :
There is a beam detect error. • 51.10=black • 51.11=cyan • 51.12=magenta • 51.13=yellow
- remede :
1. Turn the product off and then on. 2. Check the flat flexible cable (FFC) connections to the laser scanners. Also check connectors J111 and J110 at the DC controller, and check connectors J503 and J501 at the laser scanners 3. Replace the specific laser scanner
- code :
51.2Y
- affichage :
51.2Y Error
- description :
There is a laser error. • 51.20=black • 51.21=cyan • 51.22=magenta • 51.23=yellowow
- remede :
1. Turn the product off and then on. 2. Check the connectors on the laser scanner. 3. Replace the specific laser scanner
- code :
52.00
- affichage :
52.00 Error
- description :
The laser scanner experienced a startup error.
- remede :
1. Perform the laser scanner component tests in the Troubleshooting menu. 2. Depending on the test results, perform one of the following steps: . If the cyan or black component tests showed a startup failure, reconnect the connectors of the cyan/black scanner motor (J56 and J58) and the DC controller PCA (J106). . If the yellow or magenta component tests showed a startup failure, reconnect the connectors of the yellow/magenta scanner motor (J55 and J57) and the DC controller PCA (J106). 3. Re
- code :
52.20
- affichage :
52.20 Error
- description :
The laser scanner experienced a rotational error.
- remede :
1. Perform the laser scanner component tests in the Troubleshooting menu. 2. Depending on the test results, perform one of the following steps: . If the cyan or black component tests showed a startup failure, reconnect the connectors of the cyan/black scanner motor (J56 and J58) and the DC controller PCA (J106). . If the yellow or magenta component tests showed a startup failure, reconnect the connectors of the yellow/magenta scanner motor (J55 and J57) and the DC controller PCA (J106). 3. Re
- code :
53.10.0X
- affichage :
53.10.0X Unsupported DIMM
- description :
An unsupported DIMM is installed.
- remede :
Turn the product off, and then replace the DIMM that caused the error.
- code :
54.01
- affichage :
54.01 Error
- description :
The environmental sensor experienced an error.
- remede :
1. Reconnect the connector of the DC controller PCA (J108). 2. Replace the environmental sensor.
- code :
55.00.YY
- affichage :
55.00.YY DC Controller Communication Error
- description :
The DC controller experienced a communication error.
- remede :
1. Turn the product off and then on. 2. Perform an engine test. 3. Verify the connectors on the DC controller. 4. Replace the DC controller.
- code :
55.01.YY
- affichage :
55.01.YY DC Controller Memory Error
- description :
There is an error with the DC controller memory.
- remede :
1. Turn the product off and then on. 2. Perform an engine test. 3. Verify the connectors on the DC controller. 4. Replace the DC controller.
- code :
55.02.YY
- affichage :
55.02.YY Outgoing Parity Error
- description :
There is a DC controller outgoing parity error
- remede :
1. Turn the product off and then on. 2. Perform an engine test. 3. Verify the connectors on the DC controller. 4. Replace the DC controller
- code :
55.03.YY
- affichage :
55.03.YY No Engine Response
- description :
DC controller no response error.
- remede :
1. Turn the product off and then on. 2. Perform an engine test. 3. Verify the connectors on the DC controller. 4. Replace the DC controller
- code :
55.04.YY
- affichage :
55.04.YY Communications Timeout
- description :
There was a DC controller communications time out.
- remede :
1. Turn the product off and then on. 2. Perform an engine test. 3. Verify the connectors on the DC controller. 4. Replace the DC controller
- code :
55.05
- affichage :
55.05 ENGINE FIRMWARE RFU ERROR
- description :
Firmware upgrade failed.
- remede :
1. Turn the product off and then on. 2. Remove any third-party hardware. 3. Resend the firmware upgrade.
- code :
56.01
- affichage :
56.01 - Illegal input
- description :
There was an illegal input.
- remede :
1. Turn the product off and then on. 2. Remove any third-party hardware. 3. Attempt the remote firmware update again. 4. Replace the DC controller.
- code :
56.02
- affichage :
56.02 - Illegal output
- description :
There was an illegal output.
- remede :
Turn the product off and then on.
- code :
57.03
- affichage :
57.03 Error
- description :
The cartridge area cooling fan (FM2) experienced an error.
- remede :
1. Reconnect the connector J26 of the cartridge fan, connector J262 on the high voltage power supply D PCA, and connector J114 on the DC controller PCA. 2. Immediately after turning on the product, measure the voltage between the connector J262-1 and J262-3 on the high-voltage power supply D PCA. If the voltage changes from 0 V to approximately 24 V, replace the cartridge fan.
- code :
57.04
- affichage :
57.04 Error
- description :
The low-voltage power-supply fan (FM1) experienced an error.
- remede :
1. Reconnect the connector J119 on the DC controller PCA. 2. Immediately after turning on the product, measure the voltage between the connector J119-1 and J119-3 on the DC controller PCA. If the voltage changes from 0 V to approximately 24 V, replace the power-supply fan.
- code :
57.07
- affichage :
57.07 Error
- description :
The delivery area cooling fan (FM3) experienced an error.
- remede :
1. Reconnect the connector J27 of the delivery fan, connector J262 on the high voltage power supply D PCA, and connector J114 on the DC controller PCA. 2. Immediately after turning on the product, measure the voltage between the connector J262-4 and J262-6 on the high-voltage power supply D PCA. If the voltage changes from 0 V to approximately 24 V, replace the delivery fan.
- code :
59.30
- affichage :
59.30 Error
- description :
The fuser motor experienced a startup error.
- remede :
1. Perform the fuser motor component test in the Troubleshooting menu. 2. Reconnect the connector J117 on the DC controller PCA. 3. Replace the fuser motor.
- code :
59.40
- affichage :
59.40 Error
- description :
The fuser motor experienced a rotational error.
- remede :
1. Perform the fuser motor component test in the Troubleshooting menu. 2. Reconnect the connector J117 on the DC controller PCA. 3. Replace the fuser motor.
- code :
59.5Y
- affichage :
59.5Y ERROR
- description :
A drum motor has experienced a startup error. • Y=0: Black (drum motor 3) (M5) (J121) • Y=1: Cyan (drum motor 2) (M4) (J120) • Y=2: Magenta (drum motor 1) (M3) (M4) (J120) • Y=3: Yellow (drum motor 1) (M3) (J120)
- remede :
1. Perform the drum-motors component test in the DIAGNOSTICS menu. 2. Reconnect the connectors J120 or J121 on the DC controller PCA. 3. Replace the appropriate drum motor.
- code :
59.6Y
- affichage :
59.6Y ERROR
- description :
A drum motor has experienced a rotational error. • Y=0: Black (drum motor 3) (M5) (J121) • Y=1: Cyan (drum motor 2) (M4) (J120) • Y=2: Magenta (drum motor 1) (M3) (M4) (J120) • Y=3: Yellow (drum motor 1) (M3) (J120) •
- remede :
1. Perform the drum-motors component test in the DIAGNOSTICS menu. 2. Reconnect the connectors J120 or J121 on the DC controller PCA. 3. Replace the appropriate drum motor.
- code :
59.B0
- affichage :
59.B0 ERROR
- description :
The toner-collection unit is full.
- remede :
Replace the toner-collection unit.
- code :
59.BO
- affichage :
59.BO CLEANING MOTOR ERROR REPLACE TONER COLLECTION UNIT
- description :
- remede :
This message displays for one of the following reasons: • The cleaning motor is stuck. • The toner-collection unit is full. • The chute at the top of the toner collection unit is clogged.
- code :
59.C0
- affichage :
59.C0 Error
- description :
The developer-disengagement motor experienced a rotational error.
- remede :
1. Perform the Alienation Motor test in the Component Tests menu in the Troubleshooting menu. Verify that the cartridges are being correctly alienated. 2. Check the following connectors: J25 at the motor (M10), J261 and J251 on the high voltage power supply-D PCA, and connectors J138 and J106 on the DC controller PCA. 3. Perform the Manual Sensor Test and observe item G. The normal state is “0”. Locate the in-line connector J70 in the cable that is connected to developinghome- position sensor
- code :
59.F0
- affichage :
59.F0 ERROR
- description :
The transfer unit is missing or a motor error has occurred.
- remede :
1. Verify that the ITB is installed correctly. Remove the ITB and manually test the alienation mechanism. 2. The position of the alienation mechanism in the ITB is monitored by the primary transfer roller disengagement sensor (SR17), which is located in the rear of the black cartridge slot. Perform the manual sensor test while the ITB is removed, and observe the state of sensor “I”. The normal state is “0”. When you insert a piece of paper into the sensor, the state should change to “1.” 3. O
- code :
59.XY
- affichage :
59.XY ERROR
- description :
A temporary printing error occurred.
- remede :
Turn the product off and then on.
- code :
60.02
- affichage :
60.02 Tray 2 lifting error
- description :
The Tray 2 lifter motor experienced an error.
- remede :
1. Check the Tray-2 paper-surface sensor in the Manual Sensor Test 2 menu in the Troubleshooting menu. 2. Reconnect the connectors of the cassette lifter motor (J1920) and the DC controller PCA (J112). 3. Replace the lifter drive unit.
- code :
60.03
- affichage :
60.03 Tray 3 lifting error
- description :
The Tray 3 lifter motor experienced an error
- remede :
1. Check the Tray-3 paper-surface sensor in the Manual Sensor Test 2 menu in the Troubleshooting menu. 2. Reconnect the connectors of the cassette lifter motor (J1920) and the DC controller PCA (J112). 3. Replace the lifter drive unit.
- code :
68.X
- affichage :
68.X Storage error settings changed To continue, touch OK.
- description :
At least one of the settings saved in the nonvolatile storage device is invalid and was reset to its factory default. Printing can continue, but there may be some unexpected behavior because an error occurred in permanent storage. • 68.0: The onboard NVRAM failed. • 68.1: The removable disk (flash or hard) failed.?
- remede :
Touch OK to clear the message.
- code :
69.X
- affichage :
69.X Error
- description :
A duplex error occurred.
- remede :
Turn the product off and then on. This problem affects printing, but some scan functions might still be available. Touch Hide to remove this message and use other features.
- code :
79.XXXX
- affichage :
79.XXXX - ERROR
- description :
A critical hardware error occurred.
- remede :
Turn the product off and then on.
- code :
8X.YYYY
- affichage :
8X.YYYY EIO ERROR
- description :
The EIO accessory card encountered a critical error, as specified by YYYY.
- remede :
Try the following actions to clear the message: 1. Turn the product off and then on. 2. Turn the product off, reseat the EIO accessory, and then turn the product on. 3. Replace the EIO accessory.

