Indiquez-nous le code erreur ou le problème rencontré
pour obtenir un diagnostic ou un devis de réparation.
Codes erreur les plus fréquents
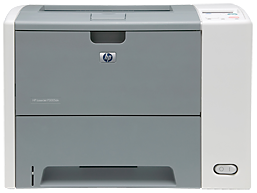
Imprimante HP LaserJet P3005, P3005D, P3005N, P3005DN, P3005X
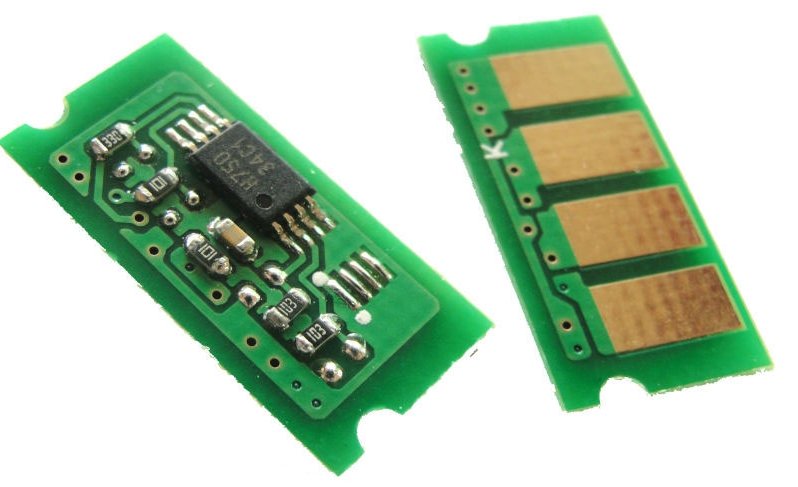
Code Erreur 10 ou Erreur mémoire consommable 
Code Erreur 13.xx ou Bourrage papier 
Code Erreur 49 
Code Erreur 50 ou Erreur Station fusion ou Remplacer kit de maintenance 
Problèmes les plus fréquemment rencontrés
Imprimante HP LaserJet P3005, P3005D, P3005N, P3005DN, P3005X
Tableau de tous les codes erreurs
Imprimante HP LaserJet P3005, P3005D, P3005N, P3005DN, P3005X
- code :
-
- affichage :
STANDARD TOP BIN FULL
- description :
The output-bin-full sensor (PS4) is signalling that the bin is full.
- remede :
1. Empty the output bin. Printing resumes automatically. 2. If the problem persists, verify that the connector at sensor PS4 is fully seated. The other end of the wiring is hard-wired to the ECU.
- code :
10.10.00
- affichage :
10.10.00 ERROR
- description :
The device cannot read or write to the print cartridge e-label, or the e-label is missing from the print cartridge.
- remede :
1. Verify that a genuine HP print cartridge is installed in the device. 2. Install another print cartridge. 3. Verify that the memory tag PCA is installed in the device. 4. Verify that the memory tag connector is firmly seated in connector J510 on the ECU. You might have to remove the main cooling fan to see this connection.
- code :
10.32.00
- affichage :
10.32.00 - Unauthorized Supply
- description :
A supply has been installed that does not pass the authentication test for genuine HP supplies.
- remede :
If you believe you purchased a genuine HP supply, visit us at www.hp.com/go/ anticounterfeit. Any repair required as a result of using non-HP supplies or unauthorized supplies are not covered under warranty. HP cannot ensure the accuracy or the availability of certain features. To continue printing, touch OK.
- code :
10.XX.XX
- affichage :
10.XX.YY SUPPLY MEMORY ERROR
- description :
The device cannot read or write to the printcartridge memory tag, or the memory tag is missing.
- remede :
1. Open the cartridge door. 2. Remove the print cartridge, and then reinstall it. 3. Close the cartridge door. 4. Turn the device off and then on. 5. Verify that a genuine HP print cartridge is installed in the device. 6. Install another print cartridge. 7. Verify that the memory tag PCA is installed in the device. 8. Verify that the memory tag connector is firmly seated in connector J510 on the ECU. You might have to remove the main cooling fan to see this connection. 9. If the error persist
- code :
11.XX
- affichage :
11.XX INTERNAL CLOCK ERROR
- description :
The device internal clock is not working correctly. Printing can continue, but you are prompted to set the date and time each time you turn the device on.
- remede :
Contact HP Support.
- code :
13.00.02
- affichage :
13.00.02 JAM IN TRAY 1
- description :
Paper is fed from tray 2 to the device by the tray 2 pick-up roller. When energized, solenoid SL2 releases a clutch, and then the pick-up roller rotates to pick up the paper and advance it into the paper path.
- remede :
1. Verify that the type and quality of the media that you are using meet HP specifications. 2. Verify that the media is loaded correctly and that the guides are not too tight or too loose against the stack of media. 3. Verify that the tray 2 pickup roller and separation pad are installed correctly. 4. Verify that solenoid SL2 is being energized. If you cannot hear it during a print job, remove tray 2, override the paper presence sensor flag, start a print job, and then see if the pick-up roll
- code :
13.01.00
- affichage :
13.01.00 JAM IN TRAY 1
- description :
The paper did not reach the top of page sensor within the specified period of time. The tray 1 feed roller moves paper into the paper path. When solenoid SL1 is energized, a clutch mechanism allows the paper stack in tray 1 to lift, and then allows the feed roller to rotate one time to move the paper into the paper path.
- remede :
1. Verify that the type and quality of the media that you are using meet HP specifications. 2. Verify that the media is loaded correctly and that the guides are not too tight or too loose against the stack of media. 3. Verify that the tray 1 pickup roller and separation pad are installed correctly. 4. Verify that solenoid SL1 is firmly seated in ECU connector J508. Verify that SL1 is being energized by removing the cover and observing the solenoid during a feed operation. 5. Open and close th
- code :
13.05.00
- affichage :
13.05.00 JAM INSIDE TOP COVER
- description :
Paper failed to reach the delivery sensor within a specified period of time when a print job was initiated. When troubleshooting paper jams, always observe where the leading edge of the paper stops in the jam.
- remede :
1. Verify that nothing is obstructing paper movement within the paper path. 2. Verify that the fuser motor (M2) connector is firmly seated. The fuser motor wiring is hard-wired to the back of the ECU at connector J501. The motor connector is free-standing behind the ECU. To see if the fuser motor is functional, observe the output stacker rollers while turning on the device. If the rollers rotate, the motor is functional. If they do not rotate, verify the connection.
- code :
13.31.00
- affichage :
13.31.00 JAM INSIDE FRONT DOOR
- description :
A jam has occurred inside the front door.
- remede :
1. Verify that nothing is obstructing paper movement within the paper path. 2. Verify that the face-up tray sensor (PS1) is functioning properly. 3. Verify that connection J505 is firmly seated on the ECU. 4. Open and close the cartridge door to clear the error message
- code :
13.65.0
- affichage :
13.65.00 JAM INSIDE REAR DOOR
- description :
A jam has occurred in the rear door area.
- remede :
1. Verify that nothing is obstructing paper movement within the paper path. 2. Verify that the sensor connections on the rear of the fuser assembly are seated correctly. 3. Verify that connection J405 is firmly seated on the ECU. 4. Open and close the cartridge door to clear the error message
- code :
13.67.0
- affichage :
13.67.00 JAM INSIDE REAR DOOR
- description :
A jam has occurred in the rear door area.
- remede :
1. Verify that nothing is obstructing paper movement within the paper path. 2. Verify that high-voltage power supply flat ribbon cable connection J404 is firmly seated on the ECU. 3. Open and close the cartridge door to clear the error message
- code :
13.XX.XX
- affichage :
13.XX.YY JAM INSIDE TOP COVER
- description :
A jam has occurred in the registration assembly area.
- remede :
1. Press "down" the to see step-by-step information. 2. Open the cartridge door, and then remove the print cartridge. 3. Remove all media found. 4. Lift the metal flap, and then remove any media remaining. 5. Reinstall the print cartridge, and then close the cartridge door. 6. If the message persists, verify that the flat ribbon cable at the bottom of the ECU is connected correctly. 7. To exit, press ?
- code :
20
- affichage :
20-INSUFFICIENT MEMORY
- description :
The device has received more data from the computer than fits in available memory.
- remede :
1. Press "OK" to continue printing. 2. Reduce the complexity of the print job to avoid this error. 3. Adding memory to the device may allow printing of more complex pages.
- code :
21
- affichage :
21 PAGE TOO COMPLEX
- description :
The page-compression process is too slow for the device. Some data may be lost on the page.
- remede :
1. Press "down" to see step-by-step information. 2. To print the job with some data loss, press " OK" to exit the message, and then press . If data is lost, simplify the page content to reduce its complexity. 3. To exit, press ?
- code :
22
- affichage :
22-USB I/O BUFFER OVERFLOW
- description :
The device's USB buffer has overflowed during a busy state.
- remede :
1. Press "OK" to continue printing. 2. If the message persists, contact HP Support.
- code :
40
- affichage :
40 EMBEDDED I/O BAD TRANSMISSION
- description :
The connection with the HP Jetdirect embedded print server has broken.
- remede :
1. Press "OK" to continue printing. 2. If the message persists, contact HP Support.
- code :
41.3
- affichage :
41.3 UNEXPECTED SIZE IN TRAY
- description :
Media is loaded that is longer or shorter in the feed direction than the size configured for the tray.
- remede :
1. Press "OK" to print from a different tray. 2. To print from the current tray, load the tray with the size and type indicated. Ensure that all trays are configured correctly before printing again
- code :
41.5
- affichage :
41.5 UNEXPECTED TYPE IN TRAY X
- description :
The device senses a different media type than what is configured in the tray.
- remede :
1. Press "OK" to print from a different tray. 2. To print from the current tray, load the tray with the size and type indicated. Ensure that all trays are configured correctly before printing again
- code :
41.X
- affichage :
41.X ERROR
- description :
A device error has occurred.
- remede :
1. Press "OK" to continue or press "?" for more information. 2. If the message persists after exiting help, turn the device off and then on. 3. If the message persists, contact HP Support.
- code :
49.XXXXX
- affichage :
49.XXXXX ERROR
- description :
A critical firmware error has occurred.
- remede :
1. Turn the device off and then on. 2. Try to determine whether the error occurs intermittently, while printing, or when turning on the device. 3. If the error appears while printing, determine whether it occurs when printing from a specific computer, a specific application, or a specific file. If all other computers, applications, or files can print without the error, then the problem may be only within one print job or computer. Make sure the computer has the most current printer drivers, o
- code :
50.1
- affichage :
50.1 FUSER ERROR
- description :
AC power is not being provided to the fuser assembly. AC voltage is necessary to generate heat in the fuser assembly.
- remede :
1. Verify that the fuser power cable at the back of the device is connected and the ECU is fully seated. 2. If the message persists, replace the fuser assembly.
- code :
50.6
- affichage :
50.6 FUSER ERROR
- description :
The main or sub thermistors are unable to provide temperature feedback to the ECU. The main and sub thermistors monitor the fuser assembly hot-roller temperature and provide feedback to regulate the fusing temperature.
- remede :
1. Verify that the seven-wire connector is firmly seated in connector J405 on the ECU. You might have to remove the main cooling fan to see this connection. 2. Verify that the four-wire connector at the rear of the device is firmly seated in the fuser assembly. 3. Verify that the AC voltage is being provided to the fuser assembly. 4. If the message persists, replace the fuser assembly.
- code :
51.XX
- affichage :
51.XY ERROR
- description :
A device error has occurred.
- remede :
1. Press "OK" to continue or press "?" for more information. 2. If the message persists after exiting help, turn the device off and then on. 3. If the message persists, contact HP Support.
- code :
52.00
- affichage :
52.00 ERROR
- description :
A scanner motor error has occurred. Scanner motor rotation is verified at the initialization of a print job.
- remede :
1. Verify that the scanner motor connector and the ribbon cable from the ECU are firmly seated on the laser/scanner assembly. 2. Verify that the scanner motor connector is firmly seated in connector J402 on the ECU. You might have to remove the main cooling fan to see this connection. 3. Verify that the ribbon cable installed in connector J403 on the ECU is fully seated You must remove the ECU in order to verify this connection. 4. If the message persists, replace the laser/scanner assembly.
- code :
53.10.01
- affichage :
53.10.01 ERROR UNSUPPORTED RAM
- description :
The memory DIMM is not a supported DIMM.
- remede :
Install a supported DIMM
- code :
54.XX
- affichage :
54.XX ERROR
- description :
A device command error has occurred.
- remede :
1. Turn the device off and then on. 2. If the message persists, contact HP support.
- code :
55.XX.XX
- affichage :
55.XX.YY DC CONTROLLER ERROR
- description :
The engine is not communicating with the formatter.
- remede :
1. Turn the device off and then on. 2. Verify that the flat ribbon cable between the ECU and the formatter PCA is connected correctly. 3. If the message persists, replace the ECU. If the message still persists, replace the formatter.
- code :
57.03
- affichage :
57.03 ERROR
- description :
A sub cooling fan (FM2) error has occurred. Fan operation is verified during device powerup. Fan operation occurs only during powerup or during a print job.
- remede :
1. Turn the device off and then on. 2. Verify that nothing is hindering or blocking the fan. 3. Verify that the fan is connected to connector J512 on the ECU PCA. You might have to remove the main cooling fan to see this connection. 4. If the message persists, replace the fan.
- code :
57.04
- affichage :
57.04 ERROR
- description :
A main cooling fan (FM1) error has occurred. Fan operation is verified during device powerup. Fan operation occurs only during powerup or during a print job.
- remede :
1. Turn the device off and then on. 2. Verify that nothing is hindering or blocking the fan. 3. Verify that the fan is connected to connector J509 on the ECU PCA. 4. If the message persists, replace the fan.
- code :
59.50
- affichage :
59.50 ERROR
- description :
A main motor (M1) error has occurred. Motor operation is verified during device power-up.
- remede :
1. Turn the device off and then on. 2. Verify that nothing is hindering the main motor. If necessary, remove all paper trays and the print cartridge, and then turn on the device and listen for motor operation. 3. Verify that the main motor is connected to connector J407 on the ECU. You might have to remove the main cooling fan to see this connection. 4. If the message persists, replace the motor.
- code :
62
- affichage :
62 NO SYSTEM
- description :
No system was found.
- remede :
1. Turn the device off and then on. 2. If the message persists, replace the formatter.
- code :
64
- affichage :
64 ERROR
- description :
A scan buffer error has occurred.
- remede :
1. Turn the device off and then on. 2. If the message persists, replace the formatter.
- code :
68.X
- affichage :
68.X STORAGE ERROR SETTINGS CHANGED
- description :
A non-volatile storage device is full. Press "OK" to clear the message. Printing can continue, but unexpected behavior could result. X Description 0 Onboard NVRAM
- remede :
1. Press "OK" to continue. 2. Turn the device off and then on. 3. Perform an NVRAM initialization. 4. If the message persists, replace the formatter.
- code :
79.XXXX
- affichage :
79.XXXX
- description :
A critical hardware error has occurred.
- remede :
1. Turn the device off and then on. 2. If the message persists, contact HP support.
- code :
8X.XXXX
- affichage :
8X.YYYY EMBEDDED JETDIRECT ERROR
- description :
The HP Jetdirect embedded print server has encountered a critical error.
- remede :
1. Turn the device off and then on. 2. Update the Jetdirect firmware. 3. If the problem persists, contact HP Support.


