Indiquez-nous le code erreur ou le problème rencontré
pour obtenir un diagnostic ou un devis de réparation.
Codes erreur les plus fréquents
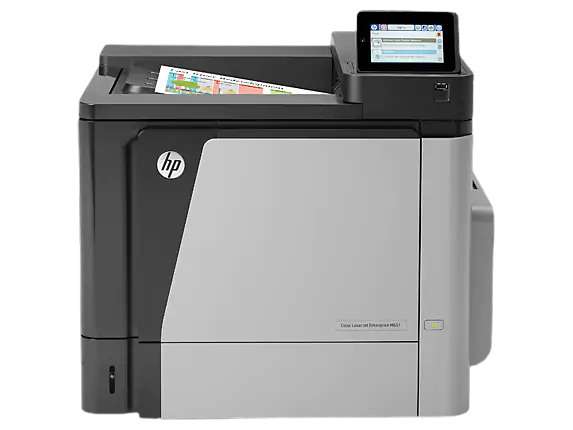
Imprimante HP Color LaserJet Enterprise M651n, dn, xh
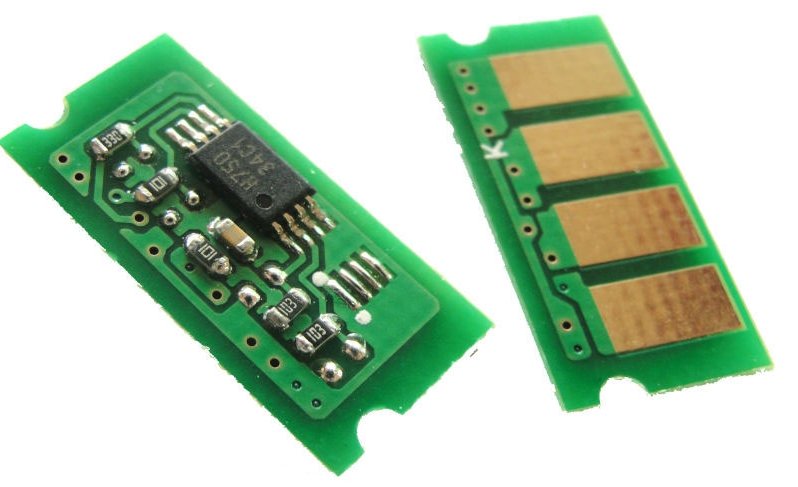
Code Erreur 10 ou Erreur mémoire consommable 
Code Erreur 13.xx ou Bourrage papier


Code Erreur 49
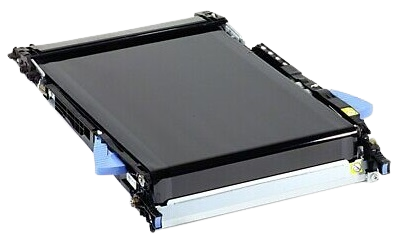
Code Erreur 50 ou Erreur Station fusion ou Remplacer kit de maintenance

Message Bac récup toner plein

Problèmes les plus fréquemment rencontrés
Imprimante HP Color LaserJet Enterprise M651n, dn, xh


Tableau de tous les codes erreurs
Imprimante HP Color LaserJet Enterprise M651n, dn, xh
- code :
- affichage :
13.D1.FF
- description :
Jam in Left Door This jam occurs when residual media is detected at the duplex switchback sensor (PS2002) or the duplex pre-registration sensor (PS2003) at power on.
- remede :
1. Open the left door and clear the jam in the indicated area. 2. Close the door to allow the product to attempt to clear the jam. 3. Replace the duplexer.
- code :
10.00.00
- affichage :
10.00.00 e-Label Memory Error
- description :
The product is unable to read the cartridge data. This message indicates that the product cannot read or write to the e-label of the toner cartridge. This error can cause the supplies status feature to be disabled.
- remede :
1. Open the front door, lower the green handle, and then remove the toner cartridge. 2. Check the cartridge e-label. If it is damaged, replace the cartridge. 3. Reinsert the cartridge, push the release button, and then rotate the green handle to the locked position. 4. Close the front door. 5. If the message displays again, turn the product off then on. 6. If the error persists, replace the toner cartridge.
- code :
10.00.10
- affichage :
10.00.10 e-Label Missing Memory Error
- description :
The product is unable to detect the e-label. This message indicates that the product has determined that the e-label is missing. This error can cause the supplies status feature to be disabled.
- remede :
1. Open the front door, lower the green handle, and then remove the toner cartridge. 2. Check the cartridge e-label. If it is damaged, replace the cartridge. 3. Reinsert the cartridge, push the release button, and then rotate the green handle to the locked position. 4. Close the front door. 5. If the message displays again, turn the product off then on. 6. If the error persists, replace the toner cartridge. 7. If the error persists, reconnect the connector (J304) on the DC controller PCA.
- code :
10.00.15
- affichage :
10.YY.15 Install <supply>
- description :
The indicated supply has been removed or installed incorrectly. Black toner cartridge
- remede :
Replace or install the indicated supply.
- code :
10.00.33
- affichage :
10.XX.33 Used Supply In Use
- description :
The toner cartridge is used. Black toner cartridge
- remede :
Using a cartridge that is near its end-of-life can cause this event code.
- code :
10.00.34
- affichage :
10.XX.34 Used Supply In Use
- description :
The toner cartridge is used. Black toner cartridge
- remede :
Removing a cartridge from one product and then installing it in a different product (for testing functionality) will cause this event code.
- code :
10.00.35
- affichage :
10.YY.35 Incompatible <supply>
- description :
The indicated supply is not compatible with this product. Black toner cartridge
- remede :
The fuser might be hot. Be careful when removing the fuser. Install a supply that is designed for this product.
- code :
10.00.40
- affichage :
10.XX.40 Genuine HP Supplies Installed
- description :
A genuine HP toner cartridge has been installed. Black toner cartridge
- remede :
No action necessary.
- code :
10.00.41
- affichage :
10.XX.41 Unsupported Supply in Use
- description :
The installed toner cartridge is for a different product. Black toner cartridge
- remede :
Remove the toner cartridge, and then install the correct cartridge for this product.
- code :
10.00.50
- affichage :
10.00.50 Cartridge seal roll up error
- description :
The product encountered a toner cartridge roll up error.
- remede :
2. Turn the product off and then on. 3. Reconnect the connector (J305) on the DC controller PCA. 4. Replace the cartridge sensor assembly. 5. Replace the DC controller PCA.
- code :
10.00.70
- affichage :
10.XX.70 Printing past very low
- description :
The product indicates when a supply level is very low. The actual remaining toner cartridge life might vary. Black toner cartridge
- remede :
If print quality is no longer acceptable, replace the toner cartridge.
- code :
10.23.15
- affichage :
10.YY.15 Install <supply>
- description :
The indicated supply has been removed or installed incorrectly. Fuser kit
- remede :
Replace or install the indicated supply.
- code :
10.23.35
- affichage :
10.YY.35 Incompatible <supply>
- description :
The indicated supply is not compatible with this product. Fuser kit
- remede :
The fuser might be hot. Be careful when removing the fuser. Install a supply that is designed for this product.
- code :
10.23.50
- affichage :
10.23.50
- description :
The fuser kit life was reset above the order threshold.
- remede :
No action necessary.
- code :
10.23.51
- affichage :
10.23.51
- description :
The fuser kit life was reset above the replace threshold.
- remede :
No action necessary.
- code :
10.23.52
- affichage :
10.23.52
- description :
The fuser kit life was reset above the reset threshold.
- remede :
No action necessary.
- code :
10.23.70
- affichage :
10.23.70 Printing Past Very Low
- description :
The product indicates when the fuser kit is very low. The actual remaining fuser kit life might vary. You do not need to replace the fuser kit at this time unless print quality is no longer acceptable. After an HP supply has reached the very low threshold, the HP premium protection warranty ends.
- remede :
If print quality is no longer acceptable, replace the fuser kit. See the parts chapter in the service manual for the fuser kit part number. Advise the customer that HP recommends that they have replacement supplies available to install when the print quality is no longer acceptable.
- code :
10.32.00
- affichage :
10.32.00 Unauthorized supply
- description :
This error message displays when a supply (or supplies) has been inserted into the product and the product determines that HP is in the OEM field, but the supply (or supplies) does not pass the new authentication test. This error will only be shown if the product currently has all genuine supplies.
- remede :
Choose to continue past this error by touching OK.
- code :
11.00.01
- affichage :
11.00.01 Internal clock error
- description :
This message indicates a problem with the formatter's real time clock. The product real time clock has experienced an error. 01=dead clock 02=dead real time clock
- remede :
1. Whenever the product is turned off and then turned on again, set the time and date on the control panel. 2. If the error persists, you might need to replace the formatter.
- code :
11.00.02
- affichage :
11.00.01 Internal clock error
- description :
This message indicates a problem with the formatter's real time clock. The product real time clock has experienced an error. 01=dead clock 02=dead real time clock
- remede :
1. Whenever the product is turned off and then turned on again, set the time and date on the control panel. 2. If the error persists, you might need to replace the formatter.
- code :
13.60.Az
- affichage :
13.60.Az
- description :
Stacker Entrance Sensor Stay Jam . Jam in the top left door Finishers upper-feed-path-entry sensor (PI103) is remaining activated longer than expected, suggesting that paper has jammed at the sensor. The specific jam error code will be one of the following forms: • 13.60.A1 • 13.60.A2 • 13.60.A3
- remede :
1. Remove any media in the upper paper path that might be activating sensor PI33.. 2. Verify that the sensor flag is not damaged, moves freely, and is correctly aligned with the sensor body. 3. Carefully clean the sensor body by gently blowing clean air across the sensor to remove dust and debris. 4. Verify that the wiring at the sensor is not damaged and that the connector J708 on the stacker controller PCA is fully seated
- code :
13.60.Dz
- affichage :
13.60.Dz
- description :
Stacker Entrance Sensor Delay Jam Jam in the top left door. The engine signals the finisher that paper is about to enter the finisher from either the Switch Back assembly or the Hole Punch assembly if installed. The finisher's upper-feed-path-entry sensor (PI103), which detects paper entering the finisher, does not detect the paper within the expected time period triggering the error. The specific jam error code will be one of the following forms: • 13.60.D1 • 13.60.D2 • 1
- remede :
1. Print and analyze the event log, looking for related jams occurring either in the Switch Back assembly or the Hole Punch assembly. These errors might be the result of media failing to reach the output device in the correct amount of time. Troubleshoot all Printer Engine Jams first. 2. Make sure that media is in good condition, and not wrinkled or damaged. 3. Make sure that the correct paper size in the trays is selected according the paper size being fed. 4. Check the finisher entry-point
- code :
13.60.FF
- affichage :
13.60.FF
- description :
Stacker Initial Jam Jam in the top left door (left bins). Finisher stay jam at either PI103 or PI104 when engine powered on. When the engine is powered on, the finisher's upper-feed-path-entry sensor (PI103) or the upperfeed- path-exit sensor (PI104) is activated suggesting that there is paper in the upper paper path of the finisher at sensors PI103 or PI104.
- remede :
1. Open the top door and remove any media in the paper path (media detected at PI103). 2. Raise the upper paper path (exit) delivery rollers and remove any media in the paper path (media detected at PI104). 3. Remove all paper found from the top left door area. 4. Verify that the sensor flags are not damaged, move freely, and are correctly aligned with the sensor body and properly mounted. Also check wiring and connectors for damage or loose connections 5. Carefully clean the sensor body by g
- code :
13.64.Az
- affichage :
13.64.Az
- description :
Stacker Delivery Sensor Stay Jam : Jam in the top left door (left bins) Finisher's upper-paper-path-exit sensor (PI104) remains activated longer than expected suggesting that paper has jammed at the sensor. The specific jam error code will be one of the following forms: • 13.64.A1 • 13.64.A2 • 13.64.A3 Control-panel diagnostics: M101 (entrance motor), SL102 (buffer-roller solenoid), and SL103 (outputroller solenoid) PI104 is located on the front frame of the finisher, above the
- remede :
1. Remove any media in the upper paper path that might be activating sensor PI104. 2. Carefully clean the sensor body, by gently blowing clean air across the sensor to remove dust and debris. 3. Verify that the sensor flag is not damaged, moves freely, and is correctly aligned with the sensor body. 4. Lift-swing-guide assembly at the paper exit area to output bins and inspect for jammed paper, obstructions, or damage. 5. Run a diagnostic through the engine control panel and turn on M101 (entr
- code :
13.64.Dz
- affichage :
13.64.Dz
- description :
Stacker Delivery Sensor Delay Jam : Jam in the top left door. Upper-paper-path-entry sensor (PI103) has signaled that paper has passed but upper paper-path-exit sensor PI104 does not actuate within the expected time, suggesting that the paper has jammed between PI103 and PI104 in the upper paper path. The specific jam error code will be one of the following forms: • 13.64.D1 • 13.64.D2 • 13.64.D3
- remede :
1. Remove any media jammed in the upper paper path between sensor PI103 and sensor PI104. 2. Check the paper path between sensor PI103 and sensor PI104 for obstructions that may be preventing the media from reaching PI104. 3. Verify that the PI104 sensor flag is not damaged, moves freely, and is correctly aligned with the sensor body. 4. Make sure that sensor PI104 is securely fastened to the chassis and wiring is properly connected to sensor. NOTE: Sensor PI104 is located on the front frame
- code :
13.67.Az
- affichage :
13.67.Az
- description :
Switchback Entrance Sensor Stay Jam . Jam in the stapler/stacker connection. Switchback entrance sensor (SR101) remains activated longer than expected suggesting that paper has jammed at the sensor. The specific jam error code will be one of the following forms: • 13.67.A1 • 13.67.A2 • 13.67.A3
- remede :
1. Remove any media in the upper paper path that might be activating sensor SR101. 2. Verify that the finisher is securely fastened to the engine. 3. Make sure that the finisher and Printer are correctly aligned. 4. Check the finisher entry-point guides for damage. 5. Carefully clean the sensor body, by gently blowing clean air across the sensor to remove dust and debris. 6. Verify that the sensor flag is not damaged, moves freely, and is correctly aligned with the sensor body. 7. Perform Sen
- code :
13.67.Dz
- affichage :
13.67.Dz
- description :
Switchback Entrance Sensor Delay Jam - Jam in the stapler/stacker connection. The engine signals the finisher that paper is about to enter the finisher Switchback assembly from the Printer. The Switchback inlet Sensor SR101, which detects paper entering the finisher, does not detect the paper within the expected time period triggering the error The specific jam error code will be one of the following forms: • 13.67.D1 • 13.67.D2 • 13.67.D3
- remede :
1. Remove any media in the upper paper path that might be activating sensor SR101. 2. Print and analyze the event log, looking for Printer- or MFP-related jams occurring either in the fuser or in the duplexer. These errors might be the result of media failing to reach the output device in the correct amount of time. Troubleshoot all Printer Engine Jams first. 3. Make sure that media is in good condition, and not wrinkled or damaged. 4. Make sure that the correct paper size in the trays is sel
- code :
13.67.FF
- affichage :
13.67.FF
- description :
Switchback Initial Jam - Jam in the stapler/stacker connection. When the engine is powered on, the finisher's Switchback inlet sensor (SR101) is activated suggesting that there is paper in the upper paper path of the finisher at sensors SR101
- remede :
1. Remove any media in the upper paper path that might be activating sensor SR101. 2. Verify that the finisher is securely fastened to the engine. 3. Check the finisher entry-point guides for damage. 4. Carefully clean the sensor body, by gently blowing clean air across the sensor to remove dust and debris. 5. Verify that the sensor flag is not damaged, moves freely, and is correctly aligned with the sensor body. 6. Perform Sensor test on SR101. If not functioning or damaged replace Sensor. 7
- code :
13.68.Az
- affichage :
13.68.Az
- description :
Switchback Registration Sensor Stay Jam . Jam in the stapler/stacker connection. Switchback Registration sensor (SR102) remains activated longer than expected suggesting that paper has jammed at the sensor. The specific jam error code will be one of the following forms: • 13.68.A1 • 13.68.A2 • 13.68.A3
- remede :
1. Remove any media in the upper paper path that might be activating sensor SR102. 2. Verify that the finisher is securely fastened to the engine and make sure that the finisher and Printer are correctly aligned. 3. Check the finisher entry-point guides for damage. 4. Carefully clean the sensor body, by gently blowing clean air across the sensor to remove dust and debris. 5. Verify that the sensor flag is not damaged, moves freely, and is correctly aligned with the sensor body. 6. Run a diagn
- code :
13.68.Dz
- affichage :
13.68.Dz
- description :
Switchback Registration Sensor Delay Jam - Jam in the stapler/stacker connection. Media did not reach SR102 (switch back registration sensor) after passing SR101 (Switch Back inlet Sensor) within the expected time period triggering the error. The specific jam error code will be one of the following forms: • 13.68.D1 • 13.68.D2 • 13.68D3
- remede :
1. Remove any media in the upper paper path that might be activating sensor SR102. 2. Verify that the finisher is securely fastened to the engine. Make sure that the finisher and Printer are correctly aligned. 3. Carefully clean the sensor body, by gently blowing clean air across the sensor to remove dust and debris. 4. Verify that the sensor flag is not damaged, moves freely, and is correctly aligned with the sensor body. 5. Run a diagnostic through the engine control panel and turn on M2 (R
- code :
13.69.Az
- affichage :
13.69.Az
- description :
Switchback Lower Sensor Stay Jam . Jam in the stapler/stacker connection. Switchback path sensor (SR103) remains activated longer than expected suggesting that paper has jammed at the sensor. The specific jam error code will be one of the following forms: • 13.69.A1 • 13.69.A2 • 13.69.A3
- remede :
1. Remove any media in the upper paper path that might be activating sensor SR103. 2. Verify that the finisher is securely fastened to the engine. 3. Make sure that the finisher and Printer are correctly aligned. 4. Check the finisher entry-point guides for damage. 5. Carefully clean the sensor body, by gently blowing clean air across the sensor to remove dust and debris. 6. Verify that the sensor flag is not damaged, moves freely, and is correctly aligned with the sensor body. 7. Perform Sen
- code :
13.69.Dz
- affichage :
13.69.Dz
- description :
Switchback Registration Sensor Delay Jam . Jam in the stapler/stacker connection. Media did not reach SR103 (switchback path sensor) after passing SR101 (Switch Back inlet Sensor) within the expected time period triggering the error. The specific jam error code will be one of the following forms: • 13.69.D1 • 13.69.D2 • 13.69.D3
- remede :
1. Remove any media in the upper paper path that might be activating sensor SR103. 2. Verify that the finisher is securely fastened to the engine. Make sure that the finisher and Printer are correctly aligned. 3. Carefully clean the sensor body, by gently blowing clean air across the sensor to remove dust and debris. 4. Verify that the sensor flag is not damaged, moves freely, and is correctly aligned with the sensor body. 5. Run a diagnostic through the engine control panel and turn on M2 (R
- code :
13.84.Az
- affichage :
13.84.Az
- description :
Accumulator Tray Stay Jam . Jam in the top left door. Upper-paper-path-entry sensor (PI104) has signaled that paper has passed but the output bin Sensor PI112 or PI111 does not actuate within the expected time. The specific jam error code will be one of the following forms: • 13.84.A0 • 13.84.A1 • 13.84.A2 • 13.84.A3
- remede :
1. Remove any media jammed in the upper paper path between sensor PI104 and output bin. 2. Check the accumulator for damage or obstructions. 3. Ensure M109 Trailing Edge Assist Motor functions properly 4. Replace M109 or Assembly as needed.
- code :
13.89.3z
- affichage :
13.89.3z
- description :
Stacker Staple Jam . Stapler 1 Jam in the front left door. When the staple motor (M41) is rotated forward, the staple home-position sensor (PI120) does not turn back on after the prescribed time has elapsed after it goes off, and the staple home-position sensor (PI120) turns on within the prescribed time after the staple motor (M41) is rotated backwards. The specific jam error code will be one of the following forms: • 13.89.30 • 13.89.31 • 13.89.32
- remede :
1. Check the stapler unit for jammed staples. 2. Check the stapler unit for loose staples and paper dust. 3. Inspect the stapler unit for damage. 4. Remove the stapler cartridge and make sure HP-approved staples are being used. 5. Verify that the wiring at the stapler unit and the connector are not damaged. 6. Install new staple cartridge and retest. 7. If the error persists, replace the stapler unit.
- code :
13.90.Az
- affichage :
13.90.Az
- description :
Booklet Inlet Sensor Stay Jam - Jam in the front left door Finisher stay jam at booklet-making paper entry sensor (PI22) Occurs when the booklet-making paper-entry sensor (PI22) remains activated longer than expected, suggesting that there is a paper jam at the sensor. The specific jam error code will be one of the following forms: • 13.90.A0 • 13.90.A3
- remede :
1. Remove any media in the upper paper path that might be activating sensor PI22. 2. Verify that the sensor flag is not damaged, moves freely, and is correctly aligned with the sensor body. 3. Carefully clean the sensor body by gently blowing clean air across the sensor to remove dust and debris. 4. Verify that the wiring at the sensor is not damaged and that the intermediate connectors between sensor PI22 and connector J21 on saddle-stitcher controller PCA for damage and proper connections.
- code :
13.90.Dz
- affichage :
13.90.Dz
- description :
Booklet Inlet Sensor Delay Jam . Jam in the front left door Finisher delay jam at booklet-making paper entry sensor (PI22). Error occurs when booklet making function is selected and after the engine signals the finisher that it is delivering paper to the finisher. The booklet-making paper-entry sensor (PI22) is not activated within the expected time period after receiving the engine's delivery signal, suggesting that a paper jam has occurred somewhere between the Reversing Assembly and sensor
- remede :
1. Print and analyze the event log, looking for related jams occurring either in the Switch Back assembly or the Hole Punch assembly. These errors might be the result of media failing to reach the output device in the correct amount of time. Troubleshoot all Printer Engine Jams first. 2. Make sure that media is in good condition, and not wrinkled or damaged. 3. Make sure that the correct paper size in the trays is selected according the paper size being fed. 4. Check the finisher entry-point
- code :
13.92.FF
- affichage :
13.92.FF
- description :
Booklet Initial Jam - Jam in the front left door. Occurs when paper is detected by one of the sensors on the paper-sensor board (PI18, PI19, PI20), vertical-path-paper sensor (PI17), booklet-delivery sensor (PI11), paper positioning-plate paper sensor (PI8), or booklet-making paper-entry sensor (PI22) when the machine is powered on.
- remede :
1. Remove media from the booklet-maker paper path. 2. Verify that the sensor flags are not damaged, move freely, and are correctly aligned with the sensor bodies. 3. Carefully clean each sensor body by gently blowing clean air across each sensor to remove dust and debris. 4. Make sure that connectors J6, J9, J10,J13, and J21 are fully seated on the saddle-stitcher controller PCA. 5. Only if the error persists and none of the previous steps correct the problem, replace the saddlestitcher contr
- code :
13.94.Az
- affichage :
13.94.Az
- description :
Booklet Deliver Sensor Stay Jam . Jam in the front left door. Finisher stay jam at the booklet-delivery sensor (PI11) or the vertical-paper-path sensor (PI17) Occurs when the booklet-delivery sensor (PI11) remains activated longer than expected after sensing the arrival of the new booklet from the folding rollers. Also occurs when the vertical-paper-path sensor (PI17) remains activated longer than expected after the paper has already passed through the folding rollers and is now detected by t
- remede :
1. Check the folder-roller area for a jam. 2. Test the folding motor (M2) by using the finisher component test from the control panel display. Remove the finisher rear cover before starting the test and make sure that the folding rollers are rotating when motor M2 is on. 3. Check sensor PI11 and PI17 for damage. 4. Make sure that the sensors are not obstructed. 5. Make sure that sensor PI11 and sensor PI17 are securely fastened to the chassis. 6. Replace Motor or assembly as needed.
- code :
13.94.Dz
- affichage :
13.94.Dz
- description :
Booklet Deliver Sensor Delay Jam . Jam in the front left door. Finisher stay jam at the booklet-delivery sensor (PI11) or the vertical-paper-path sensor (PI17) Occurs when the folded booklet exits the folding rollers and does not reach the booklet delivery sensor (PI11) within the expected time. The specific jam error code will be one of the following forms: • 13.94.D0 • 13.94.D3
- remede :
1. Check the folder-roller area for a jam or media wrapped around the rollers. 2. Check sensor PI11 for damage. 3. Make sure that the sensor is not obstructed. 4. Make sure that sensor PI11 is securely fastened to the chassis. 5. Replace Motor or assembly as needed.
- code :
13.96.33
- affichage :
13.96.33
- description :
Stapler 2 Jam Booklet Staple Jam (Front) - Jam in booklet stapler 2 Finisher jam: front-booklet stapler (SW7) When the rear-staple motor (M7) is rotated forward, the staple home-position sensor (SW7) does not turn back on after the prescribed time has elapsed after it goes off (0.4 seconds).
- remede :
1. Check the front-booklet stapler unit for jammed staples. 2. Check the front-booklet stapler unit for loose staples. 3. Inspect the front-booklet stapler unit for damage. 4. Verify that HP approved staples for this stapler are being used. 5. Verify that the wiring at the stapler unit and the connector are not damaged. 6. Replace the staple cartridge. NOTE: Replace both the front and rear cartridges at the same time so that the staple low sensors will properly detect the level of staples in
- code :
13.97.33
- affichage :
13.97.33
- description :
Stapler 3 Jam Booklet Staple Jam (Rear) - Jam in booklet stapler 3 Finisher jam: rear booklet stapler (SW5) When the rear-staple motor (M6) is rotated forward, the staple home-position sensor (SW5) does not turn back on after the prescribed time has elapsed after it goes off (0.4 seconds).
- remede :
1. Check the rear-booklet stapler unit for jammed staples. 2. Check the rear-booklet stapler unit for loose staples. 3. Inspect the rear-booklet-stitch stapler unit for damage. 4. Verify that HP approved staples for this stapler are being used. 5. Verify that the wiring at the stapler unit and the connector are not damaged. 6. Replace the staple cartridge.
- code :
13.98.A3
- affichage :
13.98.A3
- description :
Booklet Output Sensor Stay Jam - Jam in the front left door (booklet). Occurs when the folded booklet exits the folding rollers and passes PI11 booklet delivery sensor but does not reach the booklet delivery sensor (PI6) within the expected time.
- remede :
1. Check the folder-roller area for a jam or media wrapped around the rollers. 2. Check sensor PI6 for damage. 3. Make sure that the sensor is not obstructed. 4. Make sure that sensor PI6 is securely fastened to the chassis. 5. Replace sensor or assembly as needed.
- code :
13.98.D3
- affichage :
13.98.D3
- description :
Booklet Output Sensor Delay Jam - Jam in the front left door (booklet). Finisher stay jam at the booklet-output sensor (PI6) Media is present at P6
- remede :
1. Check the folder-roller area for a jam or media wrapped around the rollers. 2. Check sensor PI6 for damage. 3. Make sure that the sensor is not obstructed. 4. Make sure that sensor PI6 is securely fastened to the chassis. 5. Replace sensor or assembly as needed
- code :
13.A1.D1
- affichage :
13.A1.D1
- description :
Paper Delay Jam in Tray 1 This jam occurs when the media does not reach the Tray 1 feed sensor (PS2502) in the designated amount of time after the start of media pick-up from Tray 1. This is a no-pick jam from Tray 1.
- remede :
1. Clear the jam in the area indicated. 2. Close the door to allow the product to attempt to clear the jam. 3. Check and replace the Tray 1 pickup rollers as needed. 4. Open the following menus: • Administration • Troubleshooting • Diagnostic Tests 5. Test PS2502 using the sensor test to verify that the sensor is functioning correctly. 6. Run the Tray 1 pickup/feed motor drive test to verify that the feed motor is functioning correctly. 7. If it is not, replace the right door a
- code :
13.A1.FF
- affichage :
13.A1.FF
- description :
Residual Media Jam in Tray 1 This jam occurs when residual media is detected at the Tray 1 feed sensor (PS2502) at power on.
- remede :
1. Clear the jam in the area indicated. 2. Close the door to allow the product to attempt to clear the jam. 3. Make sure that the sensor PS2502 flag moves smoothly and that the sensor is not damaged. If the flag is damaged, replace Tray 1. 4. Open the following menus: • Administration • Troubleshooting • Diagnostic Tests 5. Test PS2502 using the Manual sensor test to verify that the sensor is functioning correctly. 6. Run the Tray 1 pickup/feed motor drive test to verify that t
- code :
13.A2.D2
- affichage :
13.A2.D2
- description :
Jam in Tray 2 This jam occurs when the media does not reach the Tray 2A feed sensor (PS1402) in the designated amount of time after the start of media pick-up from Tray 2. This is a no-pick jam from tray 2.
- remede :
1. Open Tray 2, remove any jammed paper, and then close the tray. 2. Open and close the upper right door to allow the product to attempt to clear the jam. 3. Make sure that the Tray 2 pickup, feed, and separation roller are installed correctly and show no damage or wear. 4. Clean or replace the pickup/feed rollers as needed. 5. Check the connectors at the sensor, feed motor, and the DC controller PCA. 6. Open the following menus: • Administration • Troubleshooting • Diagnostic
- code :
13.A2.FF
- affichage :
13.A2.FF
- description :
Residual Media Jam in Tray 2 This jam occurs when residual media is detected at the Tray 2A feed sensor (PS1402), the Tray 2B feed sensor (PS1401), or the Tray 2C path feed sensor (PS8) at power on.
- remede :
1. Open Tray 2, remove any jammed paper, and then close the tray. 2. Open and close the upper right door to allow the product to attempt to clear the jam. 3. Make sure that the Tray 2 pickup, feed, and separation roller are installed correctly and show no damage or wear. 4. Clean or replace the pickup/feed rollers as needed. 5. Check the connectors at the sensor, feed motor, and the DC controller PCA. 6. Check connector (J221) on the DC controller PCA and interconnect J21. 7. Open the followi
- code :
13.A3.D3
- affichage :
13.A3.D3
- description :
Jam In Tray 3 This jam occurs when the media does not reach the Tray 3A feed sensor (PS1404) in the designated amount of time after the start of media pick-up from Tray 3. This is a no-pick jam from Tray 3.
- remede :
1. Open Tray 3, remove any jammed paper, and then close the tray. 2. Open and close the upper right door to allow the product to attempt to clear the jam. 3. Make sure that the Tray 3 pickup, feed, and separation roller are installed correctly and show no damage or wear. 4. Clean or replace the pickup/feed rollers as needed. 5. Check the connectors at the sensor, feed motor, and the DC controller PCA. 6. Check connector (J221) on the DC controller PCA and interconnect J21. 7. Open the followi
- code :
13.A3.FF
- affichage :
13.A3.FF
- description :
Residual Media Jam in Tray 3. This jam occurs when residual media is detected at the Tray 3A feed sensor (PS1404) or the Tray 3B feed sensor (PS1403) at power on.
- remede :
1. Open Tray 3, remove any jammed paper, and then close the tray. 2. Open and close the upper right door to allow the product to attempt to clear the jam. 3. Make sure that the Tray 3 pickup, feed, and separation roller are installed correctly and show no damage or wear. 4. Clean or replace the pickup/feed rollers as needed. 5. Check the connectors at the sensor, feed motor, and the DC controller PCA. 6. Check connector (J221) on the DC controller PCA and interconnect J21. 7. Open the followi
- code :
13.A4.D4
- affichage :
13.A4.D4
- description :
Jam In Tray 4 This jam occurs when the media does not reach the Tray 4 feed sensor (PS3302) in the designated amount of time after the start of media pick-up from Tray 4. This is a no-pick jam from Tray 4.
- remede :
1. Open Tray 4, remove any jammed paper, and then close the tray. 2. Open and close the HCI right door to allow the product to attempt to clear the jam. 3. Make sure that the Tray 4 pickup, feed, and separation roller are installed correctly and show no damage or wear. 4. Clean or replace the pickup/feed rollers as needed. 5. Check the connectors at the sensor, feed motor, and the HCI controller PCA. 6. Open the following menus: • Administration • Troubleshooting • Diagnostic T
- code :
13.A4.FF
- affichage :
13.A4.FF
- description :
Residual Media Jam in Tray 4 This jam occurs when residual media is detected at the Tray 4 feed sensor (PS3302) at power on.
- remede :
1. Open Tray 4, remove any jammed paper, and then close the tray. 2. Open and close the HCI right door to allow the product to attempt to clear the jam. 3. Make sure that the Tray 4 pickup, feed, and separation roller are installed correctly and show no damage or wear. 4. Clean or replace the pickup/feed rollers as needed. 5. Check the connectors at the sensor, feed motor, and the HCI controller PCA. 6. Open the following menus: • Administration • Troubleshooting • Diagnostic T
- code :
13.A5.D5
- affichage :
13.A5.D5
- description :
Jam In Tray 5. This jam occurs when the media does not reach the Tray 5 feed sensor (PS3305) in the designated amount of time after the start of media pick-up from Tray 5. This is a no-pick jam from Tray 5.
- remede :
1. Open Tray 5, remove any jammed paper, and then close the tray. 2. Open and close the HCI right door to allow the product to attempt to clear the jam. 3. Make sure that the Tray 5 pickup, feed, and separation roller are installed correctly and show no damage or wear. 4. Clean or replace the pickup/feed rollers as needed. 5. Check the connectors at the sensor, feed motor, and the HCI controller PCA. 6. Open the following menus: • Administration • Troubleshooting • Diagnostic T
- code :
13.A5.FF
- affichage :
13.A5.FF
- description :
Residual Media Jam in Tray 5 This jam occurs when residual media is detected at the Tray 5 feed sensor (PS3305) at power on.
- remede :
1. Open Tray 5, remove any jammed paper, and then close the tray. 2. Open and close the HCI right door to allow the product to attempt to clear the jam. 3. Make sure that the Tray 5 pickup, feed, and separation roller are installed correctly and show no damage or wear. 4. Clean or replace the pickup/feed rollers as needed. 5. Check the connectors at the sensor, feed motor, and the HCI controller PCA. 6. Open the following menus: • Administration • Troubleshooting • Diagnostic T
- code :
13.A7.D4
- affichage :
13.A7.D4
- description :
Jam in lower Right Door (From Jam Tray 4) This jam occurs when the media does not reach the HCI Exit sensor (PS3301) in the designated amount of time after the Tray 4 feed sensor (PS3302) sensed the leading edge of the paper when printing from Tray 4.
- remede :
1. Clear the jam in the indicated area. 2. Close the door to allow the product to attempt to clear the jam. 3. Make sure that the Tray 4 pickup, feed, and separation roller are installed correctly and show no damage or wear. 4. Clean or replace the pickup/feed rollers as needed. 5. Check the connectors at the sensor, feed motor, and the HCI controller PCA. 6. Open the following menus: • Administration • Troubleshooting • Diagnostic Tests 7. Test PS3301 using the Tray/Bin Manual
- code :
13.A7.D5
- affichage :
13.A7.D5
- description :
Jam in lower Right Door (From Jam Tray 5) This jam occurs when the media does not reach the HCI Exit sensor (PS3301) in the designated amount of time after the Tray 5 feed sensor (PS3305) sensed the leading edge of the paper when printing from Tray 5.
- remede :
1. Clear the jam in the indicated area. 2. Close the door to allow the product to attempt to clear the jam. 3. Make sure that the Tray 5 pickup, feed, and separation roller are installed correctly and show no damage or wear. 4. Clean or replace the pickup/feed rollers as needed. 5. Check the connectors at the sensor, feed motor, and the HCI controller PCA. 6. Open the following menus: • Administration • Troubleshooting • Diagnostic Tests 7. Test PS3301 using the Tray/Bin Manual
- code :
13.A7.FF
- affichage :
13.A7.FF
- description :
Residual Media Jam in High Capacity Input (HCI) This jam occurs when residual media is detected at the HCI exit sensor (PS3301) at power on.
- remede :
1. Clear the jam in the indicated area. 2. Close the door to allow the product to attempt to clear the jam. 3. Make sure that the Tray 2 pickup, feed, and separation roller are installed correctly and show no damage or wear. 4. Clean or replace the pickup/feed rollers as needed. 5. Check the connectors at the sensor, feed motor, and the DC controller PCA. 6. Open the following menus: • Administration • Troubleshooting • Diagnostic Tests 7. Test PS1402 using the Tray/Bin Manual
- code :
13.A8.D3
- affichage :
13.A8.D3
- description :
Jam in Upper Right Door This jam occurs when the media does not reach the Tray 2C feed sensor (PS8) in the designated amount of time after the Tray 3B feed sensor (PS1403) sensed the leading edge of the paper when printing from Tray 3.
- remede :
1. Clear the jam in the indicated area. 2. Close the door to allow the product to attempt to clear the jam. 3. Make sure that the Tray 3 pickup, feed, and separation roller are installed correctly and show no damage or wear. 4. Clean or replace the pickup/feed rollers as needed. 5. Check the connectors at the sensor, feed motor, and the DC controller PCA. 6. Open the following menus: • Administration • Troubleshooting • Diagnostic Tests 7. Test PS1402 using the Tray/Bin Manual
- code :
13.A8.D4
- affichage :
13.A8.D4
- description :
Jam in Upper Right Door This jam occurs when the media does not reach the Tray 2C feed sensor (PS8) in the designated amount of time after the HCI Exit sensor (PS3301) sensed the leading edge of the paper when printing from Tray 4 or Tray 5. • D4 = Tray 4 • D5 = Tray 5
- remede :
1. Clear the jam in the indicated area. 2. Close the door to allow the product to attempt to clear the jam. 3. Open the following menus: • Administration • Troubleshooting • Diagnostic Tests 4. Run a Paper Path Test from both Tray 4 and Tray 5 to validate the issue. 5. Test PS3301 using the Tray/Bin Manual sensor test to verify that the sensors are functioning correctly. 6. Touch Component Test. 7. Run the intermediate feed motor drive test to verify that the feed motor is func
- code :
13.AA.EE
- affichage :
13.AA.EE
- description :
HCI Door Open Jam This jam occurs when the HCI right door (SW3301) is opened during printing.
- remede :
1. Close the Lower Right door to allow the product to attempt to clear the jam. 2. Open the following menus: • Administration • Troubleshooting • Diagnostic Tests 3. Test SW3301 using the Manual Sensor Switch test to verify that the switch is functioning correctly. 4. If the error persists, replace the Merge Assembly.
- code :
13.AB.EE
- affichage :
13.AB.EE
- description :
HCI Door Open Jam. This jam occurs when the HCI inner flap door (PS3306) is opened during printing.
- remede :
1. Close the inner flap door to allow the product to attempt to clear the jam. 2. Open the following menus: • Administration • Troubleshooting • Diagnostic Tests 3. Test PS3306 using the Manual Sensor test to verify that the sensor is functioning correctly. 4. If the error persists, replace the left tray pickup assembly.
- code :
13.B2.A1
- affichage :
13.B2.Az
- description :
This jam occurs when the media is present longer than "the expected media length plus 50mm" or more is detected at the Registration sensor (PS4) when printing from the Tray 1.
- remede :
1. Open the front door and clear the jam in the indicated area. 2. Close the door to allow the product to attempt to clear the jam. 3. Make sure that the transfer roller is seated correctly and not worn or deformed. Replace the roller if necessary. 4. Check the registration assembly for proper operation. Replace the registration assembly as needed. 5. If media is stopped under the toner cartridge, but has moved most of the way through registration, try another toner cartridge. If necessary, r
- code :
13.B2.A2
- affichage :
13.B2.Az
- description :
This jam occurs when the media is present longer than" the expected media length plus 50mm" or more is detected at the Registration sensor (PS4) when printing from the Tray 2.
- remede :
1. Open the front door and clear the jam in the indicated area. 2. Close the door to allow the product to attempt to clear the jam. 3. Make sure that the transfer roller is seated correctly and not worn or deformed. Replace the roller if necessary. 4. Check the registration assembly for proper operation. Replace the registration assembly as needed. 5. If media is stopped under the toner cartridge, but has moved most of the way through registration, try another toner cartridge. If necessary, r
- code :
13.B2.A3
- affichage :
13.B2.Az
- description :
This jam occurs when the media is present longer than "the expected media length plus 50mm" or more is detected at the Registration sensor (PS4) when printing from the Tray 3.
- remede :
1. Open the front door and clear the jam in the indicated area. 2. Close the door to allow the product to attempt to clear the jam. 3. Make sure that the transfer roller is seated correctly and not worn or deformed. Replace the roller if necessary. 4. Check the registration assembly for proper operation. Replace the registration assembly as needed. 5. If media is stopped under the toner cartridge, but has moved most of the way through registration, try another toner cartridge. If necessary, r
- code :
13.B2.A4
- affichage :
13.B2.Az
- description :
This jam occurs when the media is present longer than "the expected media length plus 50mm" or more is detected at the Registration sensor (PS4) when printing from the Tray 4.
- remede :
1. Open the front door and clear the jam in the indicated area. 2. Close the door to allow the product to attempt to clear the jam. 3. Make sure that the transfer roller is seated correctly and not worn or deformed. Replace the roller if necessary. 4. Check the registration assembly for proper operation. Replace the registration assembly as needed. 5. If media is stopped under the toner cartridge, but has moved most of the way through registration, try another toner cartridge. If necessary, r
- code :
13.B2.A5
- affichage :
13.B2.Az
- description :
This jam occurs when the media is present longer than "the expected media length plus 50mm" or more is detected at the Registration sensor (PS4) when printing from the Tray 5.
- remede :
1. Open the front door and clear the jam in the indicated area. 2. Close the door to allow the product to attempt to clear the jam. 3. Make sure that the transfer roller is seated correctly and not worn or deformed. Replace the roller if necessary. 4. Check the registration assembly for proper operation. Replace the registration assembly as needed. 5. If media is stopped under the toner cartridge, but has moved most of the way through registration, try another toner cartridge. If necessary, r
- code :
13.B2.AD
- affichage :
13.B2.Az
- description :
This jam occurs when the media is present longer than "the expected media length plus 50mm" or more is detected at the Registration sensor (PS4) when printing from the Duplexer.
- remede :
1. Open the front door and clear the jam in the indicated area. 2. Close the door to allow the product to attempt to clear the jam. 3. Make sure that the transfer roller is seated correctly and not worn or deformed. Replace the roller if necessary. 4. Check the registration assembly for proper operation. Replace the registration assembly as needed. 5. If media is stopped under the toner cartridge, but has moved most of the way through registration, try another toner cartridge. If necessary, r
- code :
13.B2.D1
- affichage :
13.B2.Dz
- description :
Media delay jam at registration sensor PS4. This jam occurs when the media does not reach the Registration sensor (PS4) in the designated amount of time after the Tray 1 feed sensor (PS2502) sensed the leading edge when printing from Tray 1.
- remede :
1. Open the front and right doors and clear the jam in the indicated area. Inspect the paper path and make sure that no paper is blocking the paper path. 2. Check the registration assembly for proper orientation. Replace the registration assembly as needed. 3. Open the following menus: • Administration • Troubleshooting • Diagnostic Tests 4. Test the TOP sensor (PS4) using the Tray/Bin manual sensor test to verify that the sensor is functioning correctly. If it is not, replace
- code :
13.B2.D2
- affichage :
13.B2.Dz
- description :
Media delay jam at registration sensor PS4. This jam occurs when the media does not reach the Registration sensor (PS4) in the designated amount of time after the Tray 2C feed sensor (PS8) sensed the leading edge when printing from Tray 2.
- remede :
1. Open the front and right doors and clear the jam in the indicated area. Inspect the paper path and make sure that no paper is blocking the paper path. 2. Check the registration assembly for proper orientation. Replace the registration assembly as needed. 3. Open the following menus: • Administration • Troubleshooting • Diagnostic Tests 4. Test the TOP sensor (PS4) using the Tray/Bin manual sensor test to verify that the sensor is functioning correctly. If it is not, replace
- code :
13.B2.D3
- affichage :
13.B2.Dz
- description :
Media delay jam at registration sensor PS4. This jam occurs when the media does not reach the Registration sensor (PS4) in the designated amount of time after the Tray 2C feed sensor (PS8) sensed the leading edge when printing from Tray 3.
- remede :
1. Open the front and right doors and clear the jam in the indicated area. Inspect the paper path and make sure that no paper is blocking the paper path. 2. Check the registration assembly for proper orientation. Replace the registration assembly as needed. 3. Open the following menus: • Administration • Troubleshooting • Diagnostic Tests 4. Test the TOP sensor (PS4) using the Tray/Bin manual sensor test to verify that the sensor is functioning correctly. If it is not, replace
- code :
13.B2.D4
- affichage :
13.B2.Dz
- description :
Media delay jam at registration sensor PS4. This jam occurs when the media does not reach the Registration sensor (PS4) in the designated amount of time after the Tray 2C feed sensor (PS8) sensed the leading edge when printing from Tray 4.
- remede :
1. Open the front and right doors and clear the jam in the indicated area. Inspect the paper path and make sure that no paper is blocking the paper path. 2. Check the registration assembly for proper orientation. Replace the registration assembly as needed. 3. Open the following menus: • Administration • Troubleshooting • Diagnostic Tests 4. Test the TOP sensor (PS4) using the Tray/Bin manual sensor test to verify that the sensor is functioning correctly. If it is not, replace
- code :
13.B2.D5
- affichage :
13.B2.Dz
- description :
Media delay jam at registration sensor PS4. This jam occurs when the media does not reach the Registration sensor (PS4) in the designated amount of time after the Tray 2C feed sensor (PS8) sensed the leading edge when printing from Tray 5.
- remede :
1. Open the front and right doors and clear the jam in the indicated area. Inspect the paper path and make sure that no paper is blocking the paper path. 2. Check the registration assembly for proper orientation. Replace the registration assembly as needed. 3. Open the following menus: • Administration • Troubleshooting • Diagnostic Tests 4. Test the TOP sensor (PS4) using the Tray/Bin manual sensor test to verify that the sensor is functioning correctly. If it is not, replace
- code :
13.B2.DD
- affichage :
13.B2.Dz
- description :
Media delay jam at registration sensor PS4. This jam occurs when the media does not reach the Registration sensor (PS4) in the designated amount of time after leaving the Duplex Wait Point when duplexing.
- remede :
1. Open the front and right doors and clear the jam in the indicated area. Inspect the paper path and make sure that no paper is blocking the paper path. 2. Check the registration assembly for proper orientation. Replace the registration assembly as needed. 3. Open the following menus: • Administration • Troubleshooting • Diagnostic Tests 4. Test the TOP sensor (PS4) using the Tray/Bin manual sensor test to verify that the sensor is functioning correctly. If it is not, replace
- code :
13.B2.FF
- affichage :
13.B2.FF
- description :
Residual Media Jam in Registration Area This jam occurs when residual media is detected at the Registration sensor (PS4) or any of the three width sensors (PS1, PS2, PS3) at power on.
- remede :
1. Open the front door and clear the jam in the indicated area. 2. Close the door to allow the product to attempt to clear the jam. 3. If media is stopped under the toner cartridge, but has moved most of the way through registration, try another toner cartridge. If necessary, replace the toner cartridge. 4. Make sure that the transfer roller is seated correctly and not worn or deformed. Replace the roller if necessary. 5. Check the registration assembly for proper operation. Replace the regis
- code :
13.B4.FF
- affichage :
13.B4.FF
- description :
Residual Media jam Loop sensor (PS9) This jam occurs when residual media is detected at the Loop sensor (PS9) at power on.
- remede :
1. Open the front door and clear the jam in the indicated area. 2. Close the door to allow the product to attempt to clear the jam. 3. If the issue persists as another specific Paper Jam, troubleshoot the specified Jam location. 4. Open the following menus: • Administration • Troubleshooting • Diagnostic Tests 5. Test the Loop sensor (PS9) using the Tray/Bin manual sensor test to verify that the sensor is functioning correctly. If it is not, replace the assembly containing Loop
- code :
13.B9.A2
- affichage :
13.B9.Az
- description :
Fuser delivery stay This jam occurs when the media stays at the fuser output sensor (PS502) for a designated amount of time after it has reached the fuser output sensor (PS502). The fuser is printing in fuser mode Normal.
- remede :
1. Open the left door and clear the jam in the indicated area. 2. Close the door to allow the product to attempt to clear the jam. 3. If the issue persists, remove the fuser and inspect the fuser sleeve, pressure roller, and delivery roller for blockage and/or damage. Replace the fuser as needed. CAUTION: The fuser might be HOT. 4. Open the following menus: • Administration • Troubleshooting • Diagnostic Tests 5. Test the Fuser Delivery sensor (PS502) using the Tray/Bin manual
- code :
13.B9.A3
- affichage :
13.B9.Az
- description :
Fuser delivery stay This jam occurs when the media stays at the fuser output sensor (PS502) for a designated amount of time after it has reached the fuser output sensor (PS502). The fuser is printing in fuser mode Light 1 or Light 2 (see the event log secondary jam information digits for specific mode).
- remede :
1. Open the left door and clear the jam in the indicated area. 2. Close the door to allow the product to attempt to clear the jam. 3. If the issue persists, remove the fuser and inspect the fuser sleeve, pressure roller, and delivery roller for blockage and/or damage. Replace the fuser as needed. CAUTION: The fuser might be HOT. 4. Open the following menus: • Administration • Troubleshooting • Diagnostic Tests 5. Test the Fuser Delivery sensor (PS502) using the Tray/Bin manual
- code :
13.B9.A4
- affichage :
13.B9.Az
- description :
Fuser delivery stay This jam occurs when the media stays at the fuser output sensor (PS502) for a designated amount of time after it has reached the fuser output sensor (PS502). The fuser is printing in fuser mode Heavy 1.
- remede :
1. Open the left door and clear the jam in the indicated area. 2. Close the door to allow the product to attempt to clear the jam. 3. If the issue persists, remove the fuser and inspect the fuser sleeve, pressure roller, and delivery roller for blockage and/or damage. Replace the fuser as needed. CAUTION: The fuser might be HOT. 4. Open the following menus: • Administration • Troubleshooting • Diagnostic Tests 5. Test the Fuser Delivery sensor (PS502) using the Tray/Bin manual
- code :
13.B9.A5
- affichage :
13.B9.Az
- description :
Fuser delivery stay This jam occurs when the media stays at the fuser output sensor (PS502) for a designated amount of time after it has reached the fuser output sensor (PS502). The fuser is printing in fuser mode Heavy 2.
- remede :
1. Open the left door and clear the jam in the indicated area. 2. Close the door to allow the product to attempt to clear the jam. 3. If the issue persists, remove the fuser and inspect the fuser sleeve, pressure roller, and delivery roller for blockage and/or damage. Replace the fuser as needed. CAUTION: The fuser might be HOT. 4. Open the following menus: • Administration • Troubleshooting • Diagnostic Tests 5. Test the Fuser Delivery sensor (PS502) using the Tray/Bin manual
- code :
13.B9.AB
- affichage :
13.B9.Az
- description :
Fuser delivery stay This jam occurs when the media stays at the fuser output sensor (PS502) for a designated amount of time after it has reached the fuser output sensor (PS502). The fuser is printing in fuser mode Transparency.
- remede :
1. Open the left door and clear the jam in the indicated area. 2. Close the door to allow the product to attempt to clear the jam. 3. If the issue persists, remove the fuser and inspect the fuser sleeve, pressure roller, and delivery roller for blockage and/or damage. Replace the fuser as needed. CAUTION: The fuser might be HOT. 4. Open the following menus: • Administration • Troubleshooting • Diagnostic Tests 5. Test the Fuser Delivery sensor (PS502) using the Tray/Bin manual
- code :
13.B9.AD
- affichage :
13.B9.Az
- description :
Fuser delivery stay This jam occurs when the media stays at the fuser output sensor (PS502) for a designated amount of time after it has reached the fuser output sensor (PS502). The fuser is printing in fuser mode Envelope 1 or Envelope 2 (see the event log secondary jam information digits for specific mode).
- remede :
1. Open the left door and clear the jam in the indicated area. 2. Close the door to allow the product to attempt to clear the jam. 3. If the issue persists, remove the fuser and inspect the fuser sleeve, pressure roller, and delivery roller for blockage and/or damage. Replace the fuser as needed. CAUTION: The fuser might be HOT. 4. Open the following menus: • Administration • Troubleshooting • Diagnostic Tests 5. Test the Fuser Delivery sensor (PS502) using the Tray/Bin manual
- code :
13.B9.Bz
- affichage :
13.B9.Bz
- description :
Jam in Left Door This jam occurs when a near complete overlap (less than 5 to 15 mm of non-overlap) multi-feed jam is detected. A multi-feed jam 13.B9.Bz can be related to the following codes: • 41.03.Az size misprint • 50.9x.yz fuser error • 13.B2.Az jam • bad media in source tray • 13.B9.B1 Multi-Feed jam is detected when printing from Tray 1. • 13.B9.B2 Multi-Feed jam is detected when printing from Tray 2. • 13.B9.B3 Multi-Feed jam is detected when printi
- remede :
1. Open the left door and clear the jam in the indicated area. 2. Close the door to allow the product to attempt to clear the jam. 3. Make sure the media meets HP specifications and is loaded in the trays correctly. 4. Make sure that the pickup, feed, and separation roller for the specified tray are installed correctly and show no damage or wear. 5. Clean or replace the pickup/feed rollers as needed.
- code :
13.B9.Cz
- affichage :
13.B9.Cz
- description :
Fuser Wrap Jam This jam occurs when the media disappears from the fuser output sensor (PS502) before a designated amount of time after the media reached the fuser output sensor (PS502). (It is determined that the media is being wrapped around the fuser roller) Z = Fuser mode • 13.B9.C1 Fuser wrap jam when Auto Sense (Normal). • 13.B9.C2 Fuser wrap jam when Normal. • 13.B9.C3 Fuser wrap jam when Light 1 or Light 2 (see event log secondary jam information for specific code). &bul
- remede :
1. Open the left door. 2. Remove the fuser, and then remove any paper wrapped around the fuser roller. CAUTION: The fuser might be HOT. 3. Reinstall the fuser, and then close the door. 4. Print a cleaning page to make sure that all of the toner is removed from the fuser roller. 5. Use the manual sensor tests to toggle the fuser output sensor (PS502). If the sensor is not functioning correctly, replace the fuser assembly. 6. If the error persists, the fuser roller or pressure roller might be d
- code :
13.B9.Dz
- affichage :
13.B9.Dz
- description :
Fuser delivery delay jam This jam occurs when the media disappears from the fuser output sensor (PS502) before a designated amount of time after the registration sensor (PS4) sensed the leading edge when printing. • 13.B9.D1 Fuser delivery delay jam when printing from Tray 1. • 13.B9.D2 Fuser delivery delay jam when printing from Tray 2. • 13.B9.D3 Fuser delivery delay jam when printing from Tray 3. • 13.B9.D4 Fuser delivery delay jam when printing from Tray 4. • 13.B
- remede :
If the media stopped before the fuser, try the following steps. 1. Open the front door and the left door and clear the jam in the indicated area. 2. Close the door to allow the product to attempt to clear the jam. 3. If media is stopped under the toner cartridge, try another toner cartridge. If necessary, replace the toner cartridge. 4. Make sure that the transfer roller is seated correctly and not worn or deformed. Replace the roller if necessary. 5. Inspect the transfer feed assembly for de
- code :
13.B9.FF
- affichage :
13.B9.FF
- description :
Residual Media jam Fuser Output Sensor This jam occurs when residual media is detected at the Fuser Output sensor (PS502) at power on. Recommended action 1. Open the left door and clear the jam in the indicated area. 2. Close the door to allow the product to attempt to clear the jam. 3. Remove the fuser and inspect the fuser sleeve, pressure roller, and delivery roller for blockage and/or damage. Replace the fuser as needed. CAUTION: The fuser might be HOT. 4. Open the following menus: •
- remede :
- code :
13.BA.EE
- affichage :
13.BA.EE
- description :
This jam occurs when the engine front door (SW8) is opened during printing.
- remede :
1. Close the front door. 2. Check the projection tabs of the front door that engage the door sensor (SW8). If damaged, replace the appropriate part. 3. Use the Manual sensor test to activate the door switch. Replace the switch if it is not functioning correctly. 4. Check connector J302 on the DC controller PCA and connector J3 on SW8.
- code :
13.BB.EE
- affichage :
13.BB.EE
- description :
This jam occurs when the engine right door (SW7) is opened during printing.
- remede :
1. Close the right door. 2. Check the projection tabs of the right door that engage the door sensor (SW7). If damaged, replace the appropriate part. 3. Use the Manual sensor test to activate the door switch. Replace the switch if it is not functioning correctly. 4. Check connector J302 on the DC controller PCA and connector J3 on SW7.
- code :
13.D1.Az
- affichage :
13.D1.Az
- description :
Jam in Left Door This jam occurs when the media stays at the duplex switchback sensor (PS2002) for a designated amount of time after it has reached the duplex switchback sensor (PS2002). Z = Fuser Mode • 13.D1.A2 The fuser is printing in fuser mode Normal. • 13.D1.A3 The fuser is printing in fuser mode Light 1 or Light 2 (see the event log secondary jam information digits for specific mode). • 13.D1.A4 The fuser is printing in fuser mode Heavy 1. • 13.D1.A5 The fuser is pr
- remede :
1. Open the left door and clear the jam in the indicated area. 2. Close the door to allow the product to attempt to clear the jam. 3. If the issue persists, remove the fuser and inspect the fuser sleeve, pressure roller, and delivery roller for blockage and/or damage. Replace the fuser as needed. CAUTION: The fuser might be HOT. 4. Open the following menus: • Administration • Troubleshooting • Diagnostic Tests 5. Test the Fuser Delivery sensor (PS502) using the Tray/Bin manual
- code :
13.D1.Dz
- affichage :
13.D1.Dz
- description :
Jam in Left Door This jam occurs when the media does not reach the duplex switchback sensor (PS2002) for a designated amount of time after the fuser output sensor (PS502) sensed the leading edge. Z = Fuser Mode • 13.D1.D2 The fuser is printing in fuser mode Normal. • 13.D1.D3 The fuser is printing in fuser mode Light 1 or Light 2 (see the event log secondary jam information digits for specific mode). • 13.D1.D4 The fuser is printing in fuser mode Heavy 1. • 13.D1.D5 The fu
- remede :
- code :
13.D2.Az
- affichage :
13.D2.Az
- description :
Jam in Left Door This jam occurs when the media stays at the duplex delivery sensor (PS2004) for a designated amount of time after it has reached the duplex delivery sensor (PS2004). • 13.D2.A2 The fuser is printing in fuser mode Normal. • 13.D2.A3 The fuser is printing in fuser mode Light 1 or Light 2 (see the event log secondary jam information digits for specific mode). • 13.D2.A4 The fuser is printing in fuser mode Heavy 1. • 13.D2.A5 The fuser is printing in fuser mod
- remede :
1. Open the left door and clear the jam in the indicated area. 2. Close the door to allow the product to attempt to clear the jam. 3. Remove and inspect the duplexer unit. Clear and clean the duplexer as needed. 4. If the issue persists, replace the duplexer.
- code :
13.D2.Dz
- affichage :
13.D2.Dz
- description :
Jam in Left Door This jam occurs when the media does not reach the duplex delivery sensor (PS2004) in a designated amount of time after the duplex pre-registration sensor (PS2003) sensed the leading edge. • 13.D2.D2 The fuser is printing in fuser mode Normal. • 13.D2.D3 The fuser is printing in fuser mode Light 1 or Light 2 (see the event log secondary jam information digits for specific mode). • 13.D2.D4 The fuser is printing in fuser mode Heavy 1. • 13.D2.D5 The fuser is
- remede :
1. Open the left door and clear the jam in the indicated area. 2. Close the door to allow the product to attempt to clear the jam. 3. Remove and inspect the duplexer unit. Clear and clean the duplexer as needed. 4. If the issue persists, replace the duplexer.
- code :
13.D2.FF
- affichage :
13.D2.FF
- description :
Jam in Left Door This jam occurs when residual media is detected at the duplex delivery sensor (PS2004) or the duplex residual sensor (PS2005) at power on.
- remede :
1. Open the left door and clear the jam in the indicated area. 2. Close the door to allow the product to attempt to clear the jam. 3. Remove and inspect the duplexer unit. Clear and clean the duplexer as needed. 4. If the issue persists, replace the duplexer.
- code :
13.D4.Az
- affichage :
13.D4.Az
- description :
Jam in Left Door This jam occurs when the media stays at the duplex pre-registration sensor (PS2003) for a designated amount of time after it has reached the duplex pre-registration sensor (PS2003). • 13.D4.A2 The fuser is printing in fuser mode Normal. • 13.D4.A3 The fuser is printing in fuser mode Light 1 or Light 2 (see the event log secondary jam information digits for specific mode). • 13.D4.A4 The fuser is printing in fuser mode Heavy 1. • 13.D4.A5 The fuser is print
- remede :
1. Open the left door and clear the jam in the indicated area. 2. Close the door to allow the product to attempt to clear the jam. 3. Remove and inspect the duplexer unit. Clear and clean the duplexer as needed. 4. If the issue persists, replace the duplexer.
- code :
13.D4.Dz
- affichage :
13.D4.Dz
- description :
Jam in Left Door This jam occurs when the media does not reach the duplex pre-registration sensor (PS2003) in a designated amount of time after the duplex switchback sensor (PS2002) sensed the leading edge. • 13.D4.D2 The fuser is printing in fuser mode Normal. • 13.D4.D3 The fuser is printing in fuser mode Light 1 or Light 2 (see the event log secondary jam information digits for specific mode). • 13.D4.D4 The fuser is printing in fuser mode Heavy 1. • 13.D4.D5 The fuser
- remede :
1. Open the left door and clear the jam in the indicated area. 2. Close the door to allow the product to attempt to clear the jam. 3. Remove and inspect the duplexer unit. Clear and clean the duplexer as needed. 4. If the issue persists, replace the duplexer.
- code :
13.E1.Dz
- affichage :
13.E1.Dz
- description :
Jam in Left Door This jam occurs when the media does not reach the face down bin full sensor (PS1452) in a designated amount of time after the face down output sensor (PS1451) sensed the leading edge. • 13.E1.D2 The fuser is printing in fuser mode Normal. • 13.E1.D3 The fuser is printing in fuser mode Light 1 or Light 2 (see the event log secondary jam information digits for specific mode). • 13.E1.D4 The fuser is printing in fuser mode Heavy 1. • 13.E1.D5 The fuser is pri
- remede :
1. Open the left door and clear the jam in the indicated area. 2. Close the door to allow the product to attempt to clear the jam. 3. Reseat the connections to the DC controller. 4. Make sure that the delivery flags move smoothly. 5. Open the following menus: • Administration • Troubleshooting • Diagnostic Tests 6. Test the face down bin full sensor (PS1452) using the Tray/Bin manual sensor test to verify the sensor is functioning correctly. If it is not, replace the delivery s
- code :
13.E1.FF
- affichage :
13.E1.FF
- description :
Residual Jam - Jam in Left Door This jam occurs when residual media is detected at the face down bin full sensor (PS1452) at power on.
- remede :
1. Open the left door and clear the jam in the indicated area. 2. Close the door to allow the product to attempt to clear the jam. 3. Reseat the connections to the DC controller. 4. Make sure that the delivery flags move smoothly. 5. Open the following menus: • Administration • Troubleshooting • Diagnostic Tests 6. Test the face down bin full sensor (PS1452) using the Tray/Bin manual sensor test to verify the sensor is functioning correctly. If it is not, replace the delivery s
- code :
13.E6.Az
- affichage :
13.E6.Az
- description :
Jam in Left Door This jam occurs when the media stays at the face down output sensor (PS1451) for a designated amount of time after it has reached the face down output sensor (PS1451). • 13.E6.A2 The fuser is printing in fuser mode Normal. • 13.E6.A3 The fuser is printing in fuser mode Light 1 or Light 2 (see the event log secondary jam information digits for specific mode). • 13.E6.A4 The fuser is printing in fuser mode Heavy 1. • 13.E6.A5 The fuser is printing in fuser m
- remede :
1. Open the left door and clear the jam in the indicated area. 2. Close the door to allow the product to attempt to clear the jam. 3. Reseat the connections to the DC controller. 4. Make sure that the delivery flags move smoothly. 5. Open the following menus: • Administration • Troubleshooting • Diagnostic Tests 6. Test the face down bin full sensor (PS1452) using the Tray/Bin manual sensor test to verify the sensor is functioning correctly. 7. If necessary, replace the deliver
- code :
13.E6.Dz
- affichage :
13.E6.Dz
- description :
Jam in Left Door This jam occurs when the media does not reach the face down output sensor (PS1451) in a designated amount of time after the fuser output sensor (PS502) sensed the leading edge. • 13.E6.D2 The fuser is printing in fuser mode Normal. • 13.E6.D3 The fuser is printing in fuser mode Light 1 or Light 2 (see the event log secondary jam information digits for specific mode). • 13.E6.D4 The fuser is printing in fuser mode Heavy 1. • 13.E6.D5 The fuser is printing i
- remede :
1. Open the left door and clear the jam in the indicated area. 2. Close the door to allow the product to attempt to clear the jam. 3. Reseat the connections to the DC controller. 4. Make sure that the delivery flags move smoothly. 5. Open the following menus: • Administration • Troubleshooting • Diagnostic Tests 6. Test the face down bin full sensor (PS1452) using the Tray/Bin manual sensor test to verify the sensor is functioning correctly. 7. Touch Component Test. 8. Inspect
- code :
13.E6.FF
- affichage :
13.E6.FF
- description :
Jam in Left Door This jam occurs when residual media is detected at the face down output sensor (PS1451) at power on. This jam code will only be in the event log if it is a residual jam at power on.
- remede :
1. Open the left door and clear the jam in the indicated area. 2. Close the door to allow the product to attempt to clear the jam. 3. Make sure that the delivery flags move smoothly. 4. Open the following menus: • Administration • Troubleshooting • Diagnostic Tests 5. Test the face down output sensor (PS1451) using the Tray/Bin manual sensor test to verify the sensor is functioning correctly. 6. If the issue persists, replace the delivery unit.
- code :
13.EA.EE
- affichage :
13.EA.EE
- description :
Left Door Open Jam This jam occurs when the engine left door (SW6) is opened during printing.
- remede :
1. Close the lower right door to allow the product to attempt to clear the jam. 2. Open the following menus: • Administration • Troubleshooting • Diagnostic Tests 3. Test SW6 using the manual sensor switch test to verify the switch is functioning correctly. 4. If the issue persists, replace SW6.
- code :
13.FF.FF
- affichage :
13.FF.FF
- description :
Jam in Printer This jam occurs when residual media is detected at the multiple media path sensors. This jam code will only be in the event log if it is a residual jam at power on.
- remede :
1. Open all the doors and clear all media from the product. 2. Close all the doors to allow the product to attempt to clear the paper path.
- code :
30.01.01
- affichage :
30.01.01
- description :
The flatbed cover sensor was interrupted.
- remede :
No action necessary. This error message should automatically clear. If the error persists, open the Scanner Tests to test the Flatbed cover sensor.
- code :
30.01.06
- affichage :
30.01.06
- description :
Scanner fan error.
- remede :
1. Turn the product off, and then on again. 2. During the MFP initialization sequence, listen to the fan to determine if it is operating. 3. If the error persists, turn the product off, and then check the fan wire-harness connectors. 4. If the fan is not operating, replace the fan. 5. If the error persists, replace the Scan Control Board (SCB). NOTE: You might want to provide both parts the fan and the SCB to the onsite technician. Have the technician verify that the connector on the scanner
- code :
30.01.08
- affichage :
30.01.08
- description :
The scanner optic failed to return to the home position.
- remede :
1. Turn the product off, and then on again. 2. Observe the movement of the optics assembly. 3. If the error persists, replace the optic assembly, the scanner motor, or the entire scanner assembly.
- code :
30.01.10
- affichage :
30.01.10 (event code) Scanner ADF fan error
- description :
The ADF fan is not operating. This fan operates only during the ADF scan process.
- remede :
1. Turn the product off, and then on again. 2. If the error persists, turn the product off and then check the fan wire-harness connectors. 3. Remove the ADF rear cover and watch the fan during a scan from the ADF. 4. If the fan does not rotate, replace the ADF assembly.
- code :
30.01.14
- affichage :
30.01.14
- description :
Scanner control board (SCB) EEPROM error.
- remede :
1. Turn the product off, and then on again. 2. Make sure that all connectors on the SCB are seated fully. 3. Make sure that the MFP has the latest SCB firmware version. 4. Replace the SCB.
- code :
30.01.15
- affichage :
30.01.15
- description :
Scanner did not initialize (internal error). The scanner failed to be initialized due to an internal error.
- remede :
1. Turn the product off, and then on again. 2. Verify that all covers are installed correctly and that the ADF and ADF jam cover are closed. 3. Check all sensors on the scanner to ensure they are not blocked. 4. If the error persists, replace the scanner flatbed assembly.
- code :
30.01.18
- affichage :
30.01.18
- description :
Scanner internal optical sensor error.
- remede :
1. Turn the product off, and then on again. 2. Make sure that all the connectors on the SCB are seated fully. 3. Make sure that the MFP has the latest SCB firmware version. 4. replace the SCB. 5. If the error persists, replace the optics or the entire scanner unit.
- code :
30.01.19
- affichage :
30.01.19
- description :
Scanner internal lamp sensor error.
- remede :
1. Turn the product off, and then on again. 2. Test the lower lamp using the Scanner test located in the Diagnostics menu. 3. Replace the scanner lamp.
- code :
30.01.23
- affichage :
30.01.23 Scanner calibration failure
- description :
The scanner calibration failed.
- remede :
1. Turn the product off, and then on again. 2. After the product warms up, repeat the calibration process. 3. If the error persists, replace the scanner.
- code :
30.01.30
- affichage :
30.01.30
- description :
HP image ASIC error.
- remede :
Turn the product off, and then on again.
- code :
30.01.32
- affichage :
30.01.32
- description :
HP image ASIC error.
- remede :
Turn the product off, and then on again.
- code :
30.01.36
- affichage :
30.01.36
- description :
Scanner firmware upgrade error.
- remede :
1. Resend the scanner firmware upgrade. 2. If the error persists, replace the SCB.
- code :
30.01.41
- affichage :
30.01.41
- description :
The formatter lost connections with the SCB or communication was corrupted.
- remede :
1. Turn the product off, and then on. 2. Reseat the formatter. 3. Upgrade the firmware. 4. Verify that all cables are connected to the product and to the interconnect board/ formatter and SCB. 5. Verify that the SCB has power. 6. Replace the SCB. 7. Replace the formatter. 8. Replace the interconnect board.
- code :
30.01.42
- affichage :
30.01.42
- description :
Internal product communication error.
- remede :
1. Turn the product off, and then on again. 2. If the error persists, turn the product off, and then check the SCB connectors. 3. If the error persists, replace the SCB.
- code :
30.01.43
- affichage :
30.01.43
- description :
Scan memory error.
- remede :
1. Turn the product off, and then on again. 2. If the error persists, turn the product off, and then reseat the formatter. 3. If the error persists, replace the formatter.
- code :
30.01.44
- affichage :
30.01.44
- description :
Internal product communication error.
- remede :
1. Turn the product off, and then on again. 2. If the error persists, turn the product off, and then check the scanner cable. 3. Upgrade the firmware. 4. If the error persists, turn the product off, and then reseat the formatter. 5. If the error persists, replace the SCB or the formatter.
- code :
30.01.45
- affichage :
30.01.45
- description :
Internal CPB communication error.
- remede :
1. Turn the product off, and then on again. 2. If the error persists, turn the product off, and then reseat the formatter. 3. Upgrade the firmware. 4. If the error persists, replace the SCB. 5. If the error persists, replace the formatter.
- code :
30.01.46
- affichage :
30.01.46
- description :
Internal CPB communication error.
- remede :
1. Turn the product off, and then on again. 2. If the error persists, turn the product off, and then reseat the formatter. 3. If the error persists, replace the SCB.
- code :
30.01.47
- affichage :
30.01.47
- description :
Document feeder error.
- remede :
1. Turn the product off, and then on again. 2. If the error persists, turn the product off, and then check the document feeder wire-harness connectors. 3. If the error persists, replace the document feeder assembly. 4. If the error persists, replace the formatter.
- code :
30.01.48
- affichage :
30.01.48
- description :
Scanner error.
- remede :
1. Turn the product off, and then on again. 2. If the error persists, turn the product off, and then check the scanner wire-harness connectors and the scanner power supply fan. 3. If the error persists, replace the scanner power supply or the scanner power supply fan.
- code :
30.01.49
- affichage :
30.01.49
- description :
Scanner inverter fan error.
- remede :
1. Turn the product off, and then on again. 2. If the error persists, turn the product off, and then check the scanner wire-harness connectors and the scanner power supply fan. 3. If the error persists, replace the scanner power supply, the scanner power supply fan, or the SCB.
- code :
30.01.50
- affichage :
30.01.50
- description :
Internal SCB error.
- remede :
1. Turn the product off, and then on again. 2. If the error persists, replace the SCB.
- code :
30.03.14
- affichage :
30.03.14
- description :
A non-fatal error has occurred. A scanner EEPROM (NVM) error has occurred.
- remede :
This is an informational message, and no action is required.
- code :
30.03.20
- affichage :
30.03.20
- description :
The copy processor board firmware cannot communicate with the PCA on the optical assembly.
- remede :
1. Turn the product off, and then on again. 2. Verify that the FFC cables between scanner and the SCB are connected. 3. Replace the scanner.
- code :
30.03.22
- affichage :
30.03.22
- description :
The scan module cannot see the illumination module, or marginal illumination. The optical assembly is not parked under the calibration strip.
- remede :
1. Turn the product off, and then on again. 2. Upgrade the firmware. 3. Check the service event log for other scanner errors, and then resolve those errors. 4. Check the scan module FFC connection. 5. Replace the scanner. 6. If the error persists, please escalate this problem to your Global Business unit.
- code :
30.03.23
- affichage :
30.03.23
- description :
The calibration stitching label shifted or there are bad sensors in the scan module.
- remede :
1. Turn the product off, and then on again. 2. Upgrade the firmware. 3. Replace the scanner.
- code :
30.03.30
- affichage :
30.03.30
- description :
The SCB cannot communicate with the flatbed scanner motor.
- remede :
1. Turn the product off, and then on again. As the product turns on, verify that the scan head moves. 2. Verify that the drive belt is in the correct position. 3. Check for a red LED illuminated on the scanner motor. 4. Check the cable connection to the SCB. 5. Replace the scanner.
- code :
30.03.45
- affichage :
30.03.45
- description :
Scanner control board (SCB) firmware assertion failure. SCB firmware assert controls the scan head motor.
- remede :
1. Turn the product off, and then on again. 2. Upgrade the firmware. 3. Replace the SCB. 4. Replace the scanner assembly.
- code :
31.01.02
- affichage :
31.01.02 Jam in document feeder
- description :
‘Jam in document feeder’ occurs when a page is picked, but gets jammed somewhere inside the document feeder.
- remede :
1. Check the ADF float to verify it is properly positioned a. Push on the float. If properly installed it should spring back. If it does not, verify the latch at the top is snapped into position. b. Check the location of the small Mylar tabs. If the tabs are blocking the paper path, push gently on the tab to place it in the proper position behind the white foam reflector 2. If the 30.01.02 message cannot be cleared, a sensor might still be blocked by a piece of paper. There are two other sens
- code :
31.01.03
- affichage :
31.01.03 Document feeder pick error
- description :
The document feeder pick (or mis-pick) error occurs when a page cannot be fed from the input tray.
- remede :
1. Verify that the roller assembly and separation pad are installed correctly. a. Open the top cover of the ADF. b. Push down on the separation pad, and then release it. It should spring back up. If it does not, the spring might be missing. NOTE: The separation pad assembly is mounted to a spring loaded paper access guide, which also moves when pushed down. c. Close the ADF top cover while observing the roller assembly. It will fall against the separation pad, and then pop up when the ADF ini
- code :
31.03.30
- affichage :
31.03.30
- description :
The document feeder pick motor is not turning.
- remede :
1. Verify that the paper meets the product specifications. 2. Make sure that the input tray is not overloaded. 3. Check the event log for document feeder errors, and then resolve any errors first. 4. Open and close the top cover to see if the pick motor turns without posting this error. If the motor turns, then the motor is good. 5. Verify that the motor cables are connected. 6. Reseat the document feeder to the SCB. 7. Replace the document feeder.
- code :
31.03.31
- affichage :
31.03.31
- description :
The document feeder pick motor is not turning.
- remede :
1. Verify that the paper meets the product specifications. 2. Make sure that the input tray is not overloaded. 3. Check the event log for document feeder errors, and then resolve any errors first. 4. Verify that the motor cables are connected. 5. Reseat the document feeder to the SCB. 6. Replace the document feeder.
- code :
31.03.32
- affichage :
31.03.32
- description :
The document feeder deskew motor is not turning.
- remede :
1. Verify that the paper meets the product specifications. 2. Make sure that the input tray is not overloaded. 3. Check the event log for document feeder errors, and then resolve any errors first. 4. Verify that the motor cables are connected. 5. Reseat the ADF to SCB cables. 6. Replace the document feeder.
- code :
31.08.A1
- affichage :
31.08.A1
- description :
An initialization occurred after an abnormal product shutdown.
- remede :
No action necessary.
- code :
31.08.A2
- affichage :
31.08.A2
- description :
A normal shutdown has occurred.
- remede :
No action necessary.
- code :
31.08.A3
- affichage :
31.08.A3
- description :
A normal initialization has occurred.
- remede :
No action necessary.
- code :
31.13.01
- affichage :
31.13.01
- description :
Paper pick was initiated, but the page didn't did not make it to the pick success sensor.
- remede :
1. Open the ADF lid, pull sheets back into input tray, and then resume the job. 2. Check the paper guides and make sure that they are set to the correct paper width. 3. Make sure that the input tray is not overloaded. 4. Check the document feeder page count for roller life. 5. Verify that the paper meets the product specifications. 6. Make sure that the ADF roller door is completely closed. 7. Check the event log for 31.03.30 errors, and and then resolve those errors first. 8. Clean the docum
- code :
31.13.02
- affichage :
31.13.02
- description :
The paper passed the pick success sensor, and then jammed in the document feeder paper path.
- remede :
1. Clear the paper path and try feeding the page again. 2. Verify that the paper meets the product specifications. 3. Check the paper guides and make sure that they are set to the correct paper width. 4. Verify that the paper path is clear. 5. Check for motor stall 31.03.31 and 31.03.32 errors. 6. Open the following menus: • Administration • Troubleshooting • Diagnostic Tests • Scanner Tests 7. Actuate the Paper-Path Sensor 1. If the sensor does not show functionality when
- code :
31.13.13
- affichage :
31.13.13
- description :
The jam access door is open.
- remede :
1. Verify that the jam access cover is closed. 2. Try feeding the paper again. 3. Verify that the flag is not broken off. 4. Open the following menus: • Administration • Troubleshooting • Diagnostic Tests • Scanner Tests 5. Actuate the ADF Jam Cover Sensor. If the sensor does not show functionality when tested, replace the document feeder.
- code :
31.13.14
- affichage :
31.13.14
- description :
This is a feed jam in the document feeder, and the motor is not turning.
- remede :
1. Verify that the paper meets the product specifications. 2. Make sure that the document feeder input tray is not overloaded. 3. Check the event log for document feeder errors, and then resolve any errors first. 4. Open and close the top cover to see if the pick motor turns without posting this error. If there is no error, then the motor is good. 5. Verify that the motor cables are connected. 6. Reseat the document feeder to the SCB. 7. Replace the document feeder.
- code :
31.13.15
- affichage :
31.13.15
- description :
Description This is a duplex refeed jam in the document feeder. The paper jam occurs on the back-side copy. The duplex refeed does not make it to the deskew sensor.
- remede :
1. Remove the jammed paper. 2. Verify that there is nothing in the paper path of the duplex refeed area. 3. Retry the copy job. 4. Replace the document feeder.
- code :
32.08.XX
- affichage :
32.08.XX Error Messages
- description :
32.08.A1 Shutdown event-boot after abnormal shutdown 32.08.A2 Boot from normal shutdown event 32.08.A3 Regular boot event
- remede :
No action necessary.
- code :
32.1C.XX
- affichage :
32.1C.XX
- description :
32.1C.05 The restore job ticket was submitted with invalid credentials 32.1C.06 The backup job ticket was submitted with invalid credentials 32.1C.07 Backup restore permissions error There was an error during the creation, read, or write of the restore file. 32.1C.08 Not enough disk space to perform backup/restore or network share issue There was an error during the creation, read, or write of the backup file. 32.1C.09 Tried to restore a backup file that was not valid for this product The dat
- remede :
32.1C.05 Verify the credentials that were submitted. Check the domain, user name, and password. 32.1C.06 Verify the credentials that were submitted. Check the domain, user name, and password. 32.1C.07 Retry the job. 32.1C.08 ?? Retry the job. ?? Remove stored jobs and retry. ?? Use a larger capacity storage device. ?? Check the network share. Remove any stored jobs, and then retry. If the error persists, try using a larger capacity storage device and check the network share settings. 32.1C.09
- code :
40.00.01
- affichage :
40.00.01 USB I/O buffer overflow To continue, touch “OK”
- description :
The USB buffer has overflowed.
- remede :
1. Touch the OK button to print the transferred date (some data might be lost). 2. Check the host configuration.
- code :
40.00.02
- affichage :
40.00.02 Embedded I/O buffer overflow To continue, touch “OK”
- description :
The product has experienced a JetDirect buffer overflow.
- remede :
1. Touch the OK button to print the transferred date (some data might be lost). 2. Check the host configuration.
- code :
40.00.03
- affichage :
40.00.03 EIO <X> buffer overflow To continue, touch “OK”
- description :
Too much data was sent to the EIO card in the specified slot (x). An incorrect communications protocol might be in use.
- remede :
Touch the OK button to print the transferred date (some data might be lost).
- code :
40.00.04
- affichage :
40.00.04 EIO <X> bad transmission To continue, touch “OK”
- description :
The connection between the product and the USB device has been broken.
- remede :
1. Touch the OK button to clear the error message and continue printing. 2. Remove, and then reinstall the USB device.
- code :
40.00.05
- affichage :
40.00.05 Embedded I/O bad transmission To continue, touch “OK”
- description :
The USB device has been removed.
- remede :
1. Touch the OK button to clear the error message (data will be lost). 2. Install the USB device.
- code :
40.08.0X
- affichage :
40.08.0X USB storage accessory removed
- description :
X = 0 or ;1 information code. Secure file erase is enabled.
- remede :
No action necessary.
- code :
40.0X.05
- affichage :
40.0X.05 USB storage accessory removed
- description :
X = 1, 2, 3, 5, or 6; information code. The USB storage accessory was removed.
- remede :
No action necessary.
- code :
41.01.YZ
- affichage :
41.01.YZ
- description :
Event log error message: 41.01.YZ. An unknown misprint error occurred on the product. Y = Type, Z = Tray • Y = 0: Photo Media (1, 2, or 3) • Y = 1: Auto Sense (Normal) • Y = 2: Normal (typed not from Auto Sense) • Y = 3: Light media 1, 2, or 3 mode • Y = 4: Heavy media 1 • Y = 5: Heavy media 2 • Y = 6: Heavy media 3 • Y = 7: Glossy media 1 • Y = 8: Glossy media 2 • Y = 9: Glossy media 3 • Y = A: Glossy film • Y = B: OHT • Y
- remede :
1. To continue printing, press . 2. Turn the product off, and then on again. 3. Resend the print job. 4. Replace or reseat the toner cartridge to test. 5. Check the toner cartridge before replacing any other parts (HP original?, connectors, etc.). 6. Reseat the connections to the laser/scanner and the DC controller. 7. If the error persists, replace the laser/scanner. 8. Replace the upper cable guide assembly. 9. Replace the DC controller.
- code :
41.02.00
- affichage :
41.02.00
- description :
A beam detected misprint error.
- remede :
1. To clear the error message, touch OK. 2. If the error persists, turn the product off, and then on again. 3. Resend the print job. 4. Reseat the connections to the laser/scanner and the DC controller. 5. Replace the laser/scanner.
- code :
41.03.FZ
- affichage :
41.03.FZ Unknown Misprint Error
- description :
This is a general misprint error. Either media is loaded off-center with the side guides in the tray or a media width sensor failure occurred from an unknown tray. The error will be one of the following: • 41.03.F0 • 41.03.F1 • 41.03.F2 • 41.03.F3 • 41.03.F4 • 41.03.F5 • 41.03.FD
- remede :
1. Reload the tray, verifying that the guides in the tray are flush with the loaded media in the tray. 2. Try the print job again. Watch the mechanism to see if it is functioning correctly. If the linkage is broken, replace the paper tray. 3. If the error persists, print a Configuration Page and note the paper size for the tray in question. • If the size is not reported correctly, run the tray size sensor test in the Diagnostic menu. • If the tray size sensors test as GOOD, replace
- code :
41.03.YZ
- affichage :
41.03.YZ Unexpected size in tray <X>
- description :
The product detected a different paper size than expected. Y = Type, Z = Tray • Y = 0 Size mismatch. Detected media is longer or shorter than expected. • Y = A Size mismatch. Detected media too long. • Y = B Size mismatch. Detected media too short. • Y = C Size mismatch. Inter-page gap error. • Z = D Source is the duplexer. • Z = E Source is the envelope feeder. • Z = 1 Source is Tray 1. • Z = 2 Source is Tray 2. • Z = 3 Source is Tray 3. • Z
- remede :
1. Make sure that the feeder is loaded with the correct paper size and that the sliding paper guides are correctly adjusted. 2. Use the Tray/Bin manual sensor test to verify that the envelope feeder paper sensor is correctly functioning. 3. If the error persists, replace the envelope feeder.
- code :
41.04.00
- affichage :
41.04.00 Printer Error
- description :
A printer error occurred: No video sync 4.
- remede :
1. Turn the product off, and then on again. 2. Resend the print job. 3. Swap out or reseat the toner cartridge to test it. 4. Check the toner cartridge before replacing any other parts (HP original?, connectors, etc.). 5. Reseat the connections to the laser/scanner and the DC controller. 6. If the error persists, replace the laser/scanner. 7. Replace the upper cable guide assembly. 8. Replace the DC controller.
- code :
41.05.YZ
- affichage :
41.05.YZ Unexpected type in tray <X>
- description :
The product detected a different paper type than expected. Tray X is loaded with a media type (transparencies, envelopes, etc.) that is different than what they tray is configured to use. Y = Type, Z = Tray • Y = 0 (expected type) Unknown • Y = 1 (expected type) Normal media • Y = 3 (expected type) LBP OHT • Y = 6 (expected type) Non-assured OHT • Y = 7 (expected type) Heavy media • Y = 8 (expected type) Light media • Y = 9 (expected type) Rough media •
- remede :
1. Load the tray with the size and type of paper indicated, or use another tray if available. 2. If this message displays and the tray is loaded with the correct paper type, check the print driver settings to make sure they match the tray type settings. 3. Check all application and product settings to make sure that the Type setting is correct.
- code :
41.XX.YZ
- affichage :
41.XX.YZ Error To continue, touch “OK”
- description :
This section covers all other errors of the form 41.XX.YZ not covered in the previous sections. A product error has occurred. XX = error type Y = fuser mode Z = input tray • XX = 02 Beam detect misprint • XX = 09 Sub thermistor abnormally high • XX = 18 Scan line inclination adjustment • XX = 20 Image drum HV • Y = 2 Normal typed (not AutoSense) • Y = 3 Light media 1, 2, 3: typed or AutoSense • Y = 4 Heavy media 1: typed or AutoSense • Z = 0 Envelope fe
- remede :
1. To clear the message, touch the OK button. 2. If the message displays again, turn the product off, and then on again. 3. If the error persists, replace the DC Controller PCA.
- code :
42.XX.YY
- affichage :
42.XX.YY Error Event Log message
- description :
Internal system failure.
- remede :
1. Turn the product off, then on, and then retry. 2. If the error persists, clear the firmware image from the active partition by using the Partial Clean item in the Preboot menu.
- code :
44.01.XX
- affichage :
44.01.XX Error Event log message (MFP Only)
- description :
A digital send error has occurred.
- remede :
Try to send the job again. No action necessary. This error message should automatically clear.
- code :
44.03.XX
- affichage :
44.03.XX Error Event log message (MFP Only)
- description :
A digital send error has occurred.
- remede :
Try to send the job again.
- code :
44.10.XX
- affichage :
44.10.XX Error Event log message (MFP Only)
- description :
A send to e-mail error has occurred.
- remede :
No action necessary.
- code :
44.34.XX
- affichage :
44.34.XX Error Event log message (MFP Only)
- description :
A fax error has occurred.
- remede :
1. Try to send the job again. 2. If the issue persists, see document c03264726, “HP LaserJet Enterprise M4555 MFP Product Series - Solve fax problems,” for additional fax troubleshooting information.
- code :
44.92.XX
- affichage :
44.92.XX Error Event log message (MFP Only)
- description :
A fax error has occurred.
- remede :
1. Try to send the job again. 2. If the issue persists, see document c03264726, “HP LaserJet Enterprise M4555 MFP Product Series - Solve fax problems,” for additional fax troubleshooting information.
- code :
47.00.XX
- affichage :
47.00.XX
- description :
Back channel internal error
- remede :
1. Turn the product off, and then on again. 2. Resend the print job. 3. If the error persists, clear the active partition by using the Partial Clean item in the Preboot menu.
- code :
47.01.XX
- affichage :
47.01.XX
- description :
Image transformer internal error
- remede :
1. Turn the product off, and then on again. 2. Resend the print job. 3. If the error persists, clear the active partition by using the Partial Clean item in the Preboot menu.
- code :
47.02.XX
- affichage :
47.02.XX
- description :
Job parser internal error
- remede :
1. Turn the product off, and then on again. 2. Resend the print job. 3. If the error persists, clear the active partition by using the Partial Clean item in the Preboot menu.
- code :
47.03.XX
- affichage :
47.03.XX
- description :
Print job internal error
- remede :
1. Turn the product off, and then on again. 2. Resend the print job. 3. If the error persists, clear the active partition by using the Partial Clean item in the Preboot menu.
- code :
47.04.XX
- affichage :
47.04.XX
- description :
Print spooler 9100 internal error
- remede :
1. Turn the product off, and then on again. 2. Resend the print job. 3. If the error persists, clear the active partition by using the Partial Clean item in the Preboot menu.
- code :
47.05.00
- affichage :
47.05.00
- description :
Print spooler framework internal error
- remede :
1. Turn the product off, and then on again. 2. Resend the print job. 3. If the error persists, clear the active partition by using the Partial Clean item in the Preboot menu.
- code :
47.06.XX
- affichage :
47.06.XX
- description :
Print App internal error
- remede :
1. Turn the product off, and then on again. 2. Resend the print job. 3. If the error persists, clear the active partition by using the Partial Clean item in the Preboot menu.
- code :
47.WX.YZ
- affichage :
47.WX.YZ Printer Calibration Failed To continue, touch “OK”
- description :
The device is unable to access or implement one of the image patterns files. Y = Calibration type, Z = Event • 47.FC.20 Error Diffusion Image not found at system initialization • 47.FC.21 Error Diffusion Store image failure • 47.FC.22 Error Diffusion Image not found • 47.FC.23 Error Diffusion Print engine execution failure • 47.FC.30 0 Drum Speed Adjustment Image not found at system initialization • 47.FC.31 Drum Speed Adjustment Store image failure • 47.FC.
- remede :
1. Turn the product off, and then on again. 2. If the error persists, reload the firmware.
- code :
48.XX.YY
- affichage :
48.XX.YY
- description :
A job framework internal error has occurred.
- remede :
1. No action should be necessary. 2. If the error persists, upgrade the product firmware. 3. If the issue persists, continue troubleshooting with the flowcharts for either Intermittent or Persistent 49 error troubleshooting (whichever is appropriate) in document c03122817, “HP LaserJet FutureSmart Devices - 49 Error Troubleshooting (Persistent and Intermittent)”.
- code :
49.XX.YY
- affichage :
49.XX.YY Error To continue turn off then on
- description :
A firmware error occurred. Corrupted print jobs, software application issues, non-product specific print drivers, poor quality USB or network cables, bad network connections or incorrect configurations, invalid firmware operations, or unsupported accessories can cause this error.
- remede :
1. Turn the product off, and then on. 2. If the error persists, check the following: • The error might be caused by a network connectivity problem, such as a bad interface cable, a bad USB port, or an invalid network configuration setting. • The error might be caused by the print job, due to an invalid print driver, a problem with the software application, or a problem with the file being printed. • Upgrading the product firmware might help resolve the error. See the product us
- code :
50.1BX.YZ
- affichage :
50.WX.YZ Fuser error To continue turn off then on
- description :
High fuser temperature 3 The fuser has experienced an error. W = fuser error code, X = fuser mode, Y = previous printer sleep state, and Z = next printer sleep state. Fuser modes and sleep states are listed after all 50.WX.YZ troubleshooting. Fuser Modes • 0 = Photo Media 1, 2, 3 • 1 = Normal.Auto Sense • 2 = Normal • 3 = Light 1 • 4 = Heavy 1 • 5 = Heavy 2 • 6 = Heavy 3 • 7 = Glossy 1 • 8 = Glossy 2 • 9 = Glossy 3 • A = Gloss
- remede :
1. Remove and reinstall the fuser. Make sure that it is seated correctly. 2. Check the paper type setting in the product control panel menus and in the print driver. Make sure that the settings match and are correct for the type of media being used. 3. Check the connector (J514) between the fuser and the printer. If it is damaged, replace the fuser connector assembly or fuser. 4. If the issue persists, replace the fuser. 5. If the issue persists, replace the low voltage power supply assembly.
- code :
50.1X.YZ
- affichage :
50.WX.YZ Fuser error To continue turn off then on
- description :
Low fuser temperature failure The fuser has experienced an error. W = fuser error code, X = fuser mode, Y = previous printer sleep state, and Z = next printer sleep state. Fuser modes and sleep states are listed after all 50.WX.YZ troubleshooting. Fuser Modes • 0 = Photo Media 1, 2, 3 • 1 = Normal.Auto Sense • 2 = Normal • 3 = Light 1 • 4 = Heavy 1 • 5 = Heavy 2 • 6 = Heavy 3 • 7 = Glossy 1 • 8 = Glossy 2 • 9 = Glossy 3 • A =
- remede :
1. Remove and reinstall the fuser. Make sure that it is seated correctly. 2. Make sure that there is no residual paper in the fuser. 3. Check the product power source. Make sure that the power source meets product requirements. Make sure that the product is the only device using the circuit. 4. Check the connector (J514) between the fuser and the printer. If it is damaged, replace the fuser connector assembly or fuser. 5. If the issue persists, replace the fuser.
- code :
50.2X.YZ
- affichage :
50.WX.YZ Fuser error To continue turn off then on
- description :
Fuser warm-up error The fuser has experienced an error. W = fuser error code, X = fuser mode, Y = previous printer sleep state, and Z = next printer sleep state. Fuser modes and sleep states are listed after all 50.WX.YZ troubleshooting. Fuser Modes • 0 = Photo Media 1, 2, 3 • 1 = Normal.Auto Sense • 2 = Normal • 3 = Light 1 • 4 = Heavy 1 • 5 = Heavy 2 • 6 = Heavy 3 • 7 = Glossy 1 • 8 = Glossy 2 • 9 = Glossy 3 • A = Glossy Fil
- remede :
1. Remove and reinstall the fuser. Make sure that it is seated correctly. 2. Make sure that there is no residual paper in the fuser. 3. Check the product power source. Make sure that the power source meets product requirements. Make sure that the product is the only device using the circuit. 4. Check the connector (J514) between the fuser and the printer. If it is damaged, replace the fuser connector assembly or fuser. 5. If the product has been serviced previously, check the connectors (J219
- code :
50.3X.YZ
- affichage :
50.WX.YZ Fuser error To continue turn off then on
- description :
High fuser temperature The fuser has experienced an error. W = fuser error code, X = fuser mode, Y = previous printer sleep state, and Z = next printer sleep state. Fuser modes and sleep states are listed after all 50.WX.YZ troubleshooting. Fuser Modes • 0 = Photo Media 1, 2, 3 • 1 = Normal.Auto Sense • 2 = Normal • 3 = Light 1 • 4 = Heavy 1 • 5 = Heavy 2 • 6 = Heavy 3 • 7 = Glossy 1 • 8 = Glossy 2 • 9 = Glossy 3 • A = Glossy
- remede :
1. Remove and reinstall the fuser. Make sure that it is seated correctly. 2. Check the paper type setting in the product control panel menus and in the print driver. Make sure that the settings match and are correct for the type of media being used. 3. Check the connector (J514) between the fuser and the printer. If it is damaged, replace the fuser connector assembly or fuser. 4. If the issue persists, replace the low voltage power supply. 5. Perform a component test on the fuser motor. Does
- code :
50.4X.YZ
- affichage :
50.WX.YZ Fuser error To continue turn off then on
- description :
Drive circuit fault The fuser has experienced an error. W = fuser error code, X = fuser mode, Y = previous printer sleep state, and Z = next printer sleep state. Fuser modes and sleep states are listed after all 50.WX.YZ troubleshooting. Fuser Modes • 0 = Photo Media 1, 2, 3 • 1 = Normal.Auto Sense • 2 = Normal • 3 = Light 1 • 4 = Heavy 1 • 5 = Heavy 2 • 6 = Heavy 3 • 7 = Glossy 1 • 8 = Glossy 2 • 9 = Glossy 3 • A = Glossy Fil
- remede :
1. Check the product power source. Make sure that the power source meets product requirements. NOTE: If the power source does not meet the power frequency requirements of 43 to 67Hz, the fuser temperature control does not work correctly and causes this error. 2. If possible, connect the product to an outlet where another product is functioning to verify the power connection. 3. Check and reconnect the connectors (J206 and J219) on the DC controller PCA. 4. If the error persists, replace the c
- code :
50.6X.YZ
- affichage :
50.WX.YZ Fuser error To continue turn off then on
- description :
Open fuser circuit (heating element failure) The fuser has experienced an error. W = fuser error code, X = fuser mode, Y = previous printer sleep state, and Z = next printer sleep state. Fuser modes and sleep states are listed after all 50.WX.YZ troubleshooting. Fuser Modes • 0 = Photo Media 1, 2, 3 • 1 = Normal.Auto Sense • 2 = Normal • 3 = Light 1 • 4 = Heavy 1 • 5 = Heavy 2 • 6 = Heavy 3 • 7 = Glossy 1 • 8 = Glossy 2 • 9 = Gloss
- remede :
1. Remove and reinstall the fuser. Make sure that it is seated correctly. 2. Check the connector (J514) between the fuser and the printer. If it is damaged, replace the fuser connector assembly or fuser. 3. If the product has been serviced previously, check the connectors (J219 and J206) on the DC controller PCA and the connectors (J90 and J91) on the power line between the low voltage power supply assembly and the fuser. 4. If the issue persists, replace the fuser. 5. If the issue persists,
- code :
50.7X.YZ
- affichage :
50.WX.YZ Fuser error To continue turn off then on
- description :
Fuser pressure-release mechanism failure The fuser has experienced an error. W = fuser error code, X = fuser mode, Y = previous printer sleep state, and Z = next printer sleep state. Fuser modes and sleep states are listed after all 50.WX.YZ troubleshooting. Fuser Modes • 0 = Photo Media 1, 2, 3 • 1 = Normal.Auto Sense • 2 = Normal • 3 = Light 1 • 4 = Heavy 1 • 5 = Heavy 2 • 6 = Heavy 3 • 7 = Glossy 1 • 8 = Glossy 2 • 9 = Glossy 3
- remede :
1. Remove and reinstall the fuser. Make sure there is no residual paper in the fuser. 2. Check the connector (J514) between the fuser and the printer. If it is damaged, replace the fuser connector assembly or fuser. 3. Run the sensor test in the sensor monitor mode to verify that the fuser depressurization sensor is functioning correctly. If it is not, replace the fuser. 4. Run the fuser motor test in the actuator drive mode to verify that the fuser motor is functioning correctly. If it is no
- code :
50.8X.YZ
- affichage :
50.WX.YZ Fuser error To continue turn off then on
- description :
Low fuser temperature 2 The fuser has experienced an error. W = fuser error code, X = fuser mode, Y = previous printer sleep state, and Z = next printer sleep state. Fuser modes and sleep states are listed after all 50.WX.YZ troubleshooting. Fuser Modes • 0 = Photo Media 1, 2, 3 • 1 = Normal.Auto Sense • 2 = Normal • 3 = Light 1 • 4 = Heavy 1 • 5 = Heavy 2 • 6 = Heavy 3 • 7 = Glossy 1 • 8 = Glossy 2 • 9 = Glossy 3 • A = Glossy
- remede :
1. Remove and reinstall the fuser. Make sure that it is seated correctly. 2. Make sure that there is no residual paper in the fuser. 3. Check the product power source. Make sure that the power source meets product requirements. Make sure that the product is the only device using the circuit. 4. Check the connector (J514) between the fuser and the printer. If it is damaged, replace the fuser connector assembly or fuser. 5. If the product has been serviced previously, check the connectors (J219
- code :
50.9X.YZ
- affichage :
50.WX.YZ Fuser error To continue turn off then on
- description :
High fuser temperature 2 The fuser has experienced an error. W = fuser error code, X = fuser mode, Y = previous printer sleep state, and Z = next printer sleep state. Fuser modes and sleep states are listed after all 50.WX.YZ troubleshooting. Fuser Modes • 0 = Photo Media 1, 2, 3 • 1 = Normal.Auto Sense • 2 = Normal • 3 = Light 1 • 4 = Heavy 1 • 5 = Heavy 2 • 6 = Heavy 3 • 7 = Glossy 1 • 8 = Glossy 2 • 9 = Glossy 3 • A = Gloss
- remede :
1. Remove and reinstall the fuser. Make sure that it is seated correctly. 2. Check the paper type setting in the product control panel menus and in the print driver. Make sure that the settings match and are correct for the type of media being used. 3. Check the connector (J514) between the fuser and the printer. If it is damaged, replace the fuser connector assembly or fuser. 4. If the issue persists, replace the fuser. 5. If the issue persists, replace the low voltage power supply assembly.
- code :
50.AX.YZ
- affichage :
50.WX.YZ Fuser error To continue turn off then on
- description :
Low fuser temperature 3 The fuser has experienced an error. W = fuser error code, X = fuser mode, Y = previous printer sleep state, and Z = next printer sleep state. Fuser modes and sleep states are listed after all 50.WX.YZ troubleshooting. Fuser Modes • 0 = Photo Media 1, 2, 3 • 1 = Normal.Auto Sense • 2 = Normal • 3 = Light 1 • 4 = Heavy 1 • 5 = Heavy 2 • 6 = Heavy 3 • 7 = Glossy 1 • 8 = Glossy 2 • 9 = Glossy 3 • A = Glossy
- remede :
1. Remove and reinstall the fuser. Make sure that it is seated correctly. 2. Make sure that there is no residual paper in the fuser. 3. Check the product power source. Make sure that the power source meets product requirements. Make sure that the product is the only device using the circuit. 4. Check the connector (J514) between the fuser and the printer. If it is damaged, replace the fuser connector assembly or fuser. 5. If the issue persists, replace the fuser.
- code :
51.00.10
- affichage :
51.00.10 Beam detect error
- description :
A printer beam detect error occurred.
- remede :
1. Reconnect the connector (J1801) of the BD sensor and connector J234 on the DC controller PCA. 2. Reconnect the connector (J151) of the laser scanner assembly and connector J234 on the DC controller PCA. 3. If the error persists, replace the laser/scanner. 4. If the error persists, replace the upper cable guide assembly. 5. If the error persists, replace the DC controller.
- code :
51.00.19
- affichage :
51.00.19 Laser Scanner Error - Laser malfunction Sens
- description :
A printer laser scanner error occurred.
- remede :
1. Reconnect the connector (J1) on the laser driver PCA and connector J209 on the DC controller PCA. 2. Reconnect the connector (J151) on the laser scanner assembly and connector J234 on the DC controller PCA. 3. Reconnect the intermediate connector (J23) of the laser scanner. 4. If the error persists, replace the laser/scanner. 5. If the error persists, replace the upper cable guide assembly. 6. If the error persists, replace the DC controller.
- code :
51.00.20
- affichage :
51.00.20 Laser Scanner Error - Laser malfunction Sens
- description :
A printer laser scanner error occurred.
- remede :
1. Reconnect the connector (J1) on the laser driver PCA and connector J209 on the DC controller PCA. 2. Reconnect the connector (J151) on the laser scanner assembly and connector J234 on the DC controller PCA. 3. Reconnect the intermediate connector (J23) of the laser scanner. 4. If the error persists, replace the laser/scanner. 5. If the error persists, replace the upper cable guide assembly. 6. If the error persists, replace the DC controller.
- code :
52.00.00
- affichage :
52.00.00 Scanner Startup error
- description :
A printer laser scanner startup error occurred.
- remede :
1. Reconnect the connector (J151) on the laser scanner assembly and connector J234 on the DC controller PCA. 2. Reconnect the intermediate connector (J23) of the laser scanner. 3. Run the scanner motor drive test in the actuator drive mode to verify that the scanner motor is functioning correctly. If it is not, replace the laser scanner assembly. 4. If the error persists, replace the DC controller.
- code :
52.00.20
- affichage :
52.00.20 Scanner Rotation error
- description :
A printer laser scanner rotation error occurred.
- remede :
1. Reconnect the connector (J151) on the laser scanner assembly and connector J234 on the DC controller PCA. 2. Reconnect the intermediate connector (J23) of the laser scanner. 3. Run the scanner motor drive test in the actuator drive mode to verify that the scanner motor is functioning correctly. If it is not, replace the laser scanner assembly. 4. If the error persists, replace the DC controller.
- code :
54.00.03
- affichage :
54.00.03 (EVENT LOG ONLY)
- description :
Environmental sensor abnormality warning
- remede :
1. Turn the product off, and then on. 2. If the environment sensor has been removed or replaced, check the connector from tray 1 to the environment sensor and the connector (J223) on the DC controller PCA. 3. If the error persists, replace the environment sensor assembly. 4. If the error persists, replace the right door assembly.
- code :
54.06.21
- affichage :
54.06.21 (EVENT LOG ONLY)
- description :
Primary laser/scanner beam detect abnormality
- remede :
1. Turn the product off, and then on. 2. If the product has had parts removed or replaced, check the connectors (J209 and J234) on the DC controller PCA. 3. Check the intermediate connection (J23). 4. If the error persists, replace the laser/scanner assembly. 5. If the error persists, replace the upper cable guide assembly.
- code :
55.00.0
- affichage :
55.00.01 DC controller error
- description :
DC controller PCA error occurred. DC controller memory error
- remede :
1. Turn the product off, and then on. 2. If the error persists, replace the DC controller PCA.
- code :
55.00.03
- affichage :
55.00.03 DC controller error
- description :
DC controller PCA error occurred. DC controller no engine response
- remede :
1. Turn the product off, and then on. 2. If the error persists, replace the DC controller PCA.
- code :
55.00.04
- affichage :
55.00.04 DC controller error
- description :
DC controller PCA error occurred. DC controller communications timeout
- remede :
1. Turn the product off, and then on. 2. If the error persists, replace the DC controller PCA.
- code :
55.01.06
- affichage :
55.01.06
- description :
NVRAM memory data error warning DC controller PCA error occurred. The engine is not communicating with the formatter. The communication link between the formatter and the DC controller was lost. This can occur due to a timing error or intermittent connection loss between the formatter and the DC controller.
- remede :
1. Turn the product off, and then on. 2. Check the life remaining on the maintenance kit. 3. Reseat the formatter, DIMMs, and EIO cards. 4. If the error persists, replace the DC controller PCA. 5. If the error persists, replace the formatter.
- code :
55.02.06
- affichage :
55.02.06
- description :
NVRAM memory access error warning DC controller PCA error occurred. The engine is not communicating with the formatter. The communication link between the formatter and the DC controller was lost. This can occur due to a timing error or intermittent connection loss between the formatter and the DC controller.
- remede :
1. Turn the product off, and then on. 2. Check the life remaining on the maintenance kit. 3. Reseat the formatter, DIMMs, and EIO cards. 4. If the error persists, replace the DC controller PCA. 5. If the error persists, replace the formatter.
- code :
56.00.YY
- affichage :
56.00.YY Error
- description :
Optional paper trays communication error occurred.
- remede :
1. Turn the product off, and then on. 2. If the error persists, reseat the optional paper trays (HCO and HCI).. 3. Check the input connectors for damage. If a connector is damaged, replace the connector.
- code :
57.00.01
- affichage :
57.00.01 Error To continue turn off then on
- description :
Power supply fan (FM-1) malfunction
- remede :
1. Turn the product off, and then on. 2. Listen for fan noise at the right side, lower right hand corner of the product. 3. If no noise is heard, make sure that the connector (J226) on the DC controller PCA and the intermediate connector J25 between the DC controller and the fan are connected and undamaged. 4. If the error persists, replace the power supply fan (FM1).
- code :
57.00.02
- affichage :
57.00.02 Error To continue turn off then on
- description :
Controller fan (FM-2) malfunction
- remede :
1. Turn the product off, and then on. 2. Listen for fan noise at the rear side, center panel of the product. 3. If no noise is heard, make sure that the connector (J221) on the DC controller PCA and the intermediate connectors (J55 and J16) between the DC controller and the fan are connected correctly and undamaged. 4. If the error persists, replace the controller fan assembly (FM2).
- code :
57.00.03
- affichage :
57.00.03 Error To continue turn off then on
- description :
Rear delivery fan (FM-3B) malfunction (M830 only)
- remede :
1. Turn the product off, and then on. 2. Listen for fan noise at the left side, upper back of the product. 3. If no noise is heard, make sure that the connectors (J1453B and J1451B) on the intermediate PCA and connector (J205) on the DC controller are connected correctly and undamaged. 4. If the error persists, replace the delivery fan assembly..
- code :
57.00.04
- affichage :
57.00.04 Error To continue turn off then on
- description :
Front delivery fan (FM-4B) malfunction (M830 only)
- remede :
1. Turn the product off, and then on. 2. Listen for fan noise at the left side, upper front of the product. 3. If no noise is heard, make sure that the connectors (J1455B and J1451B) on the intermediate PCA, relay connector (J1451), and connector (J205) on the DC controller board are connected correctly and undamaged. 4. If the error persists, replace the delivery fan assembly.
- code :
57.00.05
- affichage :
57.00.05 Error To continue turn off then on
- description :
Cartridge fan (FM-5) malfunction
- remede :
1. Turn the product off, and then on. 2. Listen for fan noise at the right side, upper back of the product just above Tray 1. 3. If no noise is heard, make sure that the connector (J225) on the DC controller PCA is connected correctly and undamaged. 4. If the error persists, replace the cartridge fan assembly (FM5)
- code :
57.00.06
- affichage :
57.00.06 Error To continue turn off then on
- description :
Center delivery fan (FM-6) (M806 only)
- remede :
1. Turn the product off, and then on. 2. Listen for fan noise at the left side, upper center of the product. 3. If no noise is heard, make sure that the connector (J205) on the DC controller PCA and connectors (J1451 and J1454) on the intermediate PCA are connected correctly and undamaged. 4. If the error persists, replace the face-down delivery assembly.
- code :
57.00.07
- affichage :
57.00.07 Error To continue turn off then on
- description :
Rear edge cooling fan (FM-7) malfunction
- remede :
1. Turn the product off, and then on. 2. Listen for fan noise at the front left side of the product. NOTE: The cooling assembly is deep inside the product and will be difficult to hear. 3. If no noise is heard, make sure that the connector (J222) on the DC controller PCA and relay connector (J33) are connected correctly and undamaged. 4. If the error persists, replace the edge cooling fan assembly.
- code :
57.00.08
- affichage :
57.00.08 Error To continue turn off then on
- description :
Front edge cooling fan (FM-8) malfunction
- remede :
1. Turn the product off, and then on. 2. Listen for fan noise at the front left side of the product. NOTE: The cooling assembly is deep inside the product and will be difficult to hear. 3. If no noise is heard, make sure that the connector (J222) on the DC controller PCA and relay connector (J33) are connected correctly and undamaged. 4. If the error persists, replace the edge cooling fan assembly.
- code :
57.00.09
- affichage :
57.00.09 Error To continue turn off then on
- description :
Condensation prevention fan (FM-9) malfunction
- remede :
1. Turn the product off, and then on. 2. Listen for fan noise at the rear panel, left center of the product. 3. If no noise is heard, make sure that the connector (J226) on the DC controller PCA and intermediate connector (J26) are connected correctly and undamaged. 4. If the error persists, replace the condensation prevention fan FM-9.
- code :
57.00.10
- affichage :
57.00.10 Error To continue turn off then on
- description :
Duplex fan (FM-2001) malfunction
- remede :
1. Turn the product off, and then on. 2. Remove and reinstall the duplex unit to ensure a proper connection. 3. If the error persists, replace the duplex unit.
- code :
59.00.30
- affichage :
59.00.30
- description :
A printer motor error occurred. Fuser motor error. Fuser motor start up error
- remede :
1. Turn the product off, and then on. 2. Check the fuser for any jammed media that might be restricting proper movement of the fuser rollers. 3. Remove and reinstall the fuser. 4. Run the fuser motor test in the actuator drive mode to make sure that the fuser motor is functioning correctly. If it is not, replace the fuser motor. 5. Check the connector (J59) of the fuser motor and connector (J233) on the DC controller PCA. 6. If the error persists, replace the fuser motor. 7. If the error pers
- code :
59.00.40
- affichage :
59.00.40
- description :
A printer motor error occurred. Fuser motor error. Fuser motor rotation error
- remede :
1. Turn the product off, and then on. 2. Check the fuser for any jammed media that might be restricting proper movement of the fuser rollers. 3. Remove and reinstall the fuser. 4. Run the fuser motor test in the actuator drive mode to make sure that the fuser motor is functioning correctly. If it is not, replace the fuser motor. 5. Check the connector (J59) of the fuser motor and connector (J233) on the DC controller PCA. 6. If the error persists, replace the fuser motor. 7. If the error pers
- code :
59.05.50
- affichage :
59.05.50
- description :
A printer motor error occurred. Main motor error. Drum motor start up error
- remede :
1. Turn the product off, and then on. 2. Run the drum motor test in the actuator drive mode to make sure that the drum motor is functioning correctly. If it is not, replace the drum motor. 3. Check the connector (J60) of the drum motor and connector (J222) on the DC controller PCA. 4. If grinding or clicking noises occur with the error, there might be other parts of the drive assembly causing the issue. • Registration assembly • Drum feed drive assembly • PIU of Tray 2 and Tray
- code :
59.05.60
- affichage :
59.05.60
- description :
A printer motor error occurred. Main motor error. Drum motor rotation error
- remede :
1. Turn the product off, and then on. 2. Run the drum motor test in the actuator drive mode to make sure that the drum motor is functioning correctly. If it is not, replace the drum motor. 3. Check the connector (J60) of the drum motor and connector (J222) on the DC controller PCA. 4. If grinding or clicking noises occur with the error, there might be other parts of the drive assembly causing the issue. • Registration assembly • Drum feed drive assembly • PIU of Tray 2 and Tray
- code :
60.00.02
- affichage :
60.00.02 Tray 2 lifting error
- description :
Lifter driver assembly Tray 2 failure A tray lift motor error has occurred.
- remede :
1. On the product control panel, open the following menus: • Administration • Troubleshooting • Diagnostic Tests 2. Use the Tray/Bin manual sensor test to make sure that the Tray 2 paper (PS1409 and PS1410) surface sensors are functioning correctly. 3. If this part has been removed or replaced, check the connector (J221) on the DC controller PCA and interconnect J21. 4. If the error persists, replace the lifter drive assembly (Tray 2).
- code :
60.00.03
- affichage :
60.00.03 Tray 3 lifting error
- description :
Lifter driver assembly Tray 3 failure A tray lift motor error has occurred.
- remede :
1. On the product control panel, open the following menus: • Administration • Troubleshooting • Diagnostic Tests 2. Use the Tray/Bin manual sensor test to make sure that the Tray 3 paper (PS1411 and PS1412) surface sensors are functioning correctly. 3. If this part has been removed or replaced, check the connector (J221) on the DC controller PCA and interconnect J21. 4. If the error persists, replace the lifter drive assembly (Tray 3).e d
- code :
60.00.04
- affichage :
60.00.04 Tray 4 lifting error
- description :
Lifter driver assembly Tray 4 failure A tray lift motor error has occurred.
- remede :
1. On the product control panel, open the following menus: • Administration • Troubleshooting • Diagnostic Tests 2. Use the Tray/Bin manual sensor test to make sure that the Tray 4 paper (PS3101 and PS3103) surface sensors are functioning correctly. 3. If this part has been removed or replaced, check the connector (J3005) on the HCI controller PCA J906. 4. If the error persists, replace the lifter drive assembly (Tray 4).y (T
- code :
60.00.05
- affichage :
60.00.05 Tray 5 lifting error
- description :
Lifter driver assembly Tray 5 failure A tray lift motor error has occurred.
- remede :
1. On the product control panel, open the following menus: • Administration • Troubleshooting • Diagnostic Tests 2. Use the Tray/Bin manual sensor test to make sure that the Tray 5 paper (PS3201 and PS3203) surface sensors are functioning correctly. 3. If this part has been removed or replaced, check the connector (J3015) on the HCI controller PCA J917. 4. If the error persists, replace the lifter drive assembly (Tray 5).
- code :
62.00.00
- affichage :
62.00.00 No system To continue turn off then on
- description :
Internal system failure
- remede :
1. Turn the product off, and then on. 2. Reload the firmware. 3. Perform a firmware upgrade. 4. If the error persists, replace the hard disk.
- code :
65.X0.AZ
- affichage :
65.X0.AZ Output accessory Failure
- description :
Output accessory disconnected An external paper handling accessory connection has been interrupted. • 65.40.A0: Punch Unit disconnected • 65.50.A0: Folding Unit disconnected • 65.80.A0: Stapler/Stacker disconnected • 65.80.A1: Stapler/Stacker Unit connection interrupted • 65.90.A0: Booklet Make disconnected
- remede :
1. Make sure that the latest firmware updates are installed for the engine and finisher. 2. Make sure that the finisher is grounded correctly. • Make sure that the finisher is latched and locked to the engine by tightening the thumbscrew inside the front door. • Make sure that the grounding-frame assembly (the bar with the wheel located between the engine and the finisher) is in the down position with the wheel touching the floor and that the grounding plate is not damaged. NOTE: Th
- code :
66.00.20
- affichage :
66.00.20
- description :
Over Current Error This is an output device failure related message.
- remede :
There is no recommended action at this time.
- code :
66.00.40
- affichage :
66.00.40
- description :
NVRAM Error This is a finisher control board NVRAM error. The checksum for the finisher stacker controller PCA has an error when the power is turned on.
- remede :
1. Turn the product off, and then on. 2. Make sure that the finisher is grounded correctly. • Make sure that the finisher is latched and locked to the engine by tightening the thumbscrew inside the front door. • Make sure that the grounding-frame assembly (the bar with the wheel located between the engine and the finisher) is in the down position with the wheel touching the floor and that the grounding plate is not damaged. NOTE: The grounding-frame assembly is in the up position wh
- code :
66.00.50
- affichage :
66.00.50
- description :
This is a CAN-CPU sequence error.
- remede :
There is no recommended action at this time.
- code :
66.00.77
- affichage :
66.00.77
- description :
This is a device communication error. The communication between the print engine and the finisher has been interrupted or lost.
- remede :
1. Make sure that the latest firmware updates are installed for the engine and the finisher. 2. Make sure that the finisher is grounded correctly. • Make sure that the finisher is latched and locked to the engine by tightening the thumbscrew inside the front door. • Make sure that the grounding-frame assembly (the bar with the wheel located between the engine and the finisher) is in the down position with the wheel touching the floor and that the grounding plate is not damaged. NOTE
- code :
66.00.79
- affichage :
66.00.79
- description :
This is a JetLink communication error. The product has lost JetLink communication with the output device.
- remede :
1. Turn off the product, and then disconnect the finisher. 2. Make sure that the grounding-frame assembly (the bar with the wheel located between the engine and the finisher) is in the down position with the wheel touching the floor and that the grounding plate is not damaged. NOTE: The grounding-frame assembly is in the up position when the finisher is shipped. It must be lowered when the finisher is installed. 3. Reconnect the finisher to the product. 4. Inspect and reconnect the JetLink ca
- code :
66.00.8Z
- affichage :
66.00.8Z
- description :
There is an issue with paper delivery. The specific message varies depending on the cause, but the solution for each message is the same. • 66.00.80: Delivery Notice with PageID = 0x00 • 66.00.81: Delivery Notice with proper PageInfo • 66.00.82: Paper delivered with unexpected timing • 66.00.83: PAGE_INFO (Change) without PAGE_INFO (New)
- remede :
1. Follow the instructions in the online help. 2. Turn the product off, and then on. 3. If the error persists, see the output finishing device service manual for detailed instructions.
- code :
66.12.46
- affichage :
66.12.46
- description :
Finisher - Communication Lost with Stitcher Controller PCA This error occurs when communication between the stacker-controller board and the saddle-stitchercontroller board is lost or interrupted.
- remede :
1. Make sure that the finisher is grounded correctly. • Make sure that the finisher is latched and locked to the engine by tightening the thumbscrew inside the front door. • Make sure that the grounding-frame assembly (the bar with the wheel located between the engine and the finisher) is in the down position with the wheel touching the floor and that the grounding plate is not damaged. NOTE: The grounding-frame assembly is in the up position when the finisher is shipped. It must be
- code :
66.40.YZ
- affichage :
66.40.YZ
- description :
Punch Unit Failure The specific message varies depending on the cause, but the solution for each message is the same. • 66.40.40: Punch NVRAM error • 66.40.46: Punch Slide motor error • 66.40.50: Punch unit CPU sequence error Punch unit micro controller unable to start punch unit • 66.40.83: Punch motor failure
- remede :
1. Follow the instructions in the online help. 2. Turn the product off, and then on. 3. If the error persists, see the output finishing device service manual for detailed instructions.
- code :
66.50.00
- affichage :
66.50.00
- description :
Folding Unit Failure An error has occurred in the folding unit.
- remede :
1. Follow the instructions in the online help. 2. Turn the product off, and then on. 3. If the error persists, see the output finishing device service manual for detailed instructions.
- code :
66.60.16
- affichage :
66.60.16
- description :
Stacker Gear Change Motor Error The speed-change motor M110 and sensor PI117 are associated with this error Finisher error - speed-change motor (M110) The speed-change motor M110 and sensor PI117 are associated with this error
- remede :
1. Turn the product off and turn it on. 2. If the error continues, Verify J3 on Stacker controller PCA is seated properly. 3. Replace Speed Change Motor (M110) or corresponding assembly.
- code :
66.60.25
- affichage :
66.60.25
- description :
Stacker Shutter Motor Error When the shutter clutch (CL101) and stack-ejection lower-roller clutch (CL102) are on, the shutter moves up (closed) when the stack-ejection motor (M102) turns forward and moves down (open, delivery enabled) when the motor turns backwards. This error occurs when the shutter home-position sensor (PI113) indicates no change when the stack-ejection motor (M102) is activated for 3 seconds, indicating the shutter is not moving.
- remede :
1. Inspect the shutter for damage. If the shutter cannot move freely, replace the shutter assembly. 2. Remove the lower guide (grate-shaped) and check sensor PI113 for damage. 3. Make sure that the sensor is securely fastened to the chassis. 4. Check for proper alignment of the shutter mounted on the back of the grate-shaped lower guide and the left mechanism on the finisher chassis. 5. Make sure that connector J6 and J19 on the stacker controller PCA is fully seated and not damaged. 6. Check
- code :
66.60.27
- affichage :
66.60.27
- description :
Stacker Align Motor Error (Front) M103 In order to neatly align the paper stack for either stapling or offsetting to take place, the front and rear aligning plats move to align each sheet of paper when it enters the processing tray. This error occurs when the aligning plate either does not leave or when it does not return to the aligning-plate front-home-position sensor.
- remede :
1. Turn the product off, and then on. 2. Make sure that there is no paper stuck in the jogger assembly. 3. Check connections J4 on the stacker controller PCA and intermediate connector J1032 to the motor (M103). 4. Run the test on alignment motors. 5. If the error persists, replace the required assembly. 6. If the error persists, replace the stacker controller PCA.
- code :
66.60.28
- affichage :
66.60.28
- description :
Stacker Align Motor Error (Rear) M104 In order to neatly align the paper stack for either stapling or offsetting to take place, the front and rear aligning plats move to align each sheet of paper when it enters the processing tray. This error occurs when the aligning plate either does not leave or when it does not return to the aligning-plate front-home-position sensor.
- remede :
1. Turn the product off, and then on. 2. Make sure that there is no paper stuck in the jogger assembly. 3. Check connections J4 on the stacker controller PCA and intermediate connector J1032 to the motor (M104). 4. Run the test on alignment motors. 5. If the error persists, replace the required assembly. 6. If the error persists, replace the stacker controller PCA.
- code :
66.60.31
- affichage :
66.60.31
- description :
BIN1 Tray Motor Error/Safety switch on - Finisher error - 1st-tray lift/lower motor (M107) This error occurs when the output bin 1 does not active the home-position sensor (PI116) when the output-bin-1-shift motor (M107) is drive for 20 seconds. NOTE: M107 moves both output bin 1 and the upper output bin that is attached to output bin 1 on the Stapler/Stacker finisher, but only output bin 1 on the Booklet Maker finisher. It also occurs when output bin 1 does not move when output-bin-1-shift m
- remede :
1. Manually release output bin 1, and then position it at the midpoint of its travel area. 2. On the product control panel, open the following menus: • Administration • Troubleshooting • Diagnostic Tests • Component Test 3. Test the output-bin-1.shift motor M107 using the finisher component test. 4. If output bin 1 moves during the test, continue with these steps. 5. If the paper-surface sensor flag was recently removed or replaced, make sure that it is installed correctly
- code :
66.60.32
- affichage :
66.60.32
- description :
BIN2 Tray Motor Error Finisher error – 2nd-tray lift/lower motor (M108) Occurs when the output-bin 2 does not activate the home-position sensor (PI115) when the outputbin- 1-shift motor (M108) is driven for 20 seconds. Also occurs when bin-2 upper limit is detected by PS983, PS982, PS981 on the Tray-2-Area Sensor PCA when no paper has been sensed by the output-bin-2 paper sensor (PI112). NOTE: Output-bin-2 home position is detected using the top sheet of paper on the bin when paper is present
- remede :
1. Manually release output bin 2, and position it at the midpoint of its travel area. 2. Test the output-bin-2-shift motor M108 by using the finisher component test from the controlpanel display. • Administration • Troubleshooting • Diagnostic Tests • Component Test 3. IF output bin 2 moves during the test, perform the following steps. 4. Verify that the paper-surface sensor flag is not damaged, moves freely, and is correctly aligned with the PI115 sensor body. Also verify
- code :
66.60.33
- affichage :
66.60.33
- description :
Stacker roller Lift Motor Error Finisher error - lift/lower motor (M107 or M108) This error occurs when the output-bin 1or 2 does not activate the Trays home-position sensor when the output-bin--shift motor (M107) is driven. NOTE: Output-bin home position is detected using the top sheet of paper on the bin when paper is present and the edge of the bin itself when there is no paper on the bin.
- remede :
1. Manually release the failing output bin, and position it at the midpoint of its travel area. 2. On the product control panel, open the following menus: • Administration • Troubleshooting • Diagnostic Tests • Component Test 3. Test the output-bin shift motor M107 or M108 by using the finisher component test from the control-panel display. 4. If the output bin moves during the test, perform the following steps. 5. If the paper-surface sensor flag was recently removed or r
- code :
66.60.34
- affichage :
66.60.34
- description :
Stacker Assist Motor Error In order to improve stacking performance when ejecting copies, a trailing-edge assist guide is used in addition to the stack-ejection roller to support the rear end of the stack during stack ejection. Error occurs when the stacker trailing-edge guide does not leave its home position (PI109) after the stack trailing-edge motor (M109) has been turned on for 3 seconds.
- remede :
1. On the product control panel, open the following menus: • Administration • Troubleshooting • Diagnostic Tests • Component Test 2. Test trailing edge motor M109 (stack trailing-edge assist motor) 3. If the trailing-edge assist guide does not move, perform the following steps: 4. Make sure that connector J4 on the stacker controller PCA is fully seated and not damaged also check the wiring at motor M109 and sensor PI109. 5. Replace the operation-tray assembly (processing
- code :
66.60.48
- affichage :
66.60.48
- description :
Stacker-CPU Communication error Occurs when the finisher's stacker-controller board has had an internal communication problem between the two processors on the board.
- remede :
1. Make sure that the finisher is properly grounded. 2. Ensure that the finisher is latched and locked to the engine by tightening the thumbscrew inside the front door. 3. Ensure that the grounding-frame assembly (the bar with the wheel located between the engine and the finisher) is in the down position with the wheel touching the floor
- code :
66.60.50
- affichage :
66.60.50
- description :
Stacker-CPU sequence error Occurs when the finisher's stacker-controller board has had an internal sequence problem.
- remede :
1. Make sure that the finisher is properly grounded. 2. Ensure that the finisher is latched and locked to the engine by tightening the thumbscrew inside the front door. 3. Ensure that the grounding-frame assembly (the bar with the wheel located between the engine and the finisher) is in the down position with the wheel touching the floor
- code :
66.80.01
- affichage :
66.80.01
- description :
Y-align malfunction In order to neatly align the paper stack for either stapling or offsetting to take place, the front and rear aligning plates move to align each sheet when it enters the processing tray. The error occurs when the aligning plate either does not leave or when it does not return to the aligning-plate front-home-position sensor.
- remede :
1. Turn the product off, and then on. 2. Make sure that there is no paper stuck in the jogger assembly. 3. Check connections J4 on the stacker controller PCA and intermediate connector J1032. 4. Run the test on alignment motors. 5. If the error persists, replace the required assembly. 6. If the error persists, replace the stacker controller PCA.
- code :
66.80.02
- affichage :
66.80.02
- description :
Jogger malfunction. In order to neatly align the paper stack for either stapling or offsetting to take place, the front and rear aligning plates move to align each sheet when it enters the processing tray. The error occurs when the aligning plate either does not leave or when it does not return to the aligning-plate front-home-position sensor.
- remede :
1. Turn the product off, and then on. 2. Make sure that there is no paper stuck in the jogger assembly. 3. Check connections J4 on the stacker controller PCA and intermediate connector J1032. 4. Run the test on alignment motors. 5. If the error persists, replace the required assembly. 6. If the error persists, replace the stacker controller PCA.
- code :
66.80.03
- affichage :
66.80.03
- description :
Stapler malfunction M105 Stapler mobility motor
- remede :
Control panel diagnostics: M105-Staple Motor (Staple-Shift Motor) and PI110-Stapler Home Sensor (Stapler Home Position Sensor). 1. Test the upper stapler-shift motor M105 by using the finisher component test from the controlpanel display. • If the stapler unit moves correctly, proceed to the next step. • If the stapler unit does not move correctly or moves erratically, perform the following steps: a. Check the flat-flexible cable (FFC) for damage (dents, folds, and/or tears). Replac
- code :
66.80.21
- affichage :
66.80.21
- description :
Lift up malfunction
- remede :
Turn the product off, and then on.
- code :
66.80.22
- affichage :
66.80.22
- description :
Lift down malfunction
- remede :
Turn the product off, and then on.
- code :
66.80.23
- affichage :
66.80.23
- description :
Lift sensor malfunction
- remede :
Turn the product off, and then on.
- code :
66.80.33
- affichage :
66.80.33
- description :
Output roller malfunction
- remede :
Turn the product off, and then on.
- code :
66.80.35
- affichage :
66.80.35
- description :
Self priming malfunction
- remede :
Turn the product off, and then on.
- code :
66.80.36
- affichage :
66.80.36
- description :
Stapler Stacker motor error Finisher upper-stapler motor failure (M41) Error occurs either when the stapler does not leave stapler home position (PI120) after staple motor (M41) is driven for 0.4 seconds or when it does not return to stapler home position after the staple motor has detected a motor-lock condition and the motor is driven backwards for 0.4 seconds, attempting to reach home position. NOTE: PI120 and M41 are located on the stapler assembly and can only be replaced by replacing th
- remede :
Control panel diagnostics: M41 Staple Motor (Staple-Shift Motor) and PI120 Stapler Home Sensor (Stapler Home Position Sensor). 1. Test the upper stapler-shift motor M41 using the finisher component test from the product control panel. • If the stapler unit moves correctly, proceed to the next step. • If the stapler unit does not move correctly or moves erratically, perform the following steps: a. Check the flat-flexible cable (FFC) for damage (dents, folds, and/or tears). Replace th
- code :
66.80.38
- affichage :
66.80.38
- description :
Stacker Stapler Mechanism Failed Occurs when stapler-alignment-interference sensor (PI116) is activated, signaling that the stapler unit is not in its proper position for stapling to occur. This is to prevent damage to stapler from occurring when stapler is positioned over one of the three stoppers when the signal to staple has been sent.
- remede :
1. If the stapler unite does not move correctly or moves erratically, check the flat-flexible cable (FFC) for damage (dents, folds, and/or tears). Replace the FFC if necessary. 2. If the stacker controller PCA was recently replaced, adjust the staple alignment and staple position. 3. If the stapler is not positioned over a stopper when this error occurs, perform the following steps: a. Make sure that the stapler unit is correctly mounted and securely fastened to the base. b. Make sure that th
- code :
66.80.46
- affichage :
66.80.46
- description :
Stacker Staple Slide motor error Finisher upper stapler shift motor failure (M105). This error occurs when the stapler does not leave the stapler-shift home-position sensor (PI110) after the stapler-shift motor (M105) has driven for 5 seconds. This error also occurs when the stapler fails to return to the stapler-shift home-position sensor (PI110) after the stapler-shift motor (M105) has driven for 20 seconds.
- remede :
Control panel diagnostics: M105 Staple Motor (Staple-Shift Motor) and PI110 Stapler Home Sensor (Stapler Home Position Sensor). 1. Test the upper stapler-shift motor M105 using the finisher component test from the product control panel. • If the stapler unit moves correctly, proceed to the next step. • If the stapler unit does not move correctly or moves erratically, perform the following steps: a. Check the flat-flexible cable (FFC) for damage (dents, folds, and/or tears). Replace
- code :
66.80.51
- affichage :
66.80.51
- description :
System error (FW error)
- remede :
Turn the product off, and then on.
- code :
66.80.55
- affichage :
66.80.55
- description :
System error 5 (FW error)
- remede :
Turn the product off, and then on.
- code :
66.80.56
- affichage :
66.80.56
- description :
System error 6 (FW error)
- remede :
Turn the product off, and then on.
- code :
66.80.57
- affichage :
66.80.57
- description :
System error 7 (FW error)
- remede :
Turn the product off, and then on.
- code :
66.80.58
- affichage :
66.80.58
- description :
System error 8 (FW error)
- remede :
Turn the product off, and then on.
- code :
66.80.59
- affichage :
66.80.59
- description :
System error 9 (FW error)
- remede :
Turn the product off, and then on.
- code :
66.80.60
- affichage :
66.80.60
- description :
System error 10 (inter-page delay mismatch)
- remede :
Turn the product off, and then on.
- code :
66.80.61
- affichage :
66.80.61
- description :
System error 11 (lifter task trouble)
- remede :
Turn the product off, and then on.
- code :
66.80.62
- affichage :
66.80.62
- description :
System error 12 (inter-page delay mismatch)
- remede :
Turn the product off, and then on.
- code :
66.80.63
- affichage :
66.80.63
- description :
System error 13 (FW error)
- remede :
Turn the product off, and then on.
- code :
66.80.64
- affichage :
66.80.64
- description :
System error 14 (FW error)
- remede :
Turn the product off, and then on.
- code :
66.80.65
- affichage :
66.80.65
- description :
System error 15 (FW error)
- remede :
Turn the product off, and then on.
- code :
66.80.70
- affichage :
66.80.70
- description :
Page-info in flush
- remede :
Turn the product off, and then on.
- code :
66.80.71
- affichage :
66.80.71
- description :
Flush request in PDLV
- remede :
Turn the product off, and then on.
- code :
66.80.72
- affichage :
66.80.72
- description :
Delivery notice error
- remede :
Turn the product off, and then on.
- code :
66.80.73
- affichage :
66.80.73
- description :
Flush request in checking paper path
- remede :
Turn the product off, and then on.
- code :
66.80.74
- affichage :
66.80.74
- description :
Checking paper path start in PDLV
- remede :
Turn the product off, and then on.
- code :
66.80.75
- affichage :
66.80.75
- description :
Flush request in flush
- remede :
Turn the product off, and then on.
- code :
66.80.76
- affichage :
66.80.76
- description :
Non-flush complete
- remede :
1. Follow the instructions in online help. 2. Turn he product off and turn it on. 3. If the error continues
- code :
66.90.10
- affichage :
66.90.10
- description :
Booklet Interlock Switch Error There are three switches in the Booklet Maker finisher: SW1 (the saddle-guide switch also known as the inlet-door switch), SW3 (the booklet-ejection-door switch), and MS31 (the front-door switch). The Stapler/Stacker finisher only has one switch, MS31 for the front door of the finisher. All three switches detect if the associated door or guide plate is open or closed. Each one of the switches also has a sensor (SW1/PI9, SW3/PI3, and MS31/PI32) that acts as a bac
- remede :
Control panel diagnostics: PI32 (front-door-1 sensor), PI3 (booklet door-1 sensor, also known as booklet-delivery-door sensor), PI9 (front-door-2 sensor, also known as the saddle-guide-door sensor or inlet-door sensor), SW3 (booklet-door 2). 1. Using the diagnostic tests from the product control panel, try to isolate which door or guide and sensor is causing the error. 2. Make sure that the sensors are securely fastened to the chassis. 3. Check the switches and sensors for damage and clean th
- code :
66.90.29
- affichage :
66.90.29
- description :
Booklet Staple Motor Error (Rear) The Booklet Maker stitch staplers do not move to different locations in relation to the paper like the main stapler. The only movement is through the movement of the rotary cam located on the stapler unit itself, during the actual stapling of the booklet. The stitch-home-position switch (SW5) is part of the rear-stitch stapler unit and senses the stapler opening and closing during stapling by the motion of the rotary drive cam. Like SW5, the stitch motor (M6)
- remede :
1. Check the rear-stitch stapler for jammed staples. 2. Clear jammed staples, and then check the staple unit for damage. Retest the stapler. • If the error continues, check the following items: a. Make sure that HP-approved staples are used. b. Replace the staple cartridge with one containing HP-approved staples. c. If the error continues, replace the saddle-stapler assembly. • If the error persists, but no damage is found, proceed to the next step. 3. Make sure that connector J8 on
- code :
66.90.30
- affichage :
66.90.30
- description :
Booklet Staple Motor Error (Front) The Booklet Maker stitch staplers do not move to different locations in relation to the paper like the main stapler. The only movement is through the movement of the rotary cam located on the stapler unit itself, during the actual stapling of the booklet. The stitch-home-position switch (SW7) is part of the front-stitch stapler unit and senses the stapler opening and closing during stapling by the motion of the rotary drive cam. Like SW7, the stitch motor (M
- remede :
1. Check the front-stitch stapler for jammed staples. 2. Clear jammed staples, and then check the staple unit for damage. Retest the stapler. • If the error continues, check the following items: a. Make sure that HP-approved staples are used. b. Replace the staple cartridge with one containing HP-approved staples. c. If the error continues, replace the saddle-stapler assembly. • If the error persists, but no damage is found, proceed to the next step. 3. Make sure that connector J8 o
- code :
66.90.41
- affichage :
66.90.41
- description :
Booklet Nip Motor Error The paper-fold motor (M2), which is located in the booklet making area of the finisher, drives the rotation of the folding rollers to create desired fold in the paper. The error occurs when the number of pulses by the paper-fold-motor clock sensor (PI4) is less than the expected standard value. This error also occurs when the status of the paper-fold home-position sensor (PI21) does not change when the paper-fold motor (M2) has driven for 3 seconds.
- remede :
1. Check the area around the folding rollers for a jam. 2. Test the paper-fold motor M2 using the finisher component test from the product control panel. • If the folding rollers rotate correctly, perform the following steps: a. Check sensor PI4 and sensor PI21 for damage. b. Make sure that the sensor flags are not damaged, move freely, and are correctly aligned with the PI48 and PI21 sensor bodies. c. Make sure that the sensors are securely fastened to the chassis. d. Carefully clean ea
- code :
66.90.42
- affichage :
66.90.42
- description :
Booklet Paper Position Select Motor Error The paper-positioning-plate motor (M4), located in the booklet making area of the finisher, controls the up and down positioning of the stacked paper for stitch stapling and folding. The error occurs when the paper-positioning-plate home-position sensor (PI7) does not turn on when the paper-positioning-plate motor (M4) has driven for 1500 pulses. This error also occurs when the paper-positioning-plate home-position sensor (PI7) does not turn off when
- remede :
Control panel diagnostics: M4-guide plate motor (paper-positioning-plate motor). 1. Test the paper-positioning-plate motor M4 using the finisher component test from the product control panel. During the test, observe the movement of the booklet-maker-guide plate, and make sure it is not obstructed or damaged. 2. Remove the booklet maker output bin to gain access to the paper-position-plate home-position sensor PI7 and delivery door. 3. Remove the plate that holds PI7, and then carefully clean
- code :
66.90.43
- affichage :
66.90.43
- description :
Booklet Paper Guide Motor Error The guide motor (M3), located in the booklet-making area of the finisher, controls the position of the guide plate. The guide plate is positioned in front of the folding rollers as the paper stack is being stapled, allowing the bottom edge of the paper to smoothly pass by the folding rollers. When the stacked paper is lowered to the folding position, the guide motor (M3) lowers the guide plate out of the way to allow the paper stack to be pushed into the foldin
- remede :
Control panel diagnostics: M3 guide motor. 1. Carefully clean the sensor body by gently blowing clean air across the sensor to remove dust and debris. 2. Make sure that the sensor is securely fastened to the plate. 3. Check the wiring at the sensor. 4. Check sensor PI13 for damage. 5. Check the guide, gears, and gear tracks on the front and rear frame for damage. Replace components as necessary. 6. If the error persists, replace the guide motor M3 and the guide-home-position sensor PI13 toget
- code :
66.90.44
- affichage :
66.90.44
- description :
Booklet Align Motor Error The alignment motor (M5), located in the booklet making area of the finisher, drives the two alignment plates that adjust the side edges of the stacked paper so that the sheets of paper in the stack is perfectly aligned with one another. This error occurs when the aligning-plate home-position sensor (PI5) does not turn on when the aligning-plate motor (M5) has driven for 500 pulses. This error also occurs when the aligning-plate home-position sensor (PI5) does not tu
- remede :
Observe the alignment plates during a Booklet Maker stacking operation. If the alignment plates move during the operation, perform the following steps: 1. Check sensor PI5 for damage. 2. Make sure that the sensor flag is not damaged, moves freely, and is correctly aligned with the sensor body. 3. Make sure that the sensor is securely fastened to the plate. 4. Carefully clean the sensor body by gently blowing clean air across the sensors to remove dust and debris. 5. If the alignment plates or
- code :
66.90.45
- affichage :
66.90.45
- description :
Booklet Push Motor Error This error occurs when the paper-pushing-plate home-position sensor (PI14) does not turn on when the paper-pushing-plate motor (M8) has driven for 0.3 seconds. This error can also occur under one of the these conditions: • When the paper-pushing-plate home-position sensor (PI14) does not turn off when the paperpushing- plate motor (M8) has driven for 80 ms • When the paper-pushing-plate leading-edge-position sensor (PI15) does not turn off when the paper-pus
- remede :
1. Open the front finishing door, and then activate the front-door switch (MSW31) and front-door sensor (PI32) so that the finisher will operate with the front door open 2. Turn the engine and finisher power off to clear the error, and then turn the power on. WARNING! Operating the finisher with the front door open exposes moving parts that can cause serious injury. Be very careful operating the finisher with the front door open. 3. Observe the paper-pushing plate motor M8 (located in the low
- code :
66.90.49
- affichage :
66.90.49
- description :
Booklet Nip Motor Error or Booklet Push Motor Error Finisher - paper-pushing-plate motor (M8). Error occurs when the paper-pushing-plate home-position sensor (PI14 or PI 15) does not turn on when the paper-pushing-plate motor (M8) has been driven for 0.3 seconds. Also occurs when the paper-pushing-plate home-position sensor (PI14 or PI15) does not turn off when the paper-pushing-plate motor (M8) has been driven for 80 ms. Also occurs when the number of pulses detected by the paper-pushing-pla
- remede :
1. Open the front finishing door, and activate the front-door switch (MSW31) and front-door sensor (PI32) so that the finisher will operate with the front door open. . 2. Turn the engine and finisher power off to clear the error, and then turn the power on. WARNING! Operating the finisher with the front door open exposes moving parts that can cause serious injury. Be very careful operating the finisher with the front door open. 3. Use the control-panel menus to begin a booklet making operatio
- code :
66.90.50
- affichage :
66.90.50
- description :
Booklet-CPU sequence error
- remede :
1. Follow the instructions in the online help. 2. Turn the product off, and then on. 3. If the error persists, see the output finishing device service manual for detailed instructions.
- code :
69.11.YZ
- affichage :
69.11.YZ
- description :
There is a duplexer error.
- remede :
1. Turn the product off, and then on. 2. If the error persists, replace the duplexer.
- code :
70.00.00
- affichage :
70.00.00 Error To continue turn off then on
- description :
The product experienced a DC controller failure.
- remede :
1. Turn the product off, and then on. 2. If the error persists, replace the DC controller.
- code :
80.0X.YY
- affichage :
80.0X.YY Embedded Jetdirect Error
- description :
An Embedded HP JetDirect print server critical error has occurred. • 80.01.80: No heartbeat • 80.01.81: Reclaim timeout • 80.01.82: Invalid data length • 80.01.8B: Invalid max outstanding packet header field • 80.01.8C: Invalid channel mapping response • 80.03.01: No PGP buffers • 80.03.02: Channel table full • 80.03.03: Producer index not reset • 80.03.04: Consumer index not reset • 80.03.05: Queue position size too small • 80.03.06: Tra
- remede :
1. Turn the product off, and then on. 2. Remove the RJ45 cable. 3. Turn the product off, and then on. 4. Reconnect the RJ45 cable. 5. If the error persists, replace the formatter.
- code :
82.73.46
- affichage :
82.73.46
- description :
A hard disk or compact flash disk cleaning failed. This error is usually caused by a failure of the disk hardware.
- remede :
1. Turn the product off, and then on. 2. Use the Clean Disk item in the Preboot menu. 3. Reload the firmware.
- code :
82.73.47
- affichage :
82.73.47
- description :
A hard disk or compact flash disk cleaning failed. This error is usually caused by a failure of the disk hardware.
- remede :
1. Turn the product off, and then on. 2. Use the Clean Disk item in the Preboot menu. 3. Reload the firmware.
- code :
98.00.01
- affichage :
98.00.01 Corrupt data in firmware volume
- description :
Data corrupt has occurred in the firmware volume.
- remede :
1. Turn the product off, and then on. 2. Use the Clean Disk item in the Preboot menu. 3. Reload the firmware. 98.00.02 Corrupt data in the solutions volume
- code :
98.00.02
- affichage :
98.00.02 Corrupt data in the solutions volume
- description :
Data corrupt has occurred in the solutions volume.
- remede :
1. Turn the product off, and then on. 2. Use the Clean Disk item in the Preboot menu. 3. Reload the firmware.
- code :
98.00.03
- affichage :
98.00.03 Corrupt data in the configuration volume
- description :
Data corrupt has occurred in the configuration volume.
- remede :
1. Turn the product off, and then on. 2. Download the firmware again, and then attempt the upgrade again. 3. Use the Clean Disk item in the Preboot menu. 4. Reload the firmware.
- code :
98.00.04
- affichage :
98.00.04 Corrupt data in the job data volume
- description :
Data corrupt has occurred in the job data volume.
- remede :
1. Turn the product off, and then on. 2. Rerun the file erase function.
- code :
98.01.00
- affichage :
98.00.01 or 98.01.00 Corrupt data in firmware volume
- description :
Data corrupt has occurred in the firmware volume.
- remede :
1. Turn the product off, and then on. 2. Use the Clean Disk item in the Preboot menu. 3. Reload the firmware. 98.00.02 Corrupt data in the solutions volume
- code :
99.00.01
- affichage :
99.00.01 Upgrade not performed file is corrupt
- description :
A remote firmware upgrade (RFU) was not performed. This is a CRC error in the firmware image (bad image).
- remede :
Download the RFU file, and then attempt the upgrade again.
- code :
99.00.02
- affichage :
99.00.02 Upgrade not performed timeout during receive
- description :
A remote firmware upgrade (RFU) was not performed. The issue is an I/O timeout when reading the header number and size. It indicates a problem with the network environment, not the product.
- remede :
The most common cause is an issue with the network environment. Make sure that there is a good network connection to the product, and then attempt the firmware upgrade again, or upgrade using the USB walk-up port.
- code :
99.00.03
- affichage :
99.00.03 Upgrade not performed error writing to disk
- description :
A remote firmware upgrade (RFU) was not performed. This is a disk error. It might indicate a problem or a hard disk failure. It might be necessary to check the connection to the hard disk or replace the hard disk.
- remede :
1. Download the RFU file, and then attempt the upgrade again. 2. If the error persists, run the Clean Disk process from the Preboot menu. You will need to download the firmware from the Preboot menu. 3. If the error persists, replace the hard disk.
- code :
99.00.04
- affichage :
99.00.04 Upgrade not performed timeout during receive
- description :
A remote firmware upgrade (RFU) was not performed. The issue is an I/O timeout when reading the header.
- remede :
The most common cause is an issue with the network environment. Make sure that there is a good network connection to the product, and then attempt the firmware upgrade again, or upgrade using the USB walk-up port.
- code :
99.00.05
- affichage :
99.00.05 Upgrade not performed timeout during receive
- description :
A remote firmware upgrade (RFU) was not performed. The issue is an I/O timeout when reading image data.
- remede :
The most common cause is an issue with the network environment. Make sure that there is a good network connection to the product, and then attempt the firmware upgrade again, or upgrade using the USB walk-up port.
- code :
99.00.06
- affichage :
99.00.06 Upgrade not performed error reading upgrade
- description :
A remote firmware upgrade (RFU) was not performed. The issue is an unexpected read error when reading the header number and size.
- remede :
1. Download the RFU file, and then attempt the upgrade again. 2. If the error persists, replace the hard disk.
- code :
99.00.07
- affichage :
99.00.07 Upgrade not performed error reading upgrade
- description :
A remote firmware upgrade (RFU) was not performed. The issue is an unexpected read error when reading the rest of the header.
- remede :
1. Download the RFU file, and then attempt the upgrade again. 2. If the error persists, replace the hard disk.
- code :
99.00.08
- affichage :
99.00.08 Upgrade not performed error reading upgrade
- description :
A remote firmware upgrade (RFU) was not performed. The issue is an unexpected read error when reading image data.
- remede :
1. Download the RFU file, and then attempt the upgrade again. 2. If the error persists, replace the hard disk.
- code :
99.00.09
- affichage :
99.00.09 Upgrade canceled by user
- description :
A remote firmware upgrade (RFU) was not performed. The RFU was canceled by the user.
- remede :
Resend the RFU.
- code :
99.00.10
- affichage :
99.00.10 Upgrade canceled by user
- description :
A remote firmware upgrade (RFU) was not performed. The RFU was canceled by the user when reading the header number and size.
- remede :
Resend the RFU.
- code :
99.00.11
- affichage :
99.00.11 Upgrade canceled by user
- description :
A remote firmware upgrade (RFU) was not performed. The RFU was canceled by the user when reading the rest of the header.
- remede :
Resend the RFU.
- code :
99.00.12
- affichage :
99.00.12 Upgrade not performed the file is invalid
- description :
A remote firmware upgrade (RFU) was not performed. The header number is 1, but the header size does not match version 1 size.
- remede :
Download the RFU file again. Make sure that you download the file for the correct product model, and then resend the RFU.
- code :
99.00.13
- affichage :
99.00.13 Upgrade not performed the file is invalid
- description :
A remote firmware upgrade (RFU) was not performed. The header number is 2, but the header size does not match version 2 size.
- remede :
Download the RFU file again. Make sure that you download the file for the correct product model, and then resend the RFU.
- code :
99.00.14
- affichage :
99.00.14 Upgrade not performed the file is invalid
- description :
A remote firmware upgrade (RFU) was not performed. The file is invalid.
- remede :
Download the RFU file again. Make sure that you download the file for the correct product model, and then resend the RFU.
- code :
99.00.2X
- affichage :
99.00.2X
- description :
There is a compatibility issue with the firmware. The specific message varies depending on the cause, but the solution for each message is the same. • 99.00.20 The bundle is not for this product. • 99.00.21 The bundle is not signed with the correct signature, or the signature is invalid. • 99.00.22 The bundle header version is not supported by this firmware. • 99.00.23 The package header version is not supported by this firmware. • 99.00.24 The format of the bundle is
- remede :
Download the correct firmware and then resend the firmware upgrade. 99.00.27 only: 1. Turn the product off, and then on. 2. Resend the firmware upgrade. 3. If the error persists, try installing the upgrade by another method (USB or Embedded Web Server).
- code :
99.01.XX
- affichage :
99.01.XX
- description :
A firmware install error has occurred. The specific message varies depending on the cause, but the solution for each message is the same. • 99.01.00 • 99.01.10 • 99.01.20 • 99.01.21
- remede :
Reload the firmware.
- code :
99.02.01
- affichage :
99.02.01
- description :
Firmware installation was successful.
- remede :
No action necessary.
- code :
99.02.09
- affichage :
99.02.09
- description :
Firmware upgrade cancelled by user.
- remede :
No action necessary.
- code :
99.09.60
- affichage :
99.09.60 Unsupported disk
- description :
This is a Preboot menu error. The hard disk currently installed is not recognized or supported by the product.
- remede :
Install the correct hard disk for this product.
- code :
99.09.61
- affichage :
99.09.61 Unsupported disk
- description :
This is a Preboot menu error. The installed disk is installed in a product configured for an encrypted hard disk.
- remede :
Access the Preboot menu, and then select Lock Disk to lock the disk.
- code :
99.09.62
- affichage :
99.09.62 Unknown disk
- description :
This error indicates that there is an encryption mismatch between the HDD and the formatter. This typically happens because an HDD was swapped into a device from another device.
- remede :
Install a new disk or use the Preboot menu unlock the disk. If a disk is to be reused in a different product, execute the Clean Disk procedure from the Preboot, and then reload the firmware and lock the disk.
- code :
99.09.63
- affichage :
99.09.63 Incorrect disk
- description :
This error indicates that the expected encrypted HDD is not present. This is expected behavior when installing a new HDD in a device where the previous HDD was encrypted.
- remede :
Follow the procedure to load firmware on a new hard disk, and then lock the disk to this product.
- code :
99.09.64
- affichage :
99.09.64 Disk malfunction
- description :
A fatal hard disk failure has occurred.
- remede :
Replace the hard disk.
- code :
99.09.65
- affichage :
99.09.65 Disk data error
- description :
Disk data corruption has occurred.
- remede :
Use the Clean Disk procedure from the Preboot menu, and then resend the RFU.
- code :
99.09.66
- affichage :
99.09.66 No disk installed
- description :
A disk drive is not installed in the product.
- remede :
1. Install a compatible hard disk drive. 2. If a compatible hard disk is installed, reseat the hard disk to make sure that it is connected correctly. 3. If the error persists, replace the hard disk drive.
- code :
99.09.67
- affichage :
99.09.67 Disk is not bootable please download firmware
- description :
This is an error indicating that there is no firmware installed on the disk. This is usually the result of installing a new disk or performing a Clean Disk operation from the Preboot menu.
- remede :
1. Press any button to continue to the main Preboot menu. 2. Press the Help button to see the help text for the error. 3. Select the Administration menu. NOTE: If there is a password assigned to the Administrator, a prompt to enter the product displays. Enter the password to proceed. 4. Select the Download item, and then download the latest firmware. The user can now download a new firmware bundle to the product.
- code :
99.XX.YY
- affichage :
99.XX.YY
- description :
A message of this form indicates a firmware installation error.
- remede :
Reload the firmware.