Indiquez-nous le code erreur ou le problème rencontré
pour obtenir un diagnostic ou un devis de réparation.
Codes erreur les plus fréquents
Imprimante HP Color LaserJet 5550, 5550N, 5550DN, 5550DTN, 5550HDN
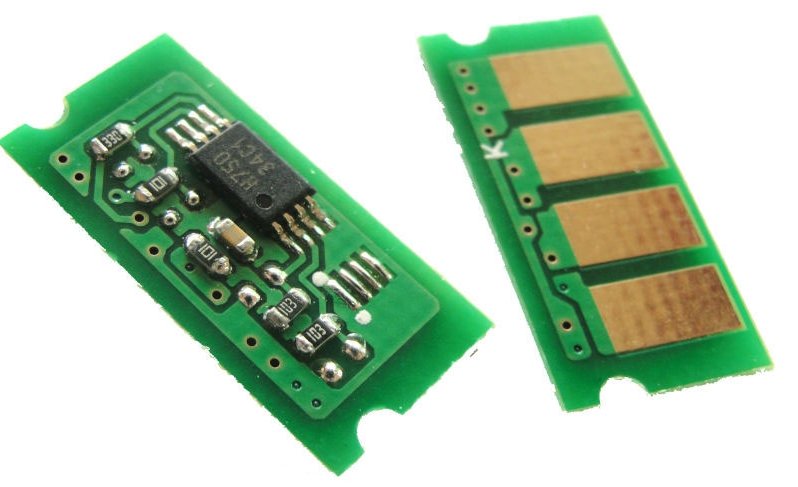
Code Erreur 10 ou Erreur mémoire consommable 
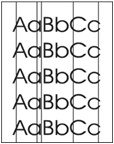
Code Erreur 13.xx ou Bourrage papier 
Code Erreur 49 
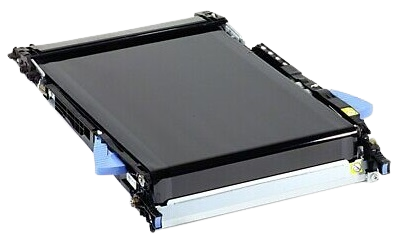
Code Erreur 50 ou Erreur Station fusion ou Remplacer kit de maintenance 
Problèmes les plus fréquemment rencontrés
Imprimante HP Color LaserJet 5550, 5550N, 5550DN, 5550DTN, 5550HDN
Tableau de tous les codes erreurs
Imprimante HP Color LaserJet 5550, 5550N, 5550DN, 5550DTN, 5550HDN
- code :
10.XX.YY
- affichage :
10.XX.YY SUPPLIES ERROR
- description :
The printer cannot read or write to at least one print cartridge memory tag or at least one memory tag is missing. XX 00 memory error on supply item 10 memory tag missing YY 00 black print cartridge 01 cyan print cartridge 02 magenta print cartridge 03 yellow print cartridge
- remede :
1 Turn the printer off and then back on. 2 Swap the cartridge for the color indicated with a cartridge in another slot to determine whether the error follows the cartridge or stays with the slot. If the error follows the cartridge, replace that cartridge. Otherwise, continue with step 3. 3 Reseat the connectors between the memory PCB (J601-J605) and the antenna PCBs (J903), the memory PCB, and the DC controller PCB (J1122). 4 Replace the antenna PCB. 5 Replace the memory PCB. 6 Replace the DC
- code :
13.XX.YY
- affichage :
13.XX.YY JAM IN TRAY X
- description :
A page is jammed in Tray 3 or Tray 4.
- remede :
1. Press ? for detailed information about clearing the jam. 2. Press up and down to step through the instructions. 3. Clean the pickup roller. If it is worn or damaged, replace it. 4. Clean the feed roller. If it is worn or damaged, replace it. 5. Replace the Tray 3 or Tray 4 pickup clutch. 6. Replace the Tray 3 or Tray 4 pickup motor. 7. Replace the Tray 3 or Tray 4 paper feeder PCB. 8. Check the cassette lifter mechanism for proper operation. 9. Replace the DC controller PCB. Calibrate the
- code :
20
- affichage :
20 INSUFFICIENT MEMORY
- description :
The printer has received more data from the computer than fits in available memory.
- remede :
1. Press GO to resume printing. Note A loss of data will occur. 2. Reduce the complexity of the print job to avoid this error. 3. Adding memory to the printer may allow printing of more complex pages.
- code :
22
- affichage :
22 SERIAL I/O BUFFER OVERFLOW
- description :
The printer’s serial buffer has overflowed during a busy state.
- remede :
Press GO to resume printing. Note A loss of data will occur.
- code :
40
- affichage :
40 EIO X BAD TRANSMISSION
- description :
A connection with the card in EIO slot X has been abnormally broken
- remede :
1. Press GO to resume printing. Note A loss of data will occur. 2. Check that all cables are connected to the EIO ports and that the EIO board is seated properly. 3. If possible, print to another network printer to verify the network is working properly.
- code :
41.3
- affichage :
41.3 UNEXPECTED SIZE IN TRAY X
- description :
Media is loaded which is longer or shorter in the feed direction than the size configured for the tray.
- remede :
1. If the incorrect size was selected, cancel the job or press ? to access help. 2. Press up and down to step through the instructions.
- code :
41.5
- affichage :
41.5 UNEXPECTED TYPE IN TRAY X
- description :
The printer senses a different media type in the media path than configured in the tray.
- remede :
1. If the incorrect type was selected, cancel the job or press to access ? help. 2. Press up and down to step through the instructions.
- code :
41.X
- affichage :
41.X PRINTER ERROR
- description :
A printer error has occurred. X 1 unknown misprint error 2 beam detect misprint error 3 media feed error (size) 4 no VSYNC error 5 media feed error (type) 6 ETB detection error 7 feed delay error 9 noise VSREQ
- remede :
1. Press GO to continue or press for more information. 2. If the message persists, turn the printer off and then back on.
- code :
49.XXXX
- affichage :
49.XXXX PRINTER ERROR
- description :
A critical firmware error has occurred that caused the processor on the formatter to abort operation. This type of error can be caused by invalid print commands, corrupt data, or invalid operations. In some cases, electrical noise in the cable can corrupt data during transmission to the printer. Other causes include poor quality parallel cables, poor connections, or homegrown applications. On rare occasions, the formatter is at fault, which is usually indicated by a 79 Service Error.
- remede :
1. Press CANCEL JOB to clear the print job from the printer memory. 2. Turn the printer off and then back on. 3. Try printing a job from a different software application. If the job prints, go back to the first application and try printing a different file. If the message appears only with a certain software application or print job, contact the software vendor for assistance. 4. If the message persists with different software applications and print jobs, disconnect all cables to the printer
- code :
50.X
- affichage :
50.X FUSER ERROR
- description :
A fuser error has occurred. X 1 low fuser temperature 2 fuser warmup service 3 high fuser temperature 4 faulty fuser 5 inconsistent fuser 6 open fuser 8 low fuser temperature (sub=thermistor) 9 high fuser temperature (sub=thermistor)
- remede :
1. Turn the printer off and allow it to cool down. 2. Reinstall the fuser, and check the connector (J100) that connects the fuser and the printer. Replace the connector if it is damaged. 3. Turn the printer off and remove the fuser. Measure the resistance between the connector pins on the fuser. If resistance does not meet the following guidelines, replace the fuser. J100LB-5 to J100LB-6: 300 - 500 KOhms J100LB-1 to J100LB-2: less than 1 KOhm 4. Check for continuity between connector pins J10
- code :
51.XY
- affichage :
51.XY PRINTER ERROR
- description :
A printer error has occurred. X 1 beam detect error 2 laser error Y Description 0 no color K black C cyan M magenta Y yellow
- remede :
1. Press GO to continue. 2. Turn the printer off and then back on. 3. Reseat the connectors between the laser/scanner (J74 - J77) and DC controller PCB (J1106 - J1109). 4. Replace the defective laser/ scanner assembly. Calibrate the printer after replacing the laser/scanner. 5. Replace the DC controller PCB. Calibrate the printer after replacing the DC controller
- code :
52.XY
- affichage :
52.XY PRINTER ERROR
- description :
A printer error has occurred. X 1 scanner error 2 scanner startup error 3 scanner rotation error Y Description 0 no color K black C cyan M magenta Y yellow
- remede :
1. Press GO to continue. 2. Turn the printer off and then back on. 3. Reseat the connectors between the laser/scanner (J74 - J77) and DC controller PCB (J1106 - J1109). 4. Replace the defective laser/ scanner assembly. Calibrate the printer after replacing the laser/scanner. 5. Replace the DC controller PCB. Calibrate the printer after replacing the DC controller
- code :
53.10.05
- affichage :
53.10.05 PRINTER ERROR
- description :
A DIMM is installed in both 168- pin DIMM Slot 4 and 100-pin DIMM Slot 5.
- remede :
This is an invalid configuration. DIMMs can not be installed in both of these slots at the same time. Remove one of the DIMMs, or move one of the DIMMs to a different slot.
- code :
53.X0.ZZ
- affichage :
53.X0.ZZ PRINTER ERROR
- description :
An error has occurred in the onboard RAM.
- remede :
1. Press GO to continue. 2. Turn the printer off and then back on.
- code :
53.XY.ZZ
- affichage :
53.XY.ZZ PRINTER ERROR
- description :
An error occurred on some memory of the printer. X DIMM Type: 1 RAM Y Device Location: 1 DIMM Slot 1 2 DIMM Slot 2 3 DIMM Slot 3 4 DIMM Slot 4 ZZ Error Number: 0 unsupported memory 1 unrecognized memory 2 unsupported memory size 3 failed RAM test 4 exceeded maximum RAM size 5 invalid DIMM speed
- remede :
Press CANCEL JOB. If the problem persists, replace the DIMM card in the slot indicated.
- code :
54.XX
- affichage :
54.XX PRINTER ERROR
- description :
X 1 temperature 3 image density sensor 5 color plane registration sensor 6 image density sensor 7 yellow drum home position sensor 8 magenta drum home pos. sensor 9 cyan drum home position sensor 10 black drum home position sensor 11 yellow density sensor 12 magenta density sensor 13 cyan density sensor 14 black density sensor 19 ETB speed control sensor 20 color plane registration sensor 21 yellow toner level sensors 22 magenta toner level sensors 23 cyan toner level sensors 24 black toner
- remede :
Turn the printer off and then back on, then check items in the order listed. 54.1 error Check the fuser. See 50.X fuser error. 54.30 error Wipe sensor lens clean. Run a full calibration and the error should go away. 54.3 error Check the connections. Replace the color registration detection assembly. 54.5 error Check the connections. Replace the color registration detection assembly. 54.6 error Check the connections. Replace the color registration detection assembly. 54.7, 54.8, 54.9, or 54.10
- code :
55.X
- affichage :
55.X PRINTER ERROR
- description :
The DC controller is not communicating with the formatter. The problem could be caused by a timing error or an intermittent connection.
- remede :
1. Press to continue. 2. Turn the printer off and then back on. 3. Reseat or replace the connectors between the DC controller and the formatter. 4. If the problem persists, replace the DC controller PCB. Calibrate the printer after replacing the DC controller. 5. Replace the formatter. Initialize NVRAM.
- code :
57.X
- affichage :
57.X PRINTER ERROR
- description :
A printer fan error has occurred. X 3 cartridge fan (vertical fan, FM3) 4 formatter fan (horizontal fan, FM2) 7 power suppply fan (FM1)
- remede :
Turn the printer off and then back on. 57.3 Cartridge fan error (FM3) 1. Reconnect the connectors J10 for the cartridge fan and J1102 on the DC controller PCB. 2. Immediately after starting the print operation, measure the voltage between pins 1 and 3 on the J10 connector. If the voltage changes from 0 V to 12 V or 24 V, replace the cartridge fan. 3. Replace the DC controller PCB. Calibrate the printer after replacing the DC controller. 57.4 Formatter fan error (FM2) 1. Reco
- code :
58.X
- affichage :
58.X PRINTER ERROR
- description :
A memory tag error was detected. X 3 CPU 4 power supply
- remede :
1. Turn the printer off and then back on. 2. Replace the memory PCB. 3. Replace the DC controller PCB. Calibrate the printer after replacing the DC controller.
- code :
59.XY
- affichage :
59.XY PRINTER ERROR
- description :
A printer motor error has occurred. X 0 motor error 1 motor startup error 2 motor rotation error 3 fuser motor startup error 4 fuser motor rotation error 5 print cartridge motor startup error 6 print cartridge motor rotation error 9 ETB motor startup error A ETB motor rotation error B developing disengaging motor startup error C developing disengaging motor rotation error. Y 0 no color K black C cyan M magenta Y yellow
- remede :
1. Turn the printer off and then back on. 2. This message might also appear if the transfer unit is missing or incorrectly installed. Ensure that the transfer unit is correctly installed. ETB motor error 1. Clean the ETB unit intermediate connector, J36. If the connector is damaged, replace it. 2. Reconnect the connetors J38 for the ETB motor and J1111 on the DC controller PCB. 3. Replace the ETB motor. 4. Replace the DC controller PCB. Calibrate the printer after replacing the DC con
- code :
62
- affichage :
62 NO SYSTEM
- description :
No system was found.
- remede :
1. Turn the printer off and then back on. 2. Reseat the firmware DIMM, making sure it is in the 168- pin slot J1.
- code :
64
- affichage :
64 PRINTER ERROR
- description :
Scan buffer error.
- remede :
1. Turn the printer off and then back on. 2. Perform a cold reset. 3. If the message persists, replace the formatter or firmware DIMM.
- code :
68.X
- affichage :
68.X PERMANENT STORAGE WRITE FAIL
- description :
A non-volatile storage device is failing to write. Pressing GO the button should clear the message. Printing can continue, but there may be unexpected behavior. X 0 onboard NVRAM 1 removable disk (flash or hard)
- remede :
1. Press GO to continue. 2. Turn the printer off and then back on. 3. If the problem persists, initialize NVRAM. 4. Reinitialize the hard disk.
- code :
79.XXXX
- affichage :
79.XXXX PRINTER ERROR
- description :
A critical hardware error has occurred.
- remede :
1. Turn the printer off and then back on. 2. If the problem persists, reseat the firmware DIMM. 3. Reseat the formatter. 4. Replace the firmware DIMM. 5. Replace the formatter. Calibrate the priner.


